16
2-4 Hardware Installation
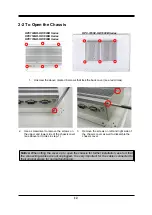
Remove the screws that lock the back cover to the system from the back side before
hardware installation procedures (refer to 2-2).
Notice:
When lifting the cover up to open the chassis for further installation, see to it that
the connecting cables are not unplugged. It is very important for the cables connected to
their original places for normal functioning.
2-4-1 To Install HDD
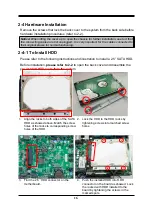
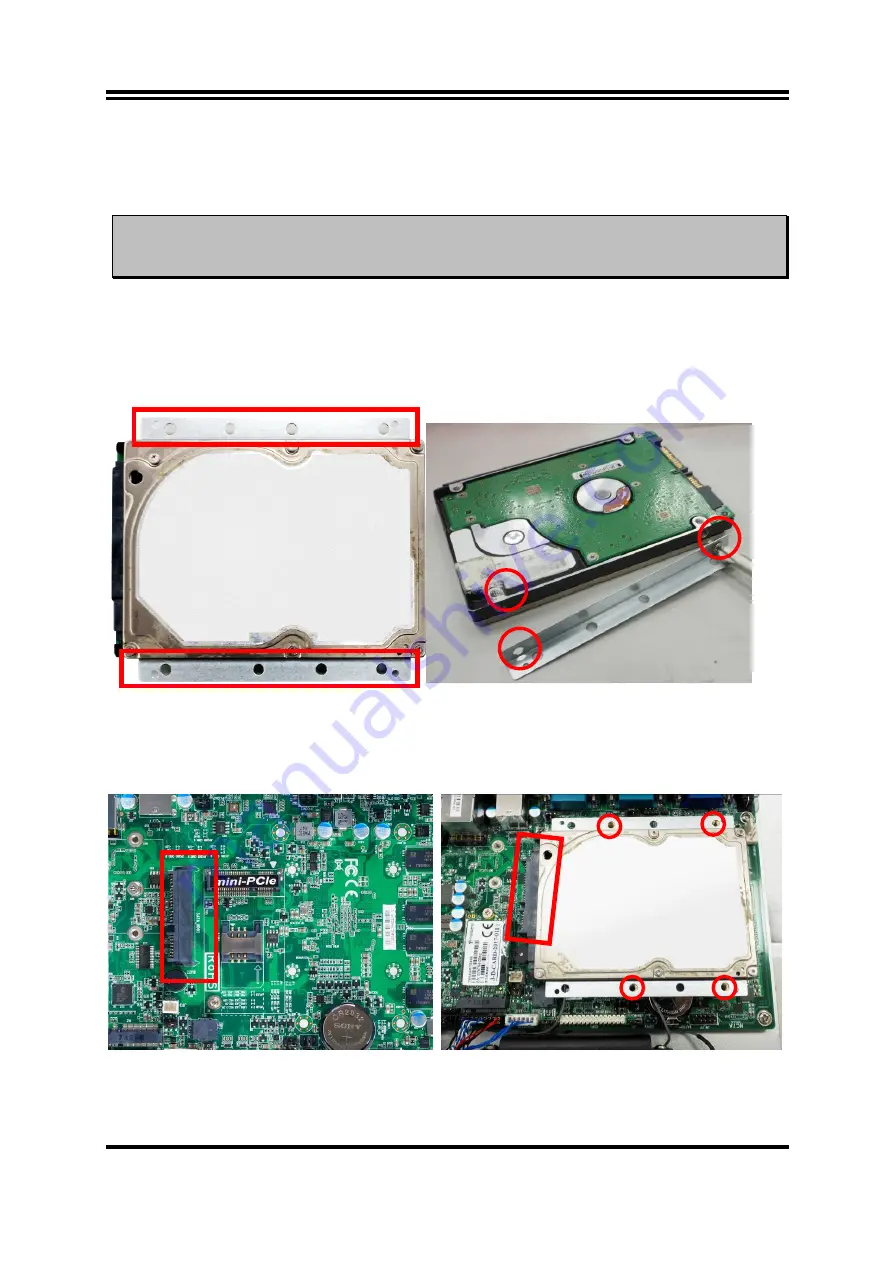
Please refer to the following instructions and illustration to install a 2.5” SATA HDD.
Before installation,
please refer to 2-2
to open the back cover and dissemble the
pre-installed HDD racks from the system.
1.
Align the racks to both sides of the SATA
HDD as showed above. Match the screw
holes of the racks to corresponding screw
holes of the HDD.
2.
Lock the HDD to the HDD racks by
tightening screws into matched screw
holes.
3.
Find the 2.5’’ HDD connector on the
motherboard.
4.
Push the installed HDD into HDD
connector on the board as showed. Lock
the racked with HDD installed to the
board by tightening the screws in the
marked spots.
Содержание HPC-185SC-HD1900B Series
Страница 1: ...Panel PC User s Manual NO G03 PCNC7ARHD F Manual Revision 4 0 Release Date October 29 2019 ...
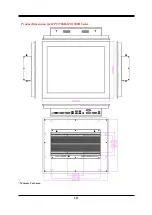
Страница 13: ...9 Product Dimension for HPC150GR HD1900B Series Measure Unit mm ...
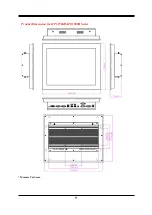
Страница 14: ...10 Product Dimension for HPC170GR HD1900B Series Measure Unit mm ...
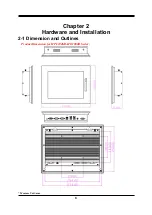
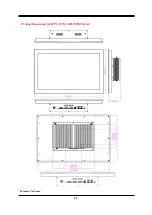
Страница 15: ...11 Product Dimension for HPC 185SC HD1900B Series Measure Unit mm ...
Страница 44: ...40 ...

