manualshive.com logo in svg
background image

Содержание 720-0062-LP

Страница 1: ...ITEM NO 57421 Jenn Air is a Trademark of the Maytag Corporation and is used under license to Lowe s Companfes Incorporated GAS FIRED I I LISTED FOR OUTDOOR USE ONLY PLEASE CONTACT 1 800 554 5799 FOR...

Страница 2: ...ller Final Check 10 SECTION FOUR Operating Instructions t1 12 Lighting Instructions 12 To Match Light the Grill 13 Easy Lighting Illustrations 14 Using the Side Burner 15 Care and Maintenance of Side...

Страница 3: ...er not connected for use should not be stored in the vicinity of this or any other appliance 3 Do not store spare LP gas cylinders under or near this appliance 4 Never fill the cylinder beyond 80 perc...

Страница 4: ...mended in this manual All other service should be referred to a qualified technician The grill is for outdoor use only The grill is not intended to be instalfed in or on recreational vehicles and or b...

Страница 5: ...to corrode Do not use the grill to cook excessively fatty meats or other products which promote flare ups Do not operate the grill under unprotected combustible constructions Use only in well ventilat...

Страница 6: ...les of the left side shelf with those in the grill cart insert the screws and tighten The top two screws insert from inside the fire box while the bottom two screws insert from under the left side she...

Страница 7: ...from the handle and reinsert them through the side burner lid 3 Tighten the screws 4 SIDE BURNER HANDLE ASSEMBLY 2 3 Remove the four handle screws from the side of the burner shelf Align the side burn...

Страница 8: ...into the housing with the positive side facing outward 3 Replace the ignition button housing after the battery has been installed SPICE TRAY BRAKE ASSEMBLY Lift the red handle upward to lock the caste...

Страница 9: ...ank onto the slide tray with the retention kit screws PROPANE TANK ASSEMBLY 1 Attach the regulator to the propane tank by turning the regulator handle clockwise 2 Turn off the gas supply at the cylind...

Страница 10: ...Manifold pressure operating 10 in water column W C non operating 11 2 in water column W C The LP gas cylinder must be fitted with an Overfill Protection Device OPD 8 LP GAS HOOK UP Make sure the black...

Страница 11: ...echeck 5 Should the gas continue to leak from any of the fittings turn off the gas supply and contact customer service at 1 800 554 5799 Only those parts recommended by the manufacturer should be used...

Страница 12: ...e contact customer service at 1 800 554 5799 INSTALLER FINAL CHECK i Specified clearance maintained 24in from combustible materiatslconstruction 2 All internal packaging has been removed 3 The hose an...

Страница 13: ...ble of turning up to a 12tb cut of meat or poultry The motor slides onto the stainless steel motor mount The rotisserie motor must be electrically grounded in accordance with local codes or in the abs...

Страница 14: ...ff the gas supply wait 5 minutes for any excess gas to dissipate and then try again FLAME CHARACTERISTICS Check for proper burner flame characteristics Each burner is adjusted prior to shipment Howeve...

Страница 15: ...to dissipate 2 Insert a lit extended match or lighter through the cooking grids to the burner 3 Press the control knob and rotate left to the HI setting continue to press the knob until the burner ig...

Страница 16: ...setting 2 Press and turn one of the ma_n or side burner control knobs to the HI setting 2 Press the electric igniter 3 to 4 seconds to light the rotisserie burner 3 After the burner is lit adjust the...

Страница 17: ...CH LIGHTING 1 Hold a lit extended match or lighter near the side burner ports 2 Turn the control knob counterclockwise to the HI setting 3 Rotate the control knob to the desired setting CARE MAINTENAC...

Страница 18: ...ns 3 Clear clogged ports with a straightened paper clip Never use a wooden toothpick It may break off and clog the port 4 If insects or other obstructions are blocking the flow of gas to the burner ca...

Страница 19: ...on properly use the following checklist before contacting your dealer for service You may save yourself the cost of a service call PROBLEMS Grill will not light when the control knob is rotated WHAT T...

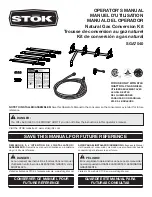
Страница 20: ...EXPLODED VIEW O8 59 58 63 6S 61 60 18 3i 43 18...

Страница 21: ...2 Caster Bracket 1 Tower Rack Bracket 1 Tower Rack 1 Spice Tray 1 Front Panel 2 Front Door 2 Door Handle 2 REF 33 34 35 36 37 38 39 4O 41 42 43 44 45 46 47 48 49 5O 51 52 53 54 55 56 57 58 59 6O 61 62...

Страница 22: ...rim excess fat from the meat before cooking To prevent steaks or chops from curling during cooking slit the fat around the edges at 2 inch intervals _i_ WARNING I Do not eave the grill unattended whil...

Страница 23: ...15 minutes 14 to 18 minutes 13 to 20 minutes 18 to 25 minutes 17 to 30 minutes 20 to 30 minutes 30 to 40 minutes 30 to 40 minutes 4 to 8 minutes 5 to 10 minutes 1 to 1 1 2 hours Grill turning once wh...

Страница 24: ...ne ISH AND SEAFOOD Steaks Halibut Salmon Swordfish 7Vhole Catfish 3 4 to 1 inch 4 to 8 ounces Medium to High Medium to Rainbow trout High H 8 to 15 minutes 12 to 20 minutes Grill turning once Brush wi...

Страница 25: ...ps brushing with the marinade occasionally Serve with mixed salad dressed with vinaigrette flavored with fresh dill BARBECUED POTATOES and CHEESE 1 1t2 cups shredded cheddar cheese 1 can 10 3 4 oz con...

Страница 26: ...ingredients in a large mixing bowl and marinate the chicken for 8 hours in the refrigerator Drain the chicken and spread on the spit running the rod on the fleshier side of the bone Bake using the rot...

Страница 27: ...er The warranty period is not extended by such repair or replacement Product repair as provided under this warranty is your exclusive remedy Nexgrill Industries Inc shall not be liable for any inciden...

Отзывы: