background image

• 

Unless absolutely necessary, do not attempt to adjust or perform any 
maintenance or repair procedure when the unit is opened and connected to 
a power source. 

• 

Repairs are to be carried out only by a qualified professional. 

• 

Do not attempt any adjustment, maintenance, or repair procedure to the 
unit’s internal mechanism if immediate first aid is not accessible. 

• 

Disconnect the power cord from the unit before adding or removing any 
components. 

• 

Operating the unit in the presence of flammable gases or fumes is extremely 
hazardous. 

• 

Do not perform any operating or maintenance procedure that is not 
described in the user’s manual. 

• 

Some of the unit’s capacitors can be charged even when the unit is not 
connected to the power source.


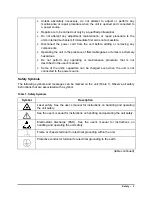
Safety Symbols 

The following symbols and messages can be marked on the unit (Table 1). Observe all safety 
instructions that are associated with a symbol. 
 

Table 1: Safety Symbols 

Symbol Description 


Laser safety. See the user’s manual for instructions on handling and operating 
the unit safely. 


See the user’s manual for instructions on handling and operating the unit safely. 


Electrostatic discharge (ESD). See the user’s manual for instructions on 
handling and operating the unit safely. 


Frame or chassis terminal for electrical grounding within the unit. 


Protective conductor terminal for electrical grounding to the earth. 


(table continued)


Safety  –


Содержание SCG Series

Страница 1: ...SCG SERIES FIBEROPTIC SWITCH User s Manual...

Страница 2: ...Multiple Common SCG E Switch Configuration 7 Multiple Common Blocking SCG F Switch Configuration 8 Key Features 8 Applications 8 Standard Accessories 8 Specifications 9 Getting Started 11 Before Init...

Страница 3: ...rser Rules 25 Operation Commands 26 Query Commands 27 Status Reporting and Service Request Control 30 Condition Register 30 Status Register 30 SRQ Mask Register 31 GPIB Programming Examples 31 Sending...

Страница 4: ...ower cord from either the power inlet on the unit s rear panel or from the AC line power source receptacle The power cord must always be accessible from one of these points If the unit is installed in...

Страница 5: ...ord only to a power outlet equipped with a protective earth contact Never connect to an extension cord that is not equipped with this feature Do not interrupt the protective earth grounding Any such a...

Страница 6: ...hat is not described in the user s manual Some of the unit s capacitors can be charged even when the unit is not connected to the power source Safety Symbols The following symbols and messages can be...

Страница 7: ...following note and subsequent information be included in this manual Note This equipment has been tested and found to comply with the limits for a Class A digital device pursuant to part 15 of the FCC...

Страница 8: ...here appropriate be accompanied by the distinctive letters used by the notified body issuing the EC type examination certificate Where the apparatus is the subject of other Directives providing for th...

Страница 9: ...selected output channel The terminations are precisely aligned using a processor controlled stepper motor Collimating lenses terminate the fiberoptic attachments minimizing the insertion loss of the s...

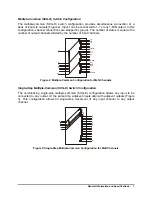
Страница 10: ...3 M M N M 2 1 2 1 3 1 M N 1 1 M 1 M 3 2 M N 1 2 M 3 4 5 Figure 2 Multiple Common Configuration for MxN Channels Single Step Multiple Common SCG E Switch Configuration The non blocking single step mul...

Страница 11: ...ration for MxN Channels Key Features Up to 180 channels Typical insertion loss of 0 3 dB Typical repeatability of 0 005 dB Typical return loss greater than 65 dB Local and remote control using IEEE 48...

Страница 12: ...mode 0 02 dB 0 03 dB 0 05 dB 0 07 dB Insertion loss stability3 0 03 dB 0 05 dB Repeatability4 sequential switching random switching 0 005 dB 0 02 dB 0 01 dB 0 04 dB Crosstalk single mode 90 dB 80 dB I...

Страница 13: ...ink current 100 mA maximum per output driver Drivers 1 2 3 4 5 V and GND ground are accessible from back panel connector Drivers 5 6 7 and 8 are internal Warm up time1 1 hour at 25 C ambient temperatu...

Страница 14: ...e contents to ensure that the shipment is complete 3 Inspect the unit for structural damage that can have occurred during shipping 4 Ensure that the power switch is set to O off 5 Connect the unit to...

Страница 15: ...ential fire or shock hazard do not expose the unit to any source of excessive moisture Storing and Shipping To maintain optimum operating reliability do not store the unit in locations where the tempe...

Страница 16: ...number of the unit and if necessary the RMA number on any accompanying documentation 8 Ship the unit only to the address given at the beginning of this document Cleaning Connectors Caution Connecting...

Страница 17: ...ow the areas cleaned Installing the Switch Caution In sensitive applications to avoid shock and vibration do not mount the switch in non rigid racks or on top of raised floors or tables Avoid use with...

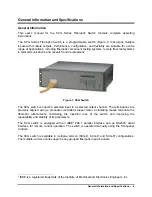
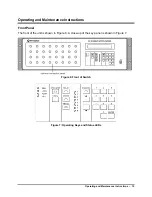
Страница 18: ...Instructions Front Panel The front of the unit is shown in Figure 6 A close up of the key panel is shown in Figure 7 Figure 6 Front of Switch Figure 7 Operating Keys and Status LEDs Operating and Mai...

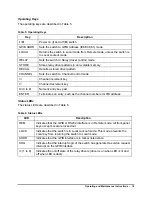
Страница 19: ...ry key pad ENTER Terminates an entry such as the channel number or GPIB address Status LEDs The status LEDs are described in Table 6 Table 6 Status LEDs LED Description REM Indicates that the GPIB or...

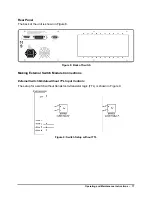
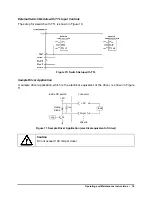
Страница 20: ...of Switch Making External Switch Module Connections External Switch Module without TTL Input Controls The setup for a switch without transistor to transistor logic TTL is shown in Figure 9 Figure 9 S...

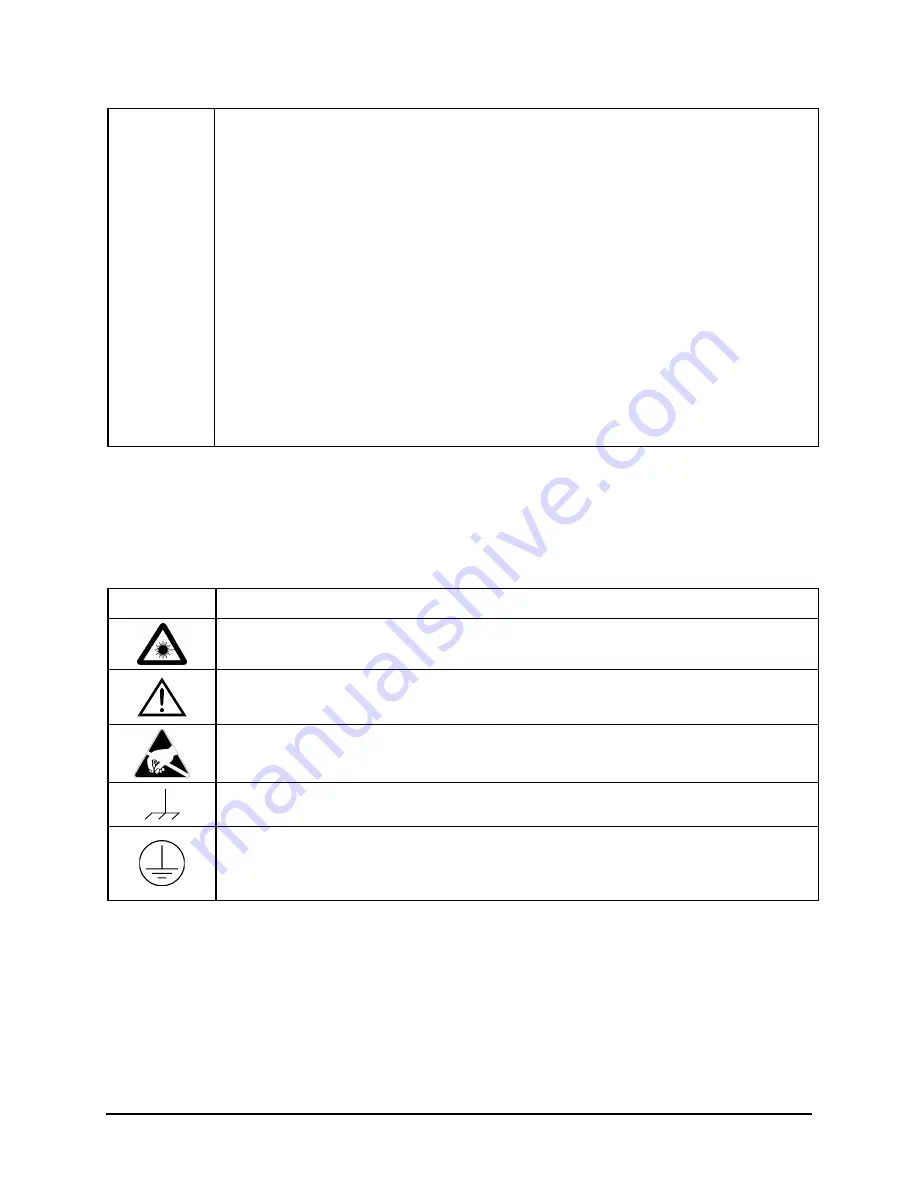
Страница 21: ...ver Application A sample driver application which is the electrical equivalent of the driver is shown in Figure 11 5V clamp diode Q 5V driver 1 driver 4 load o p 10K inside SC switch connector Figure...

Страница 22: ...erface are in the Programming Guide section Selecting Input Channels and Output Channels When the default unit display is active Figure 13 the Channel key is lit on the front panel of the unit To sele...

Страница 23: ...or Relay Driver States The SCG unit has 10 non volatile memory locations available for storing and recalling SCG unit data If expansion hardware is not installed in the SCG unit chassis the current st...

Страница 24: ...address entry is confirmed by the appearance of an asterisk Calibrating the Unit No calibration is required Maintaining the Unit Clean the connector ends with a lint free tissue and alcohol before eve...

Страница 25: ...Caution Do not extend the connector panel more than 10 cm 4 in from the body of the SCG unit Operating and Maintenance Instructions 22...

Страница 26: ...nstrumentation published by the Institute of Electrical and Electronics Engineers IEEE The SCG unit is equipped with a GPIB parallel interface and an RS232C serial interface The unit accepts the same...

Страница 27: ...E1 Electrical interface open collector drivers Setting the GPIB Address To set the GPIB address 1 Press the GPIB ADDR key The current GPIB address appended with an asterisk is displayed The factory s...

Страница 28: ...st be configured with the same settings Figure 17 shows the RS232 pin assignment of the drivers Figure 17 RS232 Driver Pin Assignment Caution Do not exceed 100 mA per driver Operation and Query Comman...

Страница 29: ...re lost The SCG unit is always ready to accept characters over the RS232C interface A query command is used to extract status information from the SCG unit For example SRE CR LF returns the contents o...

Страница 30: ...Set the GPIB Address RS232 Interface Only Modifies the GPIB address I GPIB address 0 to 30 Query Commands SWITCH A Query Optical Connection Returns the connection status of the switch specified by A c...

Страница 31: ...ls LRN Learn Returns a string containing the commands that if sent reset the currently selected switch to its current state for example SWITCH I J K SRE L where I represents the switch number J repres...

Страница 32: ...o error IDN Identifier Returns a string that identifies the manufacturer the SCG unit model number and the firmware level for example JDS Uniphase SCG unit v1 20 XDR I J Direct Drive Line Control Sets...

Страница 33: ...gister Bit 7 Bit 6 Bit 5 Bit 4 Bit 3 Bit 2 Bit 1 Bit 0 0 0 0 0 0 Settled 0 0 Status Register The status register records errors and other events that have occurred in the SCG unit When an event occurs...

Страница 34: ...lled or the status register can be read with STB The first time the SCG unit is serial polled after an SRQ is generated bit 6 is on Subsequent serial polling returns a value with bit 6 off Similarly S...

Страница 35: ...ple commands SWITCH 1 1 1 STB PRINT 1 OUTPUT 07 SWITCH 1 1 1 STB PRINT 1 ENTER 07 sample queries PRINT 1 OUTPUT 07 SWNUM PRINT 1 ENTER 07 INPUT 2 a PRINT switch a PRINT 1 OUTPUT 07 ERR PRINT 1 ENTER 0...

Страница 36: ...ify SRQ bit is now cleared INPUT 2 sr read status register PRINT sr RETURN Learn Query LRN This example demonstrates the use of the learn query DIM LEARN 100 PRINT 1 OUTPUT 07 LRN send the learn query...

Страница 37: ...gister The serial polling function is not supported on any RS232C interface but STB can be used to query the status register because the query command performs the same function as serial polling The...

Отзывы: