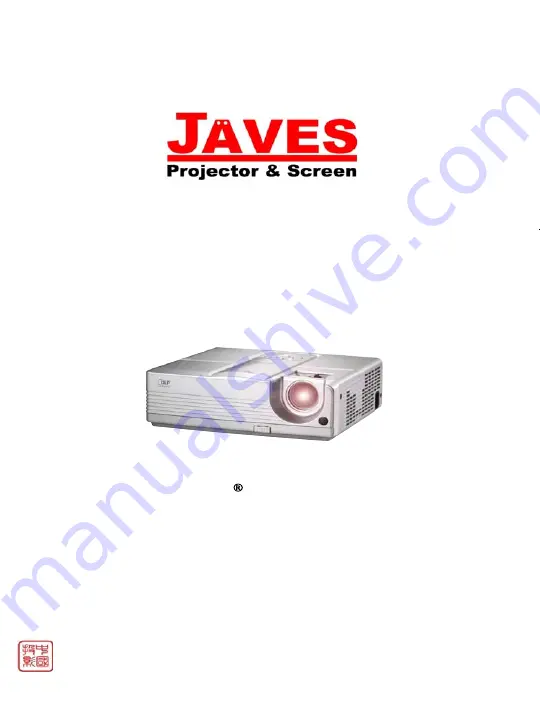
Javes HDX-520 Скачать руководство пользователя страница 1

Tel:(852) 2887-5151  e-mail: [email protected]   Web-site: www.javesprojector.com

Address: Room 207, Block B, Seaview Estate, Watson Road, North Point, Hong Kong

JAVES HDX-520

Javes Projector

DLP  Projector

USER MANUAL

Содержание HDX-520

Страница 1: ...852 2887 5151 e mail jng javesprojector com Web site www javesprojector com Address Room 207 Block B Seaview Estate Watson Road North Point Hong Kong JAVES HDX 520 Javes Projector DLP Projector USER MANUAL ...

Страница 2: ... If this equipment does cause harmful interference to radio or television reception detectable by turning the equipment in question off and on the user is encouraged to try to correct the interference by one or more of the following measures Reorient or relocate the receiving antenna Increase the distance between the equipment and the receiver Connect the equipment to an outlet on a different circ...

Страница 3: ... The projector is equipped with ventilation holes intake and ventilation holes exhaust Do not block or place anything near these slots or internal heat build up may occur causing picture degradation or damage to the projector 6 Power sources Check that the operating voltage of your unit is identical with the voltage of your local power supply 7 Servicing Do not attempt to service this projector yo...

Страница 4: ...f the supplied AC Power Cord does not match your AC outlet please contact your sales dealer This projector is equipped with a grounding type AC line plug Please ensure that your outlet fits the plug Do not defeat the safety purpose of this grounding type plug We highly recommend using a video source device also equipped with a grounding type AC line plug to prevent signal interference due to volta...

Страница 5: ... Replacing the Battery 12 Remote Control Operation 13 Installation 14 Connecting the Projector 14 Powering On Off the Projector 15 Adjusting the Projector 16 Menu Operation 18 Maintenance 22 Cleaning the Lens 22 Cleaning the Projector Housing 22 Replacing the Lamp 23 Specifications 25 Appendix 26 LED Indicator Messages 26 Compatibility Modes 27 Troubleshooting 28 ...

Страница 6: ...e chip 0 55 Texas Instruments DLP technology XGA 1024 x 768 pixels Auto image re sizing Auto Sync to 1024 x 768 full screen with scaling compression compatibility for VGA SVGA XGA and SXGA Compatibility with Macintosh computers Compatibility with NTSC PAL SECAM and HDTV D Sub 15 pin terminal for analog video connectivity User friendly multi language on screen display Advanced electronic keystone c...

Страница 7: ...B to D SUB Composite Video Cable S Video Cable Remote Control IR User s Manual Quick Start Guide Save the original shipping carton and packing material they will comein handy if you ever to ship your unit For maximum protection repack your unit as it was originally packed at the factory Accessories and components may vary by retailer and region ...

Страница 8: ...Front View Lens cap AC power socket Elevator button Zoom ring Lens cap strap Focus ring Front IR remote control sensor Control panel Projection lens Lamp cover Ventilation holes 10 1 2 4 5 6 7 8 3 9 11 1 7 2 8 3 9 4 10 5 11 6 ...

Страница 9: ...ear IR remote control sensor Ventilation holes Bottom View Elevator foot Ceiling mount 3 M4 6 Tilt adjustment foot 1 2 3 4 1 2 3 4 1 2 3 1 2 3 This projector can be used with a ceiling mount for support The ceiling mount is not included in the package ...

Страница 10: ...buttons to select items or make adjustments to your selection Enter Enter to sub menu and confirm the menu selection Activate in Color Setting Lamp Counter Reset and Factory Default menu operations Resync Resynchronize the projector to the input signal from a computer Power Turn the projector on or off Source Manually select an input source Menu Display or exit the on screen display menus 1 2 3 4 ...

Страница 11: ... RGB or component to this jack RS232 When operating the projector via a computer connect this to the controlling computer s RS 232C port S VIDEO Connect S Video output from video equipment to this jack VIDEO Connect composite video output from video equipment to this jack USB This connector is for page up down mouse control function and firmware update 1 2 3 4 5 6 7 1 2 3 4 5 6 7 ...

Страница 12: ...use left button when mouse function is selected MENU Display or exit the on screen display menus ECO Press this button to activate the eco mode POINTER Computer mode only Toggle this button to activate keyboard function or mouse function when your projector is connected with a USB cable ASPECT Press this button to switch the image aspect ratio from 1 1 4 3 to 16 9 1 1 is only available for compute...

Страница 13: ...er back into the remote control until you feel a click Keep the battery out of the reach of children There is a danger of death by accidentally swallowing the battery Do not recharge the used battery or expose the battery to fire or water Do not dispose of the used battery along with household waste Dispose of used batteries according to local regulations Danger of explosion may happen if batterie...

Страница 14: ... not operate when there is sunlight or other strong light such as a fluorescent lamp shining on the remote sensor Operate the remote control from a position where the remote sensor is visible Do not drop the remote control or jolt it Keep the remote control out of locations with excessively high temperature or humidity Do not get water on the remote control or place wet objects on it Do not disass...

Страница 15: ...3 5 1 1 1 4 6 2 4 When connecting cable power cords of both a projector and external equipment should be disconnected from AC outlet The figure above is a sample connection This does not mean that all of these devices can or must be connected simultaneously The cables that come with the projector may differ from the above illustration The included cables are based on actual shipment delivery ...

Страница 16: ...when the lamp is on This can damage your eyes It is especially important that children are not allowed to look into the lens Powering Off the Projector 1 Press button to turn off the projector lamp You will see a message Power off Press Power again appear on the screen 2 Press button again to confirm The cooling fans continue to operate for cooling cycle When the Lamp LED begins flashing the proje...

Страница 17: ...djustment 2 To level the image on the screen turn the tilt adjustment foot to fine tune the height Adjusting the Projector Zoom and Focus 1 Focus the image by rotating the focus ring A still image is recommended for focusing 2 Adjust the image by sliding the zoom ring Elevator button Elevator foot Tilt adjustment foot To avoid damaging the projector make sure that the elevator foot and tilt adjust...

Страница 18: ...le inches 1 2 33 28 2 56 46 3 83 69 5 139 116 10 8 300 250 33 Min 56 83 139 300 Max 250 116 69 46 28 1 2m 3 0m 5 0m 10 8m 2 0m Position the projector in a horizontal position other positions can cause heat build up and damage to the projector Make sure the heat ventilation holes are not blocked Do not use the projector in a smoky environment Smoke residue may cause build up on critical parts i e D...

Страница 19: ...0 Aspect Ratio 1 1 4 3 16 9 0 10 0 6 50 50 0 31 10 10 10 10 Video Image Total dots Fine sync H Position V Position Color Sharpness Tint Language Factory Default Color Setting Image PC Movie sRGB User 0 100 0 31 0 100 Red Green Blue Yes No Setting Menu Position Mounting Logo Signal Type Auto Source Power Saving Lamp Counter OSD Timeout Highland Lamp Counter Reset ECO Mode YPbPr RGB YCbCr On Off Yes...

Страница 20: ...perature the screen looks colder at lower temperature the screen looks warmer If you select User Red Green and Blue cab be adjusted Keystone Correct the keystone distortion Aspect Ratio Computer Mode Select how the picture fits on the screen 1 1 When the aspect ratio of input source is not 4 3 the input source will keep the image with original width height ratio and maximize the image to fit nativ...

Страница 21: ...fine tune the Fine sync but it is not easily identified H Position Horizontal Position Adjust the image left or right within the projection area V Position Vertical Position Adjust the image up or down within the projection area Video Image Video Mode Color Adjust the intensity of colors Sharpness Sharpen or soften the image You can fine tune the Sharpness but it is not easily identified Tint Shif...

Страница 22: ... power to the projector is automatically turned off Auto Source Automatically scan the input source ECO Mode Use this function to dim the projector lamp light output which will lower power consumption and increase lamp life Highland Turning on Highland mode operates the fans at full speed continuously to allow for proper high altitude cooling of the projector OSD Timeout Duration OSD menu stays ac...

Страница 23: ...ice this product yourself Refer all servicing to qualified service personnel Cleaning the Lens Gently wipe the lens with lens cleaning paper Do not touch the lens with your hands Cleaning the Projector Housing Gently wipe with a soft cloth If dirt and stains are not easily removed use a soft cloth damped with water or water and neutral detergent and wipe dry with a soft dry cloth Turn off the proj...

Страница 24: ...dation as a result of hours of use as its lifetime draws to an end Risk of explosion may differ according to the environment or conditions in which the projector and lamp are being used Wear protective gloves and eyeglasses when fixing or detaching the lamp Faster on off cycles will damage the lamp and reduce lamp life Wait at least for 5 minutes to turn off the projector after powering on Do not ...

Страница 25: ...n on the projector If the lamp does not turn on after the warm up period try reinstalling the lamp 9 Reset the lamp hour Refer to the Setting Computer Video menu Dispose of the used lamp according to local regulations Ensure that screws are tightened properly Screws not tightened fully may result in injury or accidents Since the lamp is made of glass do not drop the unit and do not scratch the gla...

Страница 26: ...3 58 NTSC4 43 PAL 60 M N SECAM HDTV 480i p 576i p 720p 1080i Scanning Frequency Horizontal Freq Vertical Freq 31 79 KHz 50 85 Hz Noise Level Normal 32dBA ECO 30dBA Environment Operating Temperature 5 C to 35 C Humidity 30 85 Storage Temperature 20 C to 60 C Humidity 30 85 Power Requirement AC 100 240 V 50 60 Hz Power Consumption 230 W Dimension 271 x 223 x 90 mm Weight 2 7 kg 6lb Note Design and S...

Страница 27: ...ife and must be changed soon The lamp will continue to operate until it fails Change the lamp If the lamp is off then the ballast will become malfunction LAMP LED TEMP LED Amber Amber Solid Solid The projector is shutting and the fan motor is cooling the lamp for shutdown Do not unplug the power cord or turn the power off before the Lamp LED changes to flashing The fan motor will turn off when the...

Страница 28: ...5 0 53 7 85 1 XGA 1024 x 768 48 4 60 0 56 5 70 1 60 0 75 0 68 7 85 0 SXGA 1152 x 864 64 0 70 0 67 5 75 0 1280 x 960 60 0 60 0 75 0 75 0 1280 x 1024 64 0 60 0 WXGA 1280 x 768 47 8 60 0 60 3 74 9 68 6 84 8 1280 x 800 49 7 59 8 62 8 74 9 Signal Horizontal Frequency kHz Vertical Frequency Hz 480i 15 8 60 480p 31 5 60 576i 15 6 50 576p 31 3 50 720i 45 0 60 720p 37 5 50 1080i 33 8 60 1080p 28 1 50 ...

Страница 29: ...puter s external video port is turned on Refer to the computer manual If the image is out of focus Be sure the lens cover is open While displaying the on screen menu adjust the focus ring The image size should not change if it does you are adjusting the zoom not the focus Check the projection lens to see if it needs cleaning If the image is flickering or unstable for a computer connection Press th...

Отзывы: