background image


41


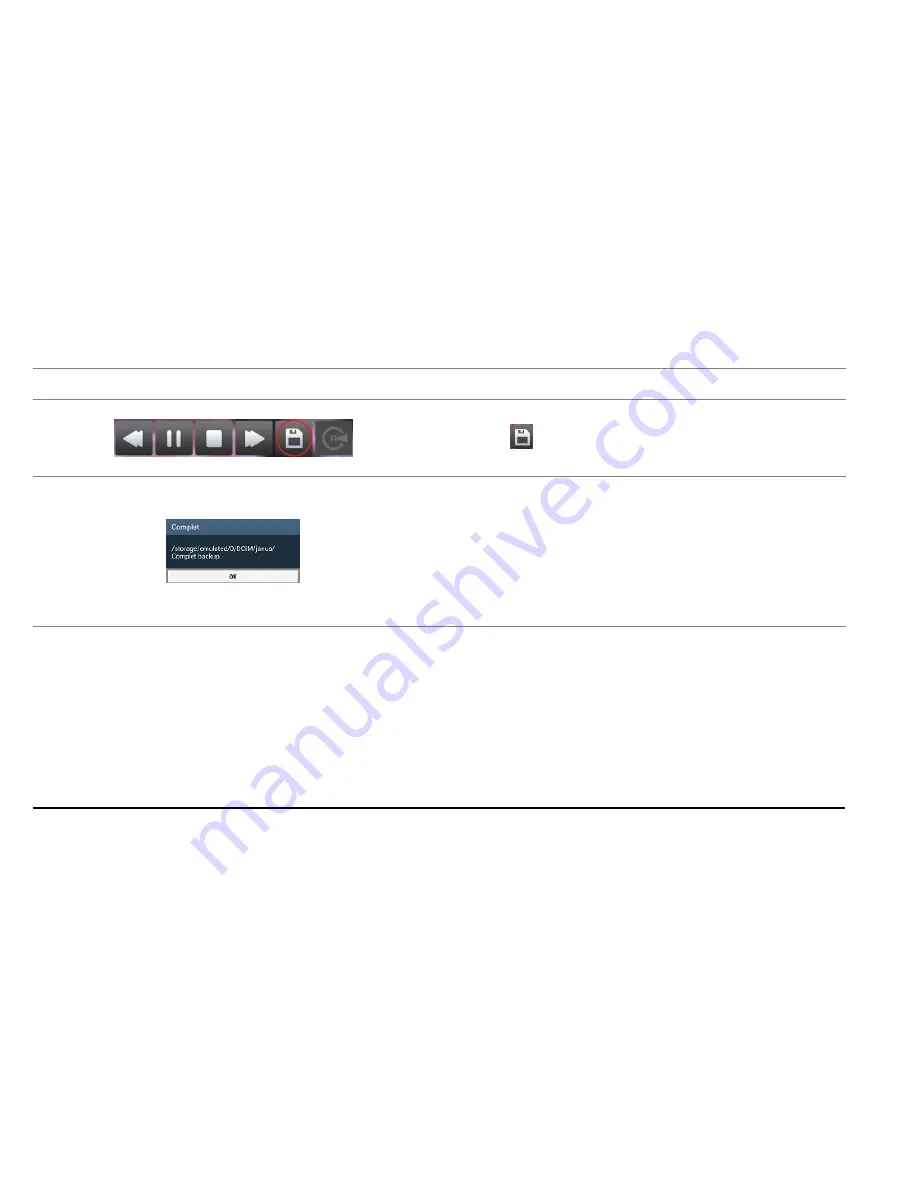
  Backup(Android) 


a. 

Move to the record data to be backed up.


b.  Click 

 button in the bottom of the right side. 


c.   In completing the backup, you are to move to the path to be 

displayed in the pop-up information window. 
(storage/sdcard0/DCIM/geeview) 


Содержание GN-100

Страница 1: ...USER S MANUAL Rev 1 2 ...

Страница 2: ...w to Install and use the device Please read the information below before using the device to avoid the discomfort in using the device Notice Please understand there might be some error in describing and editing this manual Can be changed without notice to improve product performance ...

Страница 3: ...t 10 Caution to Micro SD the card 5 6 Description of Product usage 13 1 About Product 6 7 Install the viewer program in PC 16 2 Configuration of product 7 8 Menu 19 3 Name of each part 8 9 How to upgrade 30 4 Specification 9 10 Connection with a Smart phone 32 ...

Страница 4: ...erfered Leaving or operating the device under the high temperature for the long time can cause the malfunction or defectiveness of the device Please make sure to remove the SD card only after you turn off the device to protect the SD card from being damaged If there are some dirty on the lens or the windshield they cause the poor video quality Please do not disassemble modify the device It causes ...

Страница 5: ...icro SD card they are to be automatically removed to increase stability a Please format the Micro SD card on your PC on a regular basis twice a month to keep the maintenance b The dive format function in the viewer program is recommended c Please download the Micro SD formatter program on http www sdcard org to check the SD card d MLC Type Class 4 for this device is to be recommended 5 SD card is ...

Страница 6: ...xel Support HD 720P SD card Auto recovery function Voice guide to inform the condition of the device Wi Fi for connecting with a smart phone High bright security LED Support constant power discharge protection function Power Off 11 7V Power On 13V ...

Страница 7: ...7 2 Configuration of the product The configuration of this device is subject to change without prior notice to improve the product performance ...

Страница 8: ...8 3 Name of Each part ...

Страница 9: ...he external impact Voice guide speaker Alarm and voce to inform the condition of the device External GPS Optional For connecting with E Google map Record media Micros SD card Basic 8GB Maximum 64GB Recommend spec Over MLC Class 4 Operation termperature 80 C Lens About 120 wide angle lens Viewer Windows XP VISTA 7 8 32Bit 64Bit Power DC 12V DC 24V Operation temperature 20 70 C Storage temperature 2...

Страница 10: ...5 Installing the product ...

Страница 11: ...support Min 4GB Max 64GB SDHC SDXC MLC Class 4 recommend operation temperature under 80 Warranty period of Micro SD card is 6 months Except the bundle SD card we are not responsible for its after servie How to insert the Micro SD card If the Micro SD card is not properly fitted the recording cannot start Please push the Micro SD card until you hear a click sound 3 to 5 minutes or more after the fi...

Страница 12: ... then if 3D reception status comes GPS LED keeps bright In connecting with an external GPS if GPS LED powers off please check the connection fixture status Audio recording Press the button for more than 2seconds to turn Off audio recording Press again the button more for more than 2seconds to turn On audio recording Voice guide Start recording the voice Stop recording the voice Wi Fi Press the but...

Страница 13: ...G sensor does not detect any motion in stopping or parking in case of checking the parking mode the device automatically is to enter into the parking mode after 5 minutes Recording with 5fps to extend the recording time Security LED flickering two times in every second Normal recording automatically is to restarts once the vehicle moves Motion If the motion is detected in 3 meter in front of the v...

Страница 14: ...ed When there is no Wi Fi No Wi Fi Dongle Connect with Wi Fi Wi Fi connected Disconnect with Wi Fi Wi Fi turned off Smartphone registration to the unit Complete the registration When the registered smart phone tries to access Already registered smart phone Connect with a smart phone User connected Disconnect with a smart phone User access disabled Changing the parking mode to the normal recording ...

Страница 15: ... card Please replace the memory card if this occurrence continues Change settings Setting changed and reboot Protect the car battery shut down the unit The system is to be shut down to protect the battery Update firmware process On installing the program Do not turn off the power Invalid firmware Program file is corrupted and cannot be installed ...

Страница 16: ...e 2 First insert a Micro SD card to the unit and power on 3 Depends on the capacity of a Micro SD card 4 It may take around 3 5minute to create the data file system and start recording all LED are flickering during this stage REC LED stay on when recording is normal do not power off the unit 5 Remove a Micro SD card and insert to PC 6 viewer exe will show on as below picture 7 Run viewer exe file ...

Страница 17: ...the firmware and viewer program pops up If you want to upgrade them please click Upgrade If the network is not connected viewer program runs 10 When the installation is completed GN100 viewer program automatically runs and Classic Limited viewer program icon is to be created on PC ...

Страница 18: ...18 11 Open a file when you click Open in the viewer please choose one removal Disk then click confirm ...

Страница 19: ...k up next event Setting menu Play back speed Open a file Adjust the audio volume Switching screen Black white screen Speed only case that an external GPS is connected Play list E Google map on internet only case that an external GPS connected GPS signal bar only case that an external GPS is connected G sensor graph ...

Страница 20: ...In checking Use when the SD memory card is full it will automatically overwrite only the normal mode data saved on to the SD card from the beginning In checking Not use it will not record after writing the last data in SD card Standard time zone Setting the appropriate time for each country An external GPS is to be needed Auto Reboot Set the auto reboot once daily for keeping the stable operation ...

Страница 21: ...RKING mode reduce the recording frames to 5frame per second in order to reduce recording storage MOTION During parking detect motion as an event Storage capacity of the event Set each proportion of Normal folder and event folder Caution If the device is powered on after changing the proportion of event folder SD card is always formatted automatically Please note this point and please back up the i...

Страница 22: ... enables cut off power supply to the unit based on the voltage of car battery level Power On Select the voltage of car battery to power on the unit Power Off Select the voltage of car battery to power off the unit Time set In case that an external GPS is not connected a user can set the time manually Caution This menu is for the private information Please keep this information from the disclosure ...

Страница 23: ...ting will delete all data Select the drive where the SD card is installed Select the function you want FORMAT DRIVE removes all recorded data Please make sure all data is backed up before performing FORMAT DRIVE Caution The speed of the SD card declines significantly when used for a long period of time The management of SD card is important Check and format the SD card once every week or 2 3times ...

Страница 24: ...r Click Checking the latest version to check update version of the firmware and the viewer software Caution Please make sure to connect the internet and insert the SD card into PC then make progress for upgrading the firmware In case that the latest firmware is downloaded without SD card please copy and paste the downloaded file in the update folder of SD card used in the device ...

Страница 25: ...ram e GSENSOR data backup f Back up for Image AVI and JDR Select the time of the recorded data to be backed up and press the back up button g To back up the audio with the video check Audio box nominate the backup data path then press the Next button A progress bar of the backup is displayed h AVI and BMP backup function can be used to tamper proof Run Watermark Proofer software and click Open but...

Страница 26: ...he main screen To return to the main screen click the left mouse button again Magnification h On the playback screen click the right mouse button on a screen position to make the zoom You can move the zoom around after pressing the mouse button Press the right mouse button to deactivate the zoom function ...

Страница 27: ...y button to start j To cancel Draw a lane unselect Draw lane on the load and click Apply button Thumbnail k Click Thumbnail icon as above to start Thumbnail playback l 16 divided screens will show up each screen shows individual frame in sequence Double click on one screen to show full screen m To cancel Panorama mode click Restore screen button ...

Страница 28: ...d End point during playback playback repeat between the selected times Click Release to clear Start and End point Repeat event is possible in one event OSD In playing back the data time date and speed shows up in the bottom left of the video screen Notation about time and date is applied to all the back up files ...

Страница 29: ...ity the number of JDR files is different and create the folders in advance to make the space Event Event folder Event IMPACT PARKING MOTION data are to be saved Update firmware update folder If the latest firmware is to be saved in the update folder upgrading the firmware would be automatically proceeding viewer exe PC viewer installation file copied from the unit This is a factory version of view...

Страница 30: ...nnect the power cable with the device On booting the firmware is to be upgraded with the voice guide and flashing LED When upgrading firmware is completed the device is to reboot then normally operates How to automatically upgrade the firmware When the viewer is installed and executed the menu pops up like the left picture at the first screen Connecting the internet and inserting the SD card into ...

Страница 31: ...mware if there is newest firmware Due to downloading firmware data may occur additional telecommunication cost by operator please check your network connection Only Android application GeeView support firmware update c Press Upgrade button to start download firmware files update process will automatically proceed d Do not turn off power during firmware update process e Car dvr will reboot automati...

Страница 32: ...ion is about 5 minutes If there is no connection it will automatically disconnect after 5 minutes Caution Real time video and playback video can be delayed in accordance with the specifications of the smart phone Please do not use this function while driving because it might cause the accident Please use this Wi Fi function only in parking or installing the device ...

Страница 33: ...33 How to use Smart Phone application with Wi Fi 2 1 Janus Android application a Please install Janus from Google Play store b Click Janus icon to start the application ...

Страница 34: ... execute Janus app at the first time the information window pops up to lead you directly to the registering menu as there is no registered Car DVR Select No to finish the app Select Yes to move Searching Car DVR page d Display the search for the Car DVR around ...

Страница 35: ...egistered When you research for a car DVR please press Search button 7 In case of the first time register press button on car dvr as shown on below picture to register Enter the name you wish to use for the car dvr 등록 대기모드가 활성화 되어있지 않을 시 접속 실패 문구가 나오며 와이 파이버튼을 눌러 등록 대기모드를 활성화 시킵니다 8 For re registering registration is not required because the car dvr memories the smartphone ...

Страница 36: ...red device the linked scene comes out like the left picture 10 When you click the setting menu the setting items shows up like the left picture If you want to change the setting value please click your desired item to change ...

Страница 37: ...comes up 14 F is for the front view camera and B is for the external camera s view 15 Followed by a list in the order in time to save Select your desired time and play back the related recorded data Caution During playing the video on Wi Fi the device do not record the video audio data in the SD card for the product s stability When you stop the paying the video on Wi Fi the device automatically s...

Страница 38: ...tore b First please execute Wi Fi of car dvr with short pressing the emergency button c Go to WiFi setup on iPhone setting select WiFi of CAR DVR janus_bb_xxxxxx d Enter password of car dvr WiFi default password is qwertyuiop e Click Janus icon to start the application ...

Страница 39: ...itch front and rear camera Pinch and stretch screen to zoom in and out Same to Search mode Click button to go back to main menu Click button to enter search mode from main mode Select the file you want to playback from the list Click button to save capture image to your phone ...

Страница 40: ... settings and exit the menu car dvr will reboot automatically to apply new settings Caution During playing the video on Wi Fi the device does not record the video audio data in the SD card for the product s stability When you stop the paying the video on Wi Fi the device automatically start the recording ...

Страница 41: ... Move to the record data to be backed up b Click button in the bottom of the right side c In completing the backup you are to move to the path to be displayed in the pop up information window storage sdcard0 DCIM geeview ...

Страница 42: ...42 Backup iOS a Move to the record data to be backed up b Click button in the bottom of the right side c Choose one among the photo image and the video clip ...

Страница 43: ...g sensitivity there might be the screen stutter It would be more stable to use Wi Fi function inside the vehicle 4 In connecting Wi Fi recording FPS of the device is to be changed like the right table list As the right table recording FPS is different in accordance with each every smart phone model When the Wi Fi is disconnected the recording orginal FPS is to be automatically recovered Maker Mode...

Отзывы: