background image

BELT-SANDER FOR WOODEN FLOORS

Leopard

Page 8 

INSTRUCTION MANUAL

Figures

Содержание Leopard

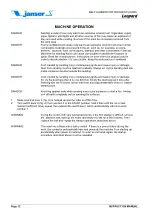
Страница 1: ...usting or carrying out maintenance operations on this machine may cause damage to persons and or things The operator must be trained to use the machine before starting it up Keep this manual for futur...

Страница 2: ...BELT SANDER FOR WOODEN FLOORS Leopard Page 2 INSTRUCTION MANUAL...

Страница 3: ...7 Instructions for electrical connection 7 Figures 8 9 Carrying the machine one person two people 10 10 Setting the machine up 11 Machine operation 12 Adjustment procedure centring the sanding pressur...

Страница 4: ...it up DANGER Sanding wooden floors may lead to an explosive environment The following safety procedures must be applied Cigarettes cigars pipes lighters pilot lights and all other sources of fire may...

Страница 5: ...ble away from the lower part of the machine in order to avoid contact with the abrasive Keep the power supply cable up over the machine DANGER The moving parts of this machine may cause serious injury...

Страница 6: ...r lowers or rises but always move at a constant speed MACHINE SAFETY INSTRUCTIONS The following information highlights potentially dangerous conditions for the operator and or machine Read this manual...

Страница 7: ...orrect mains connection of the machine leads to a risk of electrocution In order to prevent possible electric shocks always use a three wire electric system connected to an electrical earth For maximu...

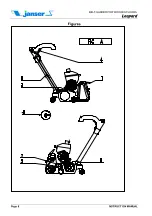
Страница 8: ...BELT SANDER FOR WOODEN FLOORS Leopard Page 8 INSTRUCTION MANUAL Figures...

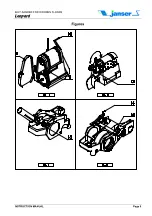
Страница 9: ...BELT SANDER FOR WOODEN FLOORS Leopard INSTRUCTION MANUAL Page 9 Figures...

Страница 10: ...A 7 Loosen nut 6 fig A slip the tube off and take it to the work site 8 Lift the base by taking hold of it at the front and back Rest the belt guard against the chest and carry it to the work site In...

Страница 11: ...mp 4 Wind the cable around the pig s tail support Keep the cable out of the machine s way 5 Open side guard 9 fig B 6 Lower the tensioning roller by turning lever 10 fig B clockwise 7 Insert the abras...

Страница 12: ...DANGER Dust created by sanding may spontaneously ignite and cause injury or damage Empty the dust bag when it is one third full Empty the dust bag each time after finishing with the machine Never leav...

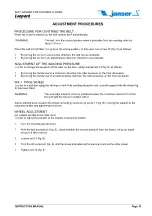
Страница 13: ...or decreases 2 By turning the handwheel in an anticlockwise direction the roller pressure on the floor increases WALL EDGE WHEEL In order to avoid damaging the skirting or wall while sanding along the...

Страница 14: ...n the bag inside out and wash it in a washing machine in cold water in order to prevent the pores from blocking and its ability to collect dust from decreasing BELT TENSION Periodically check the belt...

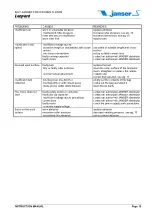
Страница 15: ...l adjustment replace the belt clean the outer surface of the tensioner clean straighten or replace the rubber coated roller correct their position see pg 11 Insufficient dust collection dust bag over...

Страница 16: ...principles and specification EN 292 Part 2 September 1991 Safety of machinery Electrical equipment of machines Part 1 General requirements EN 60204 1 October 1992 Safety of household and electrical ap...

Отзывы: