Page 20
Quit Maker Pro 18 VERSA
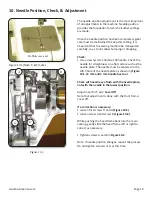
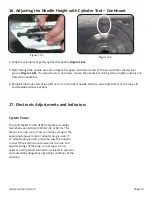
Figure 10.3
F
H
G
D
C
E
10. Needle Position, Check, & Adjustment - Continued
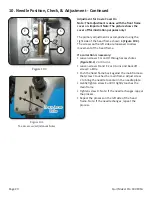
Adjustment for X axis: Cover On
Note: That adjustment is done with the front frame
cover on. Important Note: The picture shows the
cover off for illustration purposes only!
The primary adjustment is accomplished using the
right side of the head frame shown in
(Figure 10.3)
.
The screws on the left side are loosened to allow
movement of the head frame.
If a correction is necessary:
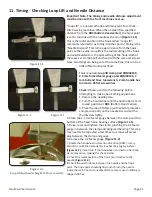
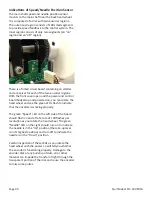
• Loosen screws F, G and H through access holes
(
Figure 10.4
) 2 or 3 turns.
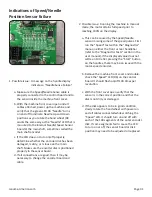
• Loosen screws D and E 2 or 3 turns and back off
screw C a little.
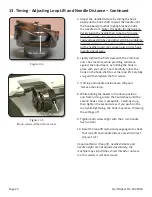
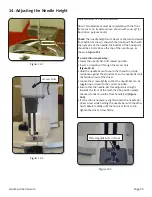
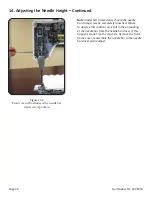
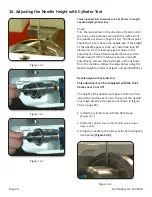
• Push the head frame back against the main frame so
that screw C touches the main frame. Adjust screw
C to bring the needle to center in the needle plate.
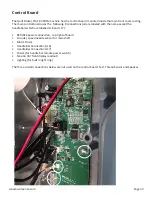
• Gently tighten screw E until it lightly touches the
main frame
• Tighten screw D. Note: If the needle changes, repeat
the process .
• Repeat the process on the left side of the head
frame. Note: If the needle changes, repeat the
process .
Figure 10.4
X-axis access/adjustment holes
X-axis Access
X-axis Access
Holes
Holes
Содержание Quilt Maker Pro 18 VERSA
Страница 1: ...Janome Quilt Maker Pro 18 VERSA Service Manual...
Страница 57: ...Janome America com Page 57 Notes...
Страница 58: ......


