background image

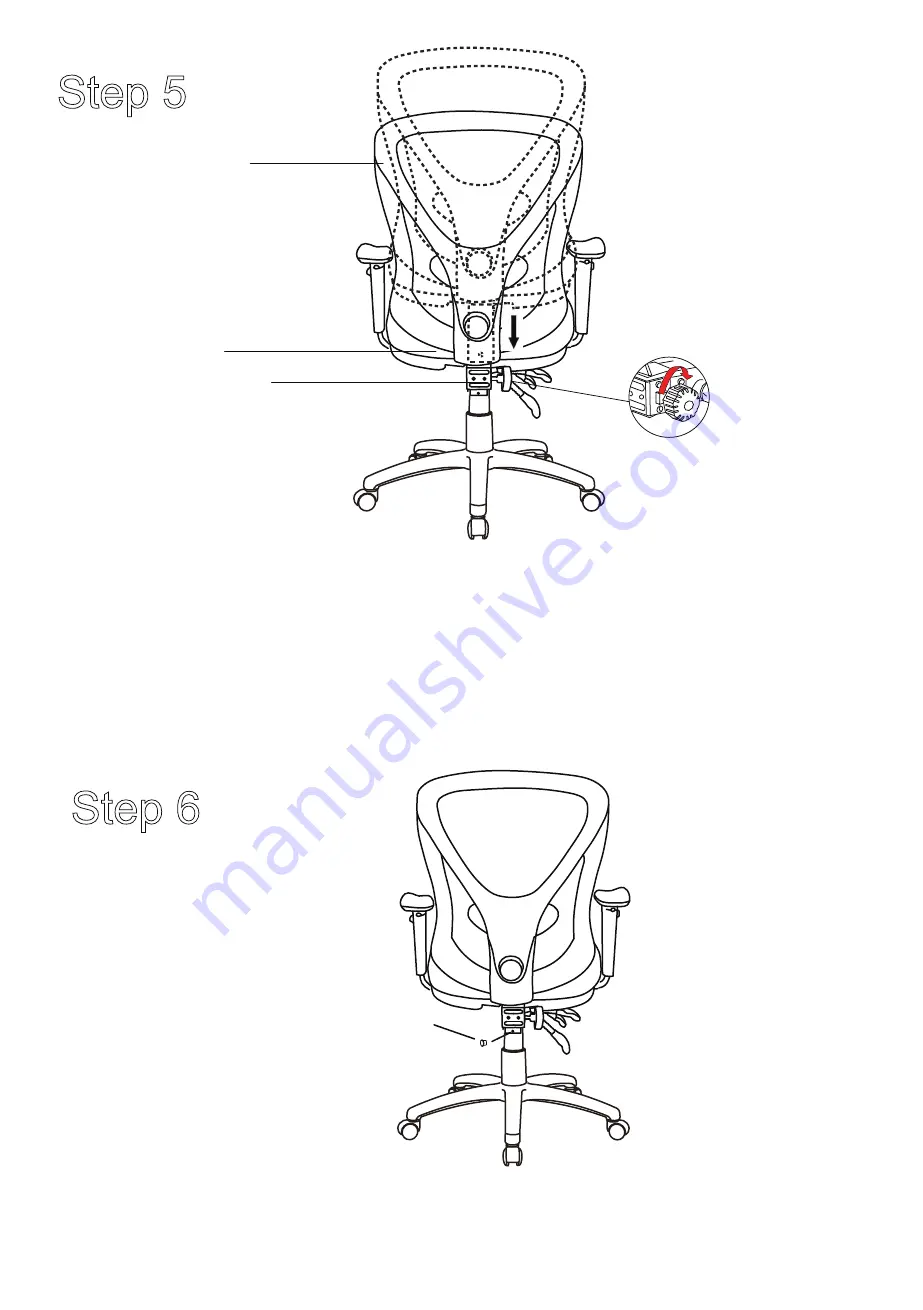
Step 5

Step 6

Page 5

L

Note: Check to make sure the knob on the rear right side of the Seat 
          Plate (D) is loose before this step. 
          Align Back Cushion (A) with Seat Cushion (B) by GENTLY inserting 
          back support plate into the rear hole of the Seat Plate (D) as shown 
          and TIGHTEN by using the knob on the rear right side of the Seat 
          Plate (D). 

Note: Insert Plastic Stopper (L) into the back support plate as shown.

D

A

B

Содержание DELANEY JBDELAMBBK

Страница 1: ...This chair has a load rating of 160kg Page 1 Assembly Instructions DELANEY CHAIR JBDELAMBBK...

Страница 2: ...l hardware components before assembling If you are missing any hardware components please contact My Zone on Tel 03 9310 3011 or Email hardware myzone net au Please ensure you have the name of the ite...

Страница 3: ...wn and insert 5 Casters H into the holes on the base Turn the Star Base G over and insert Gas Lift E with Telescopic Cover F through the center hole on top of the Star Base G Note Align the Armrests C...

Страница 4: ...Seat Plate D to the bottom of the Seat Cushion B with the front of the seat plate facing the front of seat cushion Tighten the screws E Note Place assembled seat on the Gas lift E Push down firmly un...

Страница 5: ...is loose before this step Align Back Cushion A with Seat Cushion B by GENTLY inserting back support plate into the rear hole of the Seat Plate D as shown and TIGHTEN by using the knob on the rear righ...

Страница 6: ...Page 6 Your Delaney Chair is now complete and ready for use IMPORTANT NOTE Periodically check and re tighten screws Officeworks Superstores Pty Ltd 236 262 East Boundary Road East Bentleigh 3165 Aust...

Страница 7: ...ckrest by turning anti clockwise With both hands raise or lower the backrest to desired height and re tighten knob by turning colckwise Pull lever up whilst moving the arm up or down Release lever at...

Отзывы: