


3
PREPARATION
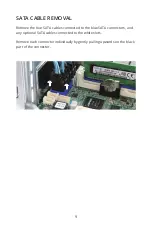
A Philips screwdriver is needed for external and internal screws. Shut down
the FreeNAS system and unplug the power cable. Make a note of where
the data cables are connected and unplug them. If a “Tamper Resistant”
sticker is present, removing or cutting it to remove the case will not affect
the warranty on the unit.
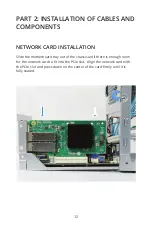
NETWORK CARD BRACKETS
The FreeNAS Mini uses a short, half height bracket and the Mini XL uses a
tall, full height bracket.
If the bracket already mounted on the card is not the correct height,
remove the two bracket screws from the card, replace the bracket, then
replace the screws.
Содержание FreeNAS Mini
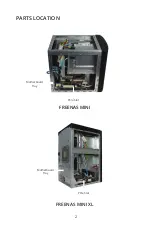
Страница 4: ...2 FREENAS MINI Motherboard Tray PCIe Slot PARTS LOCATION FREENAS MINI XL Motherboard Tray PCIe Slot...
Страница 15: ...13 Use the slot cover screw removed earlier to attach the new network card to the back panel...
Страница 23: ...21 Use the slot cover screw removed earlier to attach the new network card to the back panel...


