


15
SATA CABLE CONNECTION
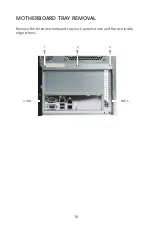
From the same side of the Mini as the power supply, reconnect the six SATA
cables.
Note:
Once installed, the new network card blocks access to the SATA ports
from the same side of the Mini as the PCIe slot.
SATA cable connectors have an L-shaped key and only fit into the mother-
board connector one way. Reconnect the SATA cables from the drive bay to
the blue motherboard SATA ports. There are two SATA cables for optional
SSD cache drives. If present, the SSD cache drives are installed on the top
or side of the drive cage. If not present, the cables might be zip-tied to the
chassis. Connect these cables to the white motherboard SATA ports. For
more instructions on SSD cache drive installation, see the FreeNAS Mini
and XL Hardware Guide at
https://www.ixsystems.com/FreeNAS_Mini_HW_
Gently press each connector individually into place, starting from 1 to 6,
until it stops.
1
2
3
4
5
6
Содержание FreeNAS Mini
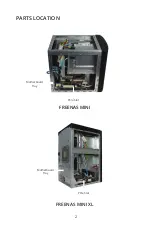
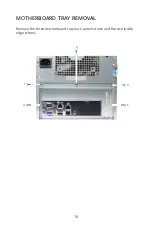
Страница 4: ...2 FREENAS MINI Motherboard Tray PCIe Slot PARTS LOCATION FREENAS MINI XL Motherboard Tray PCIe Slot...
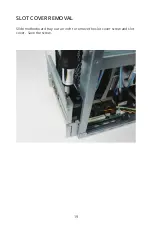
Страница 15: ...13 Use the slot cover screw removed earlier to attach the new network card to the back panel...
Страница 23: ...21 Use the slot cover screw removed earlier to attach the new network card to the back panel...


