background image

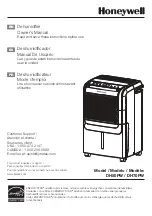
MODEL:

PR1-30XL

• USER’S MANUAL

• ΕΓΧΕΙΡΙΔΙΟ ΧΡΗΣΗΣ

• MANUAL UTILIZATORULUI

• BEDIENUNGSANLEITUNG

• MANUEL D’UTILISATEUR

• MANUALE DELL’ UTENTE

• MANUAL DEL PROPIETARIO

ENGLISH | ΕΛΛΗΝΙΚΑ | ROMANA | DEUTSCH |  
FRANÇAIS | ITALIANO | ESPAÑOL

DEHUMIDIFIER

Содержание PR1-30XL

Страница 1: ...MODEL PR1 30XL USER S MANUAL MANUAL UTILIZATORULUI BEDIENUNGSANLEITUNG MANUEL D UTILISATEUR MANUALE DELL UTENTE MANUAL DEL PROPIETARIO ENGLISH ROMANA DEUTSCH FRAN AIS ITALIANO ESPA OL DEHUMIDIFIER...

Страница 2: ...LANGUAGES ENGLISH 3 19 ROMANA 35 DEUTSCH 51 FRAN AIS 67 ITALIANO 83 ESPA OL 99...

Страница 3: ...Please refer to this manual to obtain full efficiency of the dehumidifier through the guidelines included in the following pages and make savings via clever use of this device TABLE OF CONTENTS 1 SAFE...

Страница 4: ...the unit is misplaced or tipped unplug the power cord immediately Make sure the unit is completely dry before resuming operation l Disconnect the device if abnormal sounds odors or smoke occur l If t...

Страница 5: ...r supply of the device before maintenance Power off the dehumidifier before removing the plug 3 SOCIABLE REMARKS ENVIRONMENTAL PROTECTION Disposal of equipment no longer used Please follow the instruc...

Страница 6: ...oses please note the SN serial number The SN is labeled opposite the device Please refer to the electronic warranty instructions in the last page English section of this manual User s manual Dehumidif...

Страница 7: ...obstructed Allow 40cm of clearance around the unit 2 Ensure the filter is clean 3 Place unit in vertical operating position and allow 2 hours before initial use in order to avoid malfunctions 4 Befor...

Страница 8: ...lter Drain hose outlet Removable water tank Handle both sides Water level indicator Control Panel Shoes Dryer Cover Power cord strap For storage usage Casters This unit has preinstalled casters positi...

Страница 9: ...speed and the louver swing angle The AUTO mode indicator AUTO will light up Select Auto Mode and use the PLUS AND MINUS CONTROL BUTTONS to adjust the preferred settings regarding the room s conditions...

Страница 10: ...CLOTHES indication light will be activated The FAN is set automatically to high fan speed and the louver s angle will be set at 45 For drying clothes place the dehumidifier in a small room and set nea...

Страница 11: ...r flow angle from 45 to 90 degrees By pressing this button for 3 seconds you may set the lock unlock function of the control panel to prevent minors from tampering with the unit The lock feature indic...

Страница 12: ...ater tank must be securely and properly placed for the dehumidifier to operate When the water tank is re installed the unit will automatically restart When you remove the tank do not touch any parts i...

Страница 13: ...13 EN Caution water hose should never be bend or twisted When the continuous drainage feature is not being used remove the drain hose from the drain hose outlet and re install the rubber plug x...

Страница 14: ...rtially fill the tank with clean water adding a minimal amount of mild detergent Clean thoroughly empty and rinse Clean the tank every 2 weeks to prevent mold mildew and bacteria growth After cleaning...

Страница 15: ...rs windows and furniture and make you vulnerable to electric shocks due to increased static electricity On the other hand high humidity may promote mold growth serving as breeding grounds for various...

Страница 16: ...f the dehumidifier has reached its preset level l Make sure the water bucket is positioned properly l Room temperature is lower or higher than the advised operational range l Check whether the humidit...

Страница 17: ...the first two digits E1 for one second and then will display the last two digits 22 for another second This process will circle Indicator lights Display NOW Actual humidity level indication light SET...

Страница 18: ...ard please fill in the following fields Activate your Warranty l Fill all the fields as shown below once the warranty submission has been completed a confirmation message will be sent to your email Re...

Страница 19: ...19 GR Premium XL 1 20 2 21 3 21 4 22 5 24 6 25 7 28 8 30 9 30 10 31...

Страница 20: ...20 GR 1 l 8 l l l l l l l l l 3 l l l l l l l l l l l l l l l l...

Страница 21: ...21 GR 24 2 l l l l l l l 3 l 2002 96 EC 27 2003 l A B...

Страница 22: ...22 GR SN D2002255780115715200209 SN D2002255780115715200209 4 A SN...

Страница 23: ...23 GR 1 40cm 2 3 2 4...

Страница 24: ...24 GR 5 4...

Страница 25: ...25 GR 6 POWER Power H 3 5 MODE Mode AUTO SHOES CLOTHES AUTO AUTO AUTO 40 RH 70 RH 5 CO SHOES SHOES SHOES...

Страница 26: ...26 GR 2 SHOES SHOES FAN SWING CLOTHES CLOTHES CLOTHES 45 30 50cm SHOES AUTO n n n n...

Страница 27: ...27 GR FAN FAN Low FAN High FAN SHOES CLOTHES SWING SWING SWING 45 90 SWING 3 TIMER 1 8...

Страница 28: ...28 GR 7 1 P2 P2 2...

Страница 29: ...29 GR x...

Страница 30: ...30 GR 20 8 l l 2 9 24...

Страница 31: ...31 GR 10 HEPA 45 55 Mode Clothes Shoes Clothes Shoes...

Страница 32: ...32 GR 3 l l l l l l l l l l l l l l l l l l l l...

Страница 33: ...33 GR l l l E 122 E142 E163 E554 E554 122 1 22 NOW SET 211 300 3300 www inventoraircondition gr media library...

Страница 34: ...l link QR code https www inventoraircondition gr egiisi inventor l email email newsletter Inventor A...

Страница 35: ...a obtine informatii suplimentare despre folosirea cat mi eficienta a acestui produs si pentru sfaturi cu privire la economia de energie CUPRINS 1 INFORMATII SI AVERTIZARI CU PRIVIRE LA SIGURANTA 36 2...

Страница 36: ...asturnarii aparatului scoateti cablul de alimentare din priza imediat Asigurati va ca aparatul s a uscat complet inainte de a l reutiliza l In cazul aparitiei fumului sau a unor zgomote ciudate scoate...

Страница 37: ...de stecher si trageti cu grija Opriti apratul inainte de a l scoate din priza 3 OBSERVATII PROTECTIA MEDIULUI Mai jos veti gasi informatii cu privire la procedeul de eliminare a acestui produs cand a...

Страница 38: ...lui Mai multe informatii despre inregistrarea electronica a garantiei dumneavoastra veti gasi pe ultima pagina a acestui manual La inregistrarea electronica a garantiei completati seria si numarul apa...

Страница 39: ...urati un spatiu liber de cel putin 40cm in jurul aparatului 2 Asiturati va ca filtrul este curat 3 Inainte de a l folosi mentineti aparatul in pozitie vertical pentru cel putin 2 ore pentru a evita de...

Страница 40: ...ntare Grila evacuare aer Maner Filtrul Canal furtun de scurgere Rezervor de apa detasabil Indicator nivel apa Panou de control Grila admisie aer Banda pentru cablul de alimentare Se va folosi atunci c...

Страница 41: ...ui si unghiul flapsului Indicatorul modului AUTO se va aprinde Pentru a regla parametrii doriti folositi butoanele PLUS si MINUS Butoanele pentru reglarea umiditatii Nivelul umiditatii relative RH poa...

Страница 42: ...aprinde Ventilatorul va functiona la viteza maxima iar flapsul va fi fixat in unghi de 45 Pentru a usca hainele folositi aparatul intr o incapere mica si montati l aproape de uscator Usile si ferestr...

Страница 43: ...ux uniform de aer Puteti alege unghiuri intre 45 si 90 de grade Daca veti tine apasat butonul pentru 3 secunde veti putea bloca debloca panoul de control butoanele pentru a evita accesul copiilor la b...

Страница 44: ...inlaturarea rezervorului nu atingeti partile componente din interiorul aparatului Introduceti usor rezervorul in interiorul aparatului Nu beti si nu folositi in nici un fel apa colectata Uscati in tot...

Страница 45: ...45 RO Atentie Nu ridicati si nu indoiti furtunul Daca nu folositi drenajul continuu deconectati furtunul si reintroduceti dopul de cauciuc x...

Страница 46: ...ui inainte de a l reinstala l Curatarea rezervorului de apa Umpleti partial cu apa si adaugati un detergent delicat Rotiti usor si curatati la final goliti apa si clatiti bine Curatati rezervorul o da...

Страница 47: ...conditii pentru dumneavoastra si familia dumneavoastra prevenind alergiile si neplacereile cauzate de o atmosfera umeda In acelasi timp acest nivel asigura o protectie si mobilei vopselei sau alte ech...

Страница 48: ...t pentru o durata de timp suficienta pentru a inlatura umiditatea l Asigurati va ca partea frontala sau posterioara a aparatului nu e blocata l Nivelul umiditatii relative setate nu este suficient de...

Страница 49: ...l 22 in cicluri de cate 1 secunda Indicatoi luminosi afisati pe Display NOW nivelul actual al umiditatii incaperii SET nivelul selectat al umiditatii indicatorul temporizatorului AUTO STOP Indicator r...

Страница 50: ...mplului de mai jos Odata ce garantia a fost activata veti primi un email de confirmare Nume complet Adresa Cod Postal Numar de telefon E mail Tip aparat Numarul de Serie al aparatului Data de achiziti...

Страница 51: ...Sie diese Bedienungsanleitung sorgf ltig durch um die volle Effizienz des Entfeuchters zu erlangen und durch den cleveren Gebrauch dieses Ger tes Einsparun gen zu erzielen INHALTSVERZEICHNIS 1 ALLGEM...

Страница 52: ...n Wassertank l Wenn das Ger t ausgeschaltet wird beachten Sie bitte dass es die n chsten 3 Minuten nicht wieder eingeschaltet werden kann l Schalten Sie das Ger t aus wenn ungew hnliche Ger usche Ger...

Страница 53: ...zlich zum Abschalten des Ger tes den Netzstecker aus der Schutzkontakt Steckdose ziehen um das Ger t vollst ndig vom Netz zu trennen Zie hen Sie aber niemals am Netzkabel Schalten Sie den Luftentfeuch...

Страница 54: ...ng sollten Sie das SN Nummernfeld ausf llen Dieses finden Sie auf der R ckseite des Ger tes Finden Sie bitte die elektronischen Garantieanweisungen auf der letzten Seite im DeutschsprachigenTeil diese...

Страница 55: ...Sie einen Freiraum von 40cm rund um das Ger t 2 Stellen Sie sicher dass der Filter sauber ist 3 Stellen Sie das Ger t auf eine vertikale Position und lassen es f r 2 Stunden stehen bevor Sie es in Bet...

Страница 56: ...KENNEN Kabel Griff Filter Ablauf ffnung mit Gummistopfen Wasserstandsanzeiger Bedienfeld Lufteingang Kabelhalter Wird bei der Lagerung des Ger tes verwendet Laufrollen Laufrollen sind auf den unteren...

Страница 57: ...en L ftungsschlitz Schwenkwinkel einstellen Die Anzeige f r AUTO Modus sxh ma erscheint auf dem Display W hlen Sie den Auto Modus und verwenden Sie die PLUS UND MINUS CONTROL TASTEN um die bevorzugten...

Страница 58: ...as Ger t im kontinuierlichen Betrieb und die W SCHE Anzeige erscheint auf dem Display Der Ventilator wird auf hoher Ventila torgeschwindigkeit eingestellt und der L ftungswinkel wird auf 45 eingestell...

Страница 59: ...ng um einen direkten Luftstrom zu vermeiden und so einen gr eren Luftstromwinkel von 45 bis 90 Grad zu gew hrleisten Durch Dr cken dieser Taste f r 3 Sekunden k nnen Sie die Sperren Entsperren Funktio...

Страница 60: ...t die Anzeige f r vollen Wassertank auf und auf der Digitalanzeige erscheint P2 Wenn das Ger t eingeschaltet ist und der Wassertank voll ist schalten sich der Kompressor und der Ventilator aus Anschli...

Страница 61: ...Entw sserungsfunktion nicht verwendet wird entfernen Sie den Ablaufschlauch vom der Ablauf ffnung und setzen Sie wieder den Gummistopfen auf Wichtiger Hinweis Der Ablaufschlauch darf nicht angehoben...

Страница 62: ...it sauberem Wasser und geben Sie ein bisschen mil des Reinigungsmittel dazu Wischen Sie rundherum den Wassertank leeren Sie ihn aus und sp len Sie ihn mit klarem Wasser ab Alle 2 Wochen sollte der Was...

Страница 63: ...n Bedingungen f r Sie und Ihre Familie Er beugt Allergien h ufigen Erk ltungen und Knochenschmerzen vor und hilft gleichzeitig bei der Erhaltung Ihres Zuhauses wie z B der Gipsplatten der Farbabbl tte...

Страница 64: ...igkeit erreicht hat l Vergewissern Sie sich dass der Wassertank korrekt platziert wurde l Die Raumtemperatur ist h her oder niedriger als die empfohlene Temperatur l Kontrollieren Sie ob der Feuchtigk...

Страница 65: ...von jeweils zwei Ziffern gleichzeitig angezeigt Wenn es sich zum BeispielumdenCodeE122handelt zeigtdasBedienfeldzuerstdie ersten beiden Ziffern E1 f r eine Sekunde an und anschlie end werdendieletzten...

Страница 66: ...tie eingereicht wird und der Prozess abgeschlossen ist wird eine Best tigungsnachricht an Ihre E Mail gesendet Pflichtfeld Mit der folgenden Garantie akzeptieren Sie die Bedingungen SENDEN Vor und Nac...

Страница 67: ...l efficacit totale du d shumidificateur travers les lignes directrices incluses dans les pages suivantes et faire des conomies gr ce une utilisation judicieuse de cet appareil TABLE DES MATI RES 1 INS...

Страница 68: ...il ne fonc tionnera pas pendant les trois prochaines minutes l Si l appareil est renvers ou bascul d branchez imm diatement le c ble d alimentation As surez vous que l appareil est compl tement sec av...

Страница 69: ...la prise de courant ne jamais extraire ou tirer le c ble teignez le d shumidificateur avant de retirer la fiche 3 REMARQUES SOCIALES PROTECTION DE L ENVIRONNEMENT limination des quipements qui ne sont...

Страница 70: ...Tuyau de Drainage 4 D MARCHES AVANT L USAGE Manuel d Utilisateur D shumidificateur Compresseur Veuillez trouver les instructions de garantie lectronique sur la derni re page section fran aise de ce m...

Страница 71: ...stru es Autoriser 40 cm de d gagement autour de l appareil 2 Assurez vous que le filtre air est propre 3 Placez l appareil en position verticale et laissez le fonctionner pendant 2 heures pour viter d...

Страница 72: ...oign e Filtre R servoir d eau amovible Indicateur de niveau d eau Panneau de Contr le Grille d Admission d Air C ble d Alimentation Sortie du tuyau de drainage Clip du c ble d alimentation Utilis lors...

Страница 73: ...entilateur et l angle des persiennes L indicateur du mode AUTO s allume S lectionnez le Mode Auto et utilisez les BOUTONS DE CONTR LE PLUS ET MOINS pour ajuster les param tres pr f r s concernant les...

Страница 74: ...e Continu et le voyant lumineux CLOTHES sera activ Le ventilateur FAN est r gl automatiquement sur une vitesse lev e du ventilateur et l angle de la persienne sera r gl 45 Pour s cher les v tements pl...

Страница 75: ...sez ce r glage afin d viter un flux d air direct assurant ainsi un angle d cou lement d air plus large de 45 90 degr s En appuyant sur ce bouton pendant 3 secondes vous pouvez r gler la fonction de ve...

Страница 76: ...ment plac pour que le d shumidificateur fonctionne L appareil red marre lorsque le r servoir d eau est plac dans sa position correcte Lorsque vous retirez le bac ne touchez pas les pi ces l int rieur...

Страница 77: ...ion Ne Ne pas plier ou tordre le tuyau de drainage Lorsque la fonction de drainage continu n est pas utilis e retirez le tuyau de drainage de la sortie du tuyau de drainage et r installez la fiche en...

Страница 78: ...t le seau avec de l eau propre et ajouter un peu de d tergent doux D layer le dans le seau vider et rincer Nettoyer le seau toutes les 2 semaines pour viter la croissance de moisissure et des bac t ri...

Страница 79: ...entretenue en termes de plaques de pl tre d exfoliation de colorants de meubles en bois et de tout autre quipement ou mat riau qui est sensible aux cons quences n fastes des conditions d humidit extr...

Страница 80: ...Assurez vous que le seau eau est correctement positionn l La temp rature ambiante est inf rieure ou sup rieure la plage op rationnelle conseill e l V rifiez si le taux d humidit a t r gl aux niveaux...

Страница 81: ...mmande dans une s quence de deux chiffres la fois Par exemple si le code est E122 le panneau de commande affichera les deux premiers chiffres E1 pendant une seconde puis il affichera les deux derniers...

Страница 82: ...essage de confirmation sera envoy votre courrier lectronique Nom Complet Adresse Code Postale Num ro de t l phone Adresse lectronique Type de l Appareil Num ro de s rie de l appareil Date d achat Num...

Страница 83: ...ere lamassimaefficienzadeldeumidificatore attraversolelinee guidainclusenellepagineseguentirisparmiandointalsenso tramite un uso intelligente di questo dispositivo SOMMARIO 1 ISTRUZIONI PER LA SICUREZ...

Страница 84: ...nclinata o rovesciata scollegare immediatamente il cavo di alimentazione Assicurarsi che l unit sia completamente drenata prima di riprendere l operazione l Scollegare il dispositivo in presenza di su...

Страница 85: ...dificatore prima di rimuovere la spina 3 OSSERVAZIONI GENERALI E PROTEZIONE AMBIENTALE Smaltimento di componenti non pi utilizzabili Seguire le istruzioni riportate di seguito quando si utilizza quest...

Страница 86: ...ntazione della garanzia necessario compilare il campo con il numero seriale SN Suddetto numero pu essere individuato sul retro del dispositivo Troverete le istruzioni inerenti alla garanzia elettronic...

Страница 87: ...l unit 2 Assicurarsi che il filtro sia pulito 3 Collocare l unit in posizione verticale e lasciarla cosi per 2 ore prima del funzionamento iniziale per evitare malfunzionamenti 4 Prima del funzionamen...

Страница 88: ...appo di chiusura Serbatoio di acqua estraibile Indicatore del livello di riempimento Pannello di controllo Griglia di entrata dell aria Cavo di alimentazione 5 CONOSCERE IL VOSTRO DEUMIDIFICATORE Rote...

Страница 89: ...ilatore e l angolo di oscillazione delle alette Selezionare la modalit automatica Auto Mode utilizzando i pulsanti di impostazione o per scegliere le impostazioni preferite relative alle condizioni de...

Страница 90: ...nzione continua e Il simbolo digitale CLOTHES si illuminer Il ventilatore verr impostato automaticamente ad alta velocit mentre l oscillazione delle alette verr impostata a 45 Per asciugare i vestiti...

Страница 91: ...olazione di portata pi ampia da 45 a 90 gradi Premendo questo pulsante per 3 secondi possibile impostare la funzione di blocco sblocco del pannello di controllo per evitare che i minori possano compro...

Страница 92: ...ndo il serbatoio dell acqua verr inserito alla posizione corretta Durante l estrazione del serbatoio dell acqua non toccare i componenti presenti all interno dell unit in quanto il prodotto stesso pot...

Страница 93: ...3 IT Attenzione Non piegare tirare o torcere il tubo dell acqua Al termine dell operazione di drenaggio continuo rimuovere il tubo di scarico dalla uscita di scarico dell acqua e reinserire il tappo x...

Страница 94: ...l serbatoio Pulire il serbatoio ogni 2 settimane per evitare la formazione di muffe e la crescita di batteri Al termine dell operazione di pulizia assicurarsi che il serbatoio sia posizionato corretta...

Страница 95: ...fort per voi e per la vostra famiglia prevenendo le allergie o le malat tie e mantenendo la vostra casa sana e pulita evitando dete rioramenti sulle pareti sui pannelli di carta e gesso su mobili in l...

Страница 96: ...nserito correttamente l La temperatura ambiente inferiore o superiore rispetto al raggio operativo di temperature consigliato l Controllare se il livello di umidit stato impostato in livelli alti Il d...

Страница 97: ...te le prime due cifre E1 perunsecondoepoisarannovisualizzateleultimeduecifre 22 per un secondo Questa processo di visualizzazione si ripeter in senso rotatorio Simboli Digitali sul panello di controll...

Страница 98: ...verr inviato un messaggio di conferma alla tua email Campo obbligatorio Con la presente garanzia elettronica l utente accetta i termini e le condizioni INVIARE Nome Completo Tipo di Unit Indirizzo di...

Страница 99: ...Y CONSEJOS PARA SOLUCIONAR PROBLEMAS 111 Estimado Consumidor Le felicitamos por su elecci n Deshumidificador Premium XL se distingue entre su clase por sus caracter sticas especiales para secar no s l...

Страница 100: ...d vuelca o se cae desenchufe el cable de corriente inmediatamente Aseg rese de que la unidad se ha secado completamente antes de volver a arrancar l Desconecte el aparato se se oye un ruido extra o sa...

Страница 101: ...n del aparato antes de realizar el mantenimiento Apague el deshumidificador antes de quitar la clavija 3 OBSERVACIONES EN MATERIA DE PROTECCI N MEDIOAMBIENTAL Eliminaci n del equipo cuando resulte ins...

Страница 102: ...ara hacer uso de la garant a deber rellenar la casilla del campo num rico SN n mero de abonado Lo encontrar en la parte posterior del aparato Encontrar las instrucciones de la garant a electr nica en...

Страница 103: ...salida de aire no est n obstru das Deje libre un espacio de 40cm alrededor de la unidad 2 Compruebe que el filtro est limpio 3 Coloque la unidad en posici n vertical y d jela 2 horas antes de empezar...

Страница 104: ...e Filtre Sortie du tuyau de drainage R servoir d eau amovible Indicateur de niveau d eau Panneau de Contr le Grille d Admission d Air C ble d Alimentation Banda del cable de corriente Utilizada cuand...

Страница 105: ...ncionamiento el dispositivo emitir un breve pitido AUTO AUTOM TICO Bajo este modo puede ajustar los niveles de humedad deseados la velocidad del ventilador y el ngulo de giro de la persiana El indicad...

Страница 106: ...ierta de pl stico CLOTHES ROPA Cuando se ha seleccionado la funci n ROPA la unidad funciona en modo continuo y la luz in dicadora de ROPA se activar El ventilador se ajusta autom ticamente a una alta...

Страница 107: ...ra evitar el flujo de aire directo asegurando as un ngulo de flujo de aire m s amplio de 45 a 90 grados Al presionar este bot n durante 3 segundos puede configurar la funci n de blo queo desbloqueo de...

Страница 108: ...deshumidificador funcione La m quina se reiniciar cuando el desp sito de agua est colocado en la posici n co rrecta NOTAS Cuando retire la cubeta no toque ninguna pieza del interior de la unidad pues...

Страница 109: ...109 ES tenci n No levante doble o tuerza la manguera de desag e Cuando la funci n de drenaje continuo no se utilice retire la manguera de desag e de la salida de drenaje y vuelva a instalar el cubo x...

Страница 110: ...a cantidad de detergente suave Friegue el interior de la cubeta vac ela y enju guela Limpie la cubeta cada 2 semanas para prevenir la aparici n de moho hongos o bacterias Tras el limpiado cerci rese d...

Страница 111: ...y su familia previniendo alergias y enfermedades y mantiene su vivienda sana y en buen estado de mantenimiento en cuanto a paredes de yeso decoloraci n muebles de madera y otros materiales o equipos q...

Страница 112: ...preseleccionado lAseg rese de que la cubeta de agua est colocada correctamente lLa temperatura del cuarto es m s baja o m s elevada de la banda operacional recomen dada lCompruebe si el nivel de hume...

Страница 113: ...Los c digos de error se muestran en el panel de control en una secuencia de dos d gitos a la vez Por ejemplo si el c digoesE122 elpaneldecontrolmostrar losdosprimeros d gitos E1 durante un segundo y...

Страница 114: ...cibir un mensaje de confirmaci n en su correo electr nico Nombre completo Direcci n C digo Postal N mero de Tel fono Correo Electr nico Tipo de Unidad N mero de Serie de la unidad Fecha de compra N me...

Страница 115: ......

Страница 116: ...DEHUMIDIFIER v 3 1...

Отзывы: