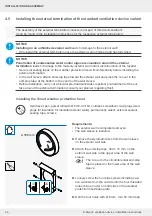
The assembly of the external termination variants is not part of this documentation!
It can be found in the installation instructions for the respective external termination.
26
INSTALLATION AND ASSEMBLY
26
iV-Smart+ ventilation device | Installation instructions
4.5 Installing the external termination of the standard ventilation device variant
Requirements:
• The exterior wall is completed and even.
• The wall sleeve is installed.
►
Remove the styrofoam discs from the wall sleeve
on the exterior wall side.
►
Attach the end-stop tape, 380 x 15 mm, on the
exterior wall side in the upper area of the wall
sleeve.
The cut-out in the circumferential end-stop
tape is placed in the lower area of the wall
sleeve.
►
Loosely screw the four side screws including cap-
tive washers from the outside into the four threaded
holes (blue arrows) on both sides of the weather
protection hood base plate.
►
Drill the four holes with Ø 8 mm, min. 50 mm deep.
NOTICE
Installing on an unfinished exterior wall
leads to damage to the exterior wall!
•
Only install the external termination once the exterior wall is finished and has fully dried.
NOTICE
Penetration of condensation water and/or algae accumulation around the external
termination
leads to damage to the masonry/exterior wall and/or discolouration of the façade!
• Secure all sealing tapes on the weather protection hood circumferentially before installing the
external termination.
• In the wall sleeve, attach end-stop tape toward the exterior wall and place the cut-out in the
end-stop tape at the bottom in the centre of the wall sleeve.
• Before installation, carry out a biocidal pre-treatment/water-repellent pre-treatment of the sur-
face around the external termination (consult your planner regarding this!).
Installing the Smart weather protection hood
Spirit level, pen, power drill with Ø 8mm drill bit, cordless screwdriver, rawl plugs (wall-
plugs for insulation for insulated exterior walls), permanently elastic external sealant,
sealing tape, screws
ø 160 mm
!


