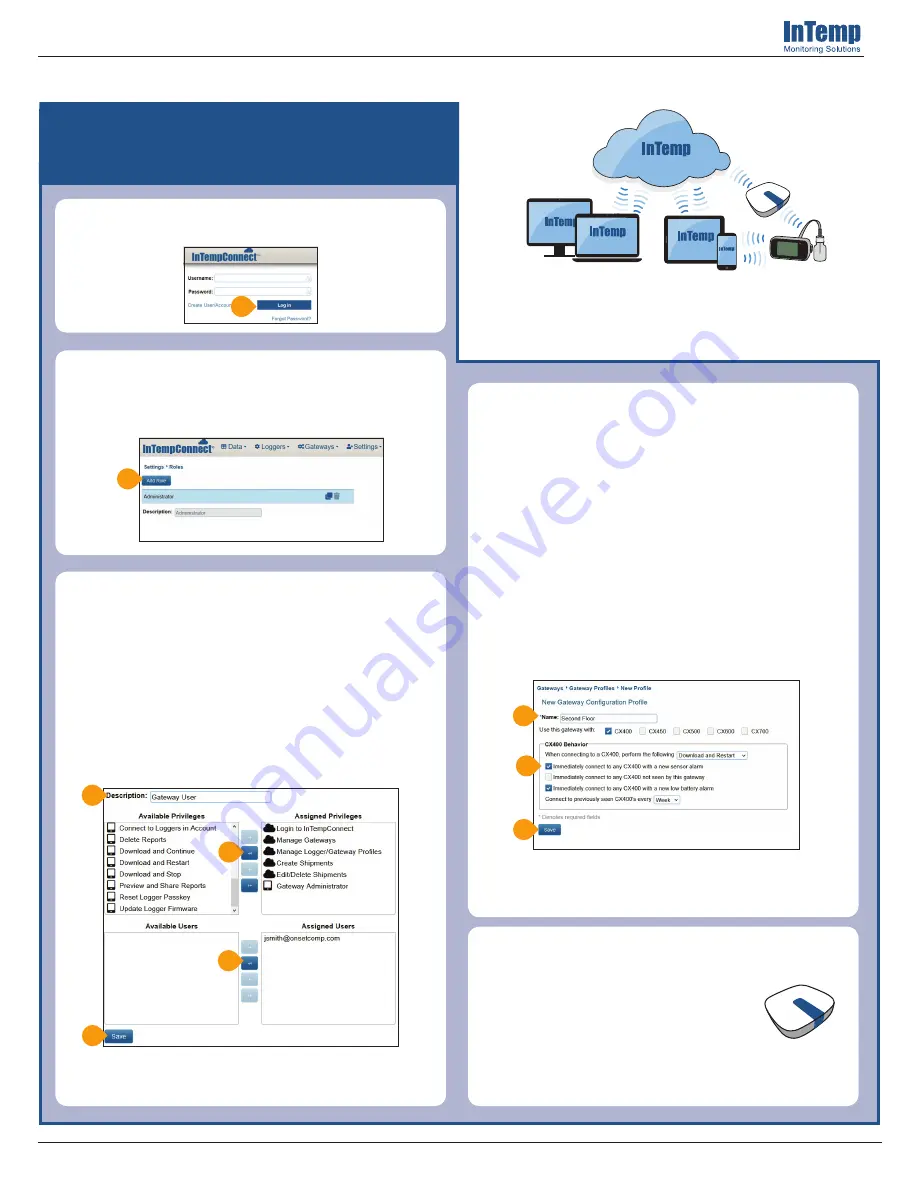
Click Gateways and then Gateway Profiles. Click Add
Gateway Profile and type a name (A) for the profile.
Select the CX logger type. If the gateway will be
used in a storage application (i.e. a clinic or office),
enter these settings (B):
• Select Download and Restart for when to
connect.
• Select “Immediately connect to a logger with
a new sensor alarm.”
• DO NOT select “Immediately connect to a
logger not seen by this gateway.”
• Choose to immediately connect to a logger
with a low battery alarm (CX400 and CX450
loggers only).
• Choose to connect to loggers every week.
Click Save (C).
Insert the appropriate plug for your
region into the AC adapter. Connect
the AC adapter to the gateway and
plug it in. Wait a couple of minutes
for the gateway to completely power
up. The LED on the gateway will be
yellow-green while it powers up and
then change to deep green once it is
ready to set up.
Upload Data from the Logger
to the Cloud via the Gateway
21853-I MAN-CX5000-QSG
Quick Start for the InTemp
®
CX5000 Gateway
4
5
I am setting up a CX5000 gateway for automatic
download of CX loggers to the InTempConnect
®
cloud.
Tip: Refer to the full product manual for details on other
configuration settings. Go to www.onsetcomp.com/intemp/
resources/cx5000-manual.
Connect
Connect
Connect
Mobile
Mobile
1
Go to www.intempconnect.com to set up an
account or log into your existing account (A).
A
2
In InTempConnect, click Settings and then Roles.
Click Add Role (A) to create a role for the person
who will be setting up the gateway or click an
existing role to edit it.
A
3
Type the name of the role (A) for the Description.
Select “Login to InTempConnect” plus the gateway-
related privileges (Manage Gateways, Manage
Logger/Gateway Profiles, Create Shipments, Edit/
Delete Shipments, and Gateway Administrator)
from the Available Privileges list on the left and
click the right arrow button (B) to move them to
the Assigned Privileges list on the right. Select a
user from the Available Users list on the left and
click the right arrow button (C) to move the user to
the Assigned Users list on the right. Click Save (D).
Tip: If you need to add a user, click the Users tab and
then Add User, fill in the fields, and assign the user a role
with gateway privileges.
A
B
C
D
C
A
B


