
NAS Quick Start Installation
Note:
Make sure that the TCP/IP protocol is installed on the networked computers
that are to access the NAS.
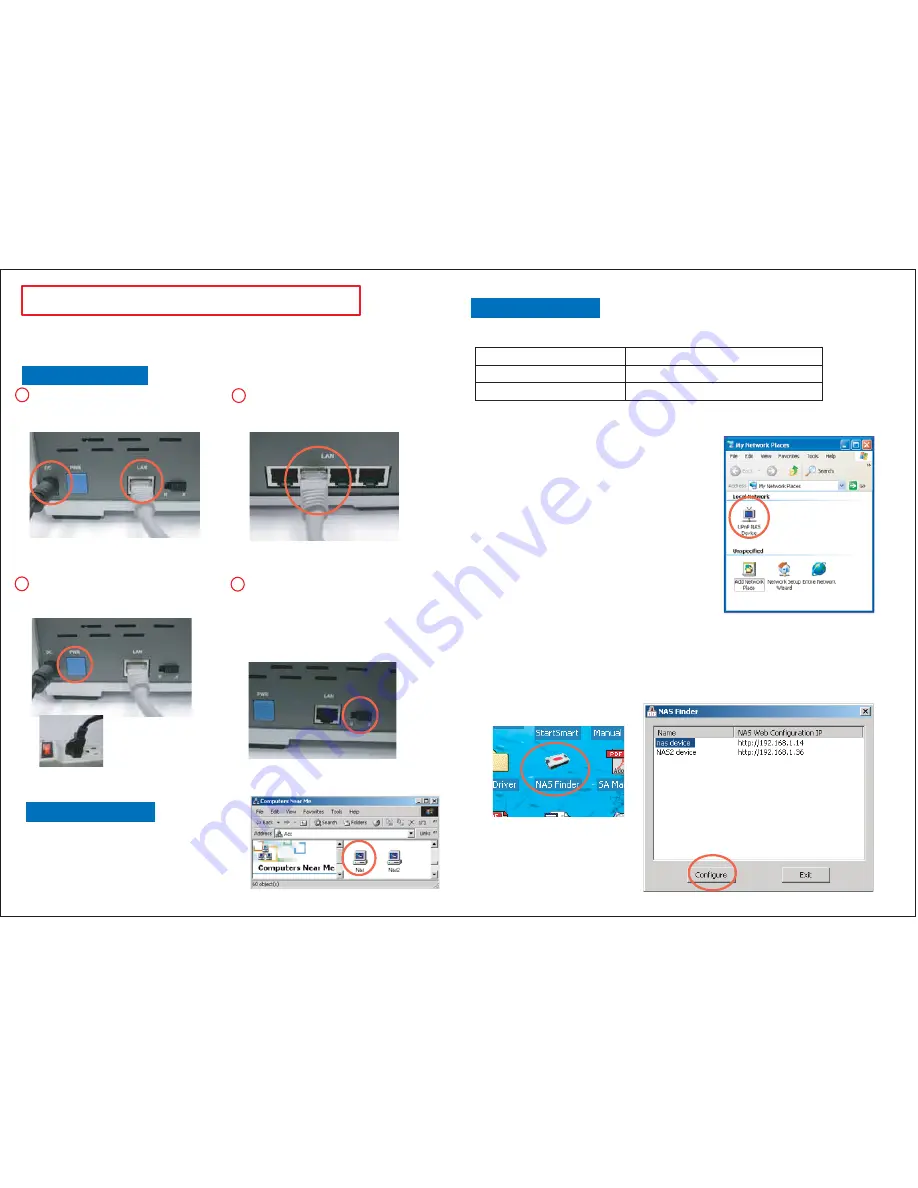
Connect the included Ethernet cable
and power adapter to the back of
the NAS.
Connect the other end of the Ethernet
cable to an available port on a network
switch, router or computer's LAN port.
Plug in the AC adapter into a wall
outlet or power strip and turn on
the NAS.
If the LAN link LED in the front of the NAS
is not ON, please change the switch next
to the LAN port of the NAS unit to the
alternate position.
Power off
the NAS and
turn it back on to get an IP address from
the network.
You can insert the NAS CD into your Windows PC and run the
NAS Finder
utility. All NAS devices will be listed with the unit's IP address. Double click on the
device name or highlight the device name and click on
Configure
to bring up the
configuration page.
1
2
3
4
Hardware Installation
Configuring the NAS
There are several methods for accessing
the configuration interface for the NAS:
If you have UPnP enabled in your Windows ME
or XP computer, you can access the configuration
by double clicking the UPnP device name under
My Network Places
. See the user's manual on
the CD for instructions on how to enable UPnP
on your computer.
Default Settings
Administrator user name
<empty>
Administrator password
admin
Internal IP address
Dynamically Assigned(DHCP Client)
In order to facilitate the use of the NAS, the
product comes with default settings that most
users can install without any modification.
Please refer to the user's manual located on the
CD for additional information and configurations.
Accessing the NAS
If your unit shipped with a preformatted
hard drive, you can find the new
share
folder by double clicking
My Network
Places
and the
Nas
device name.


