


8
Installation and Configuration
HDMI TX and RX Setup
In a point-to-point setup, there is no need to configure TX and RX.
For point-to-many, many-to-point and many to many setups, make sure:
•
every TX and RX has a unique IP and MAC address;
•
every TX has a unique group ID.
This HDMI over IP Extender assigns a
unique default MAC address for every TX and RX, so you don’t have
to set MAC addresses for the units. You just need to set the IP address and Group ID using the steps that
follow:
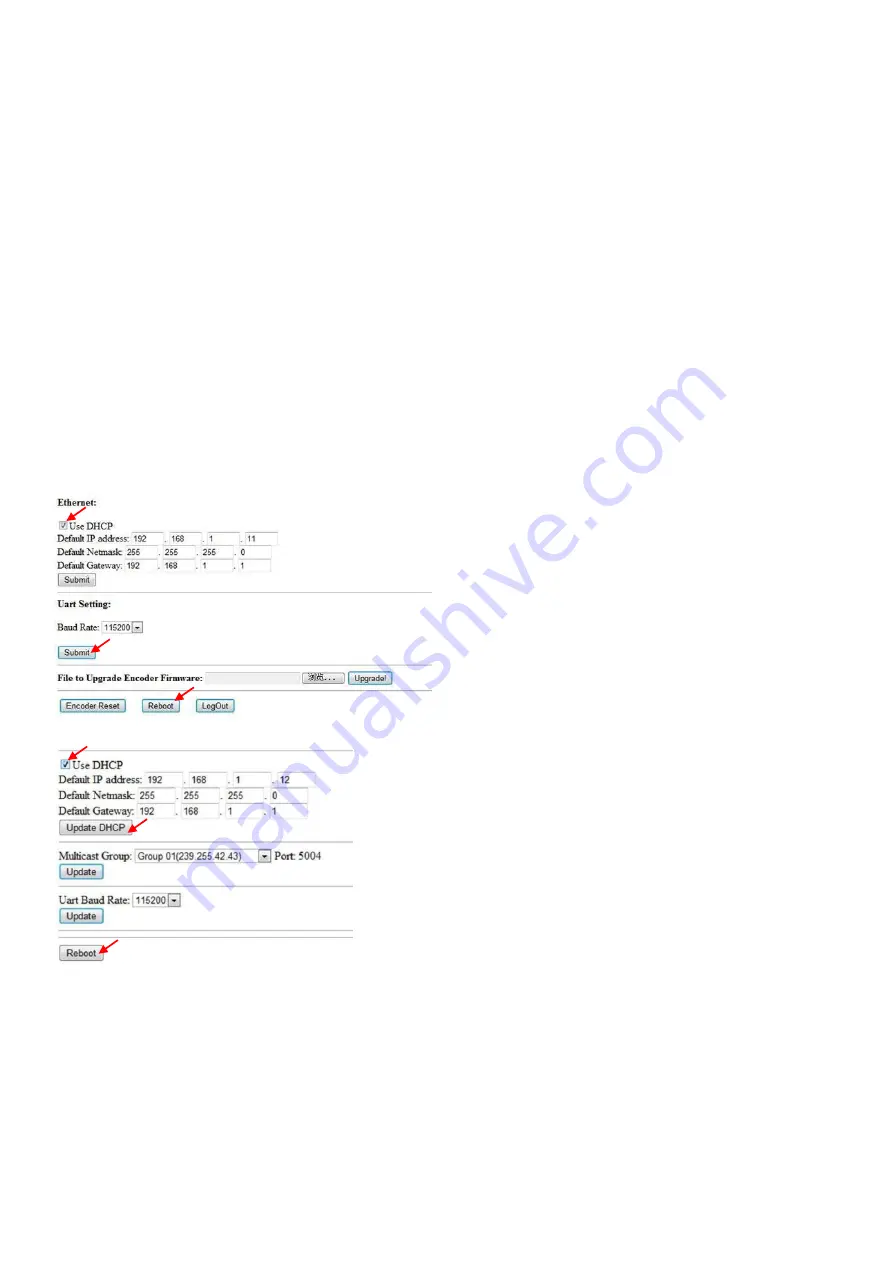
Setting the IP address
A). DHCP (Dynamic Host Configuration Protocol)
If you are using a Switch that supports DHCP, make sure that the function is enabled so that the switch will
assign a unique IP for each transmitter and receiver, and you w
on’t need to
manually change the IPs for
the units.
B). Set the IP via Web Browser
If you are using a Switch that does not support DHCP, manually change the default IPs for TX
(192.168.1.11) and RX (192.168.1.12).
An HTTP server is embedded in each TX and RX. You can set up IP address for HDMI Extender via web
browser.
•
The default IP address of the TX is
192.168.1.11
o
username:
admin
o
password:
admin
•
The default IP address of the RX is
192.168.1.12
Содержание 207577
Страница 1: ...H 264 HDMI Over IP Extender User Manual Models 207577 208246 208253 ...
Страница 7: ...7 How to connect the IR Cable Panel Drawings Source remote HDMI extender remote ...
Страница 16: ...16 Step 4 Choose the TX or RX Name Firmware Upgrade Upgrade for TX Step 1 Click Firmware Upgrade ...
Страница 17: ...17 Step 2 Click Upgrade Encoder FW first ...
Страница 19: ...19 Step 2 Click Upgrade Rx FW ...
Страница 21: ...21 Click Factory Reset on TX or RX ...
Страница 23: ...23 Step 6 Click Next Step 7 Choose RTP MPEC Transport Stream or UDP ...
Страница 24: ...24 Step 8 Click Next Step 9 Click Stream ...
Страница 25: ...25 Step 10 Click Open Network Stream then click Play to view the video ...


