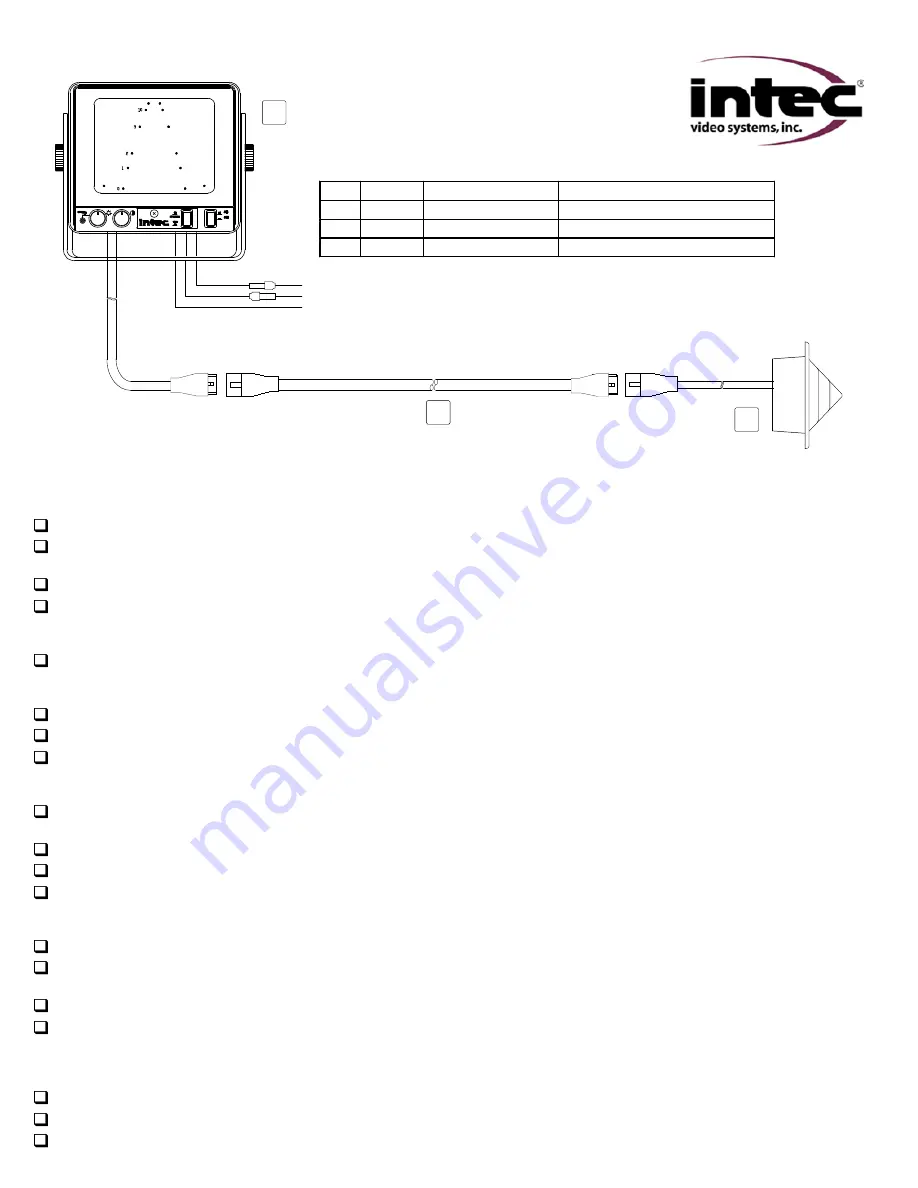
Original System
Item Quantity Part
Number
Description
1
1
CVMxxx
Car Vision Monitor
2 1
CVU18M
Cable
3
1
CVCxxx
Car Vision Camera
1
2
3
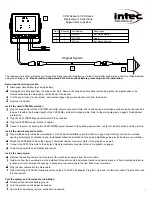
The following instructions will guide you through the steps required to replace your older Car Vision® system with a new Car Vision® system
using the existing cable.
Please read and understand all the instructions before proceeding with the installation.
Removing the existing monitor:
Disconnect Ground from the vehicle battery.
Unplug the monitor pigtail from the main cable. Note: Some CVM series monitors have removable pigtails, the pigtail needs to be
disconnected from the main cable, not the back of the monitor.
Cut the power (red), ground (black), and reverse trigger (blue) wires about a foot from the monitor.
Remove the monitor.
Install the new CVS100M controller:
Plug the main cable into the CVS100M controller camera connector. Note: The controller can be installed anywhere inside the coach as
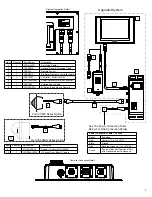
long as it is within the 6 meter length of the CVDC6MA controller to display cable. Refer to the wiring diagram on page 2 for additional
information.
Plug the CVS100MP3M power harness into the controller.
Plug the CVDC6MA cable into the controller.
Connect to power by splicing the CVS100MP3M power harness to the existing power wires; red to red, black to black, and blue to blue.
Install the new display and remote:
Prepare the dash to install the new display. For flush mount installations see the chart on page 3 and modify your dash or overhead
opening accordingly. For bracket mount installations follow the directions on the quick installation guide provided with your new display.
Attach the CVDC6MA cable to the display’s Controller (inside) connector. Refer to the graphic on page 2.
Connect the CVR100 remote to the display’s Remote (outside) connector. Refer to the graphic on page 2.
Temporarily install the new display and remote.
Install the new camera:
Remove the existing camera from the rear of the coach and unplug it from the main cable.
Determine how the new camera will be installed. If bracket mounted determine location and secure bracket. If flush mounted determine
location and cut or enlarge the opening, if necessary, to accommodate the new flush mount enclosure.
Plug the new camera into the main cable.
When installing a CVC500AH series camera use the 313-02-02-002 adapter. Plug the 12 pin end into the main cable. Plug the other end
into the camera.
Test the system and Complete the installation:
Reconnect the vehicles battery ground.
Turn the system on and adjust as needed.
Secure the new display, remote, controller and camera.
CVM Series to CVD Series
Replacement Instructions
Single Camera System
1


