Page 47
EN
Chapter 10 Cleaning & decommissioning
10004591) in order to make it easier to screw the rotor
into the stator. Make sure that the rotor is correctly in-
stalled in the stator.
NOTE
Always carry out this cleaning process be-
fore longer breaks in work (> 0.5 hours).
15. Turn the main switch on the switching cabinet to “0”.
16. Pull out the mains plug.
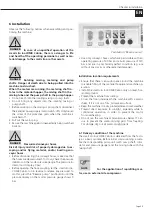
17. Open the two eccentric locks on the mixing tube cover.
18. Now pull the mixing tube cover together with the mix-
ing shaft (this is screwed to the mixing tube cover) out
of the mixing tube and clean them over a suitable con-
tainer of water.
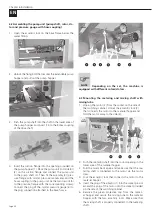
19. Uncouple the GEKA coupling and remove the internal
water hose from the mixing tube.
20. Open the two eccentric catches that secure the mix-
ing tube to the material container and clean the mixing
tube over a suitable container.
21. For further operation, mount the mixing tube again
with the two eccentric locks on the mixing tube holder
and push the mixing shaft with the mixing tube cover
into the mixing tube. Also secure the mixing tube cover
to the mixing tube frame with the two eccentric locks.
At the end of work, place the cleaned mixing
tube back into the pump pull-out frame. Close
the mixing tube receptacle with the green cover.
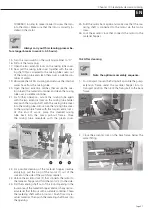
1
2
3
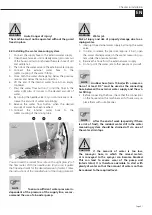
22. For possible cleaning of the material hopper (residue
emptying), pull the plug of the motor (1) out of the
socket on the side of the switching cabinet.
23. Unlock the eccentric lock (2) that connects the motor to
the material hopper and fold the motor (3) to the side.
24. Pull the metering shaft out of the round opening in the
lower area of the material hopper and catch any residu-
al material that falls out with a suitable container. Clean
the metering shaft with a broom or brush from dry re-
sidual material. Then push the metering shaft back into
the opening.
25. Fold the motor back again and make sure that the me-
tering shaft is connected to the motor via the motor
claw.
26. Lock the eccentric lock that connects the motor to the
material hopper.
10.2 After cleaning
NOTE
Note the optimum assembly sequence.
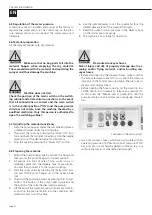
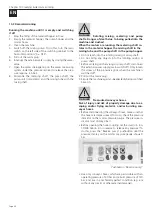
1. For transport, loosen the fixing bolt and slide the pump
extension frame under the material hopper into its
transport position. Then lock the fixing bolt to the base
frame.
2. Close the eccentric lock on the base frame below the
water fitting.


