M A N U A L D E I N S T R U C C I O N E S
REFS.: 900104
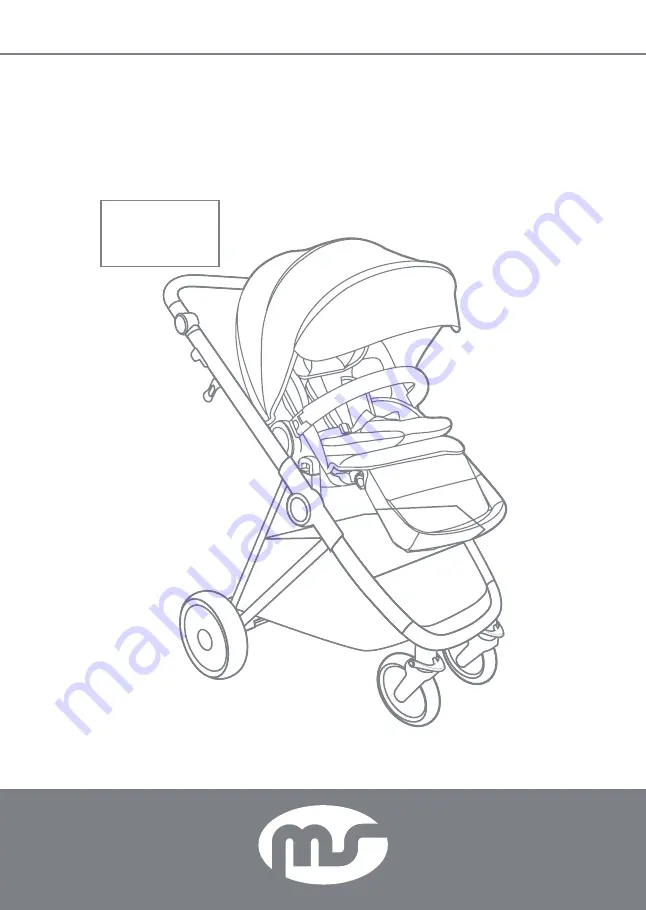
CARRO
MOMMY PLUS
IMPORTANTE!!
LEER DETENIDAMENTE Y GUARDARLAS PARA FUTURAS CONSULTAS
ESTE CARRO
CUMPLE CON LA NORMA
UNE EN
1888:2018
Страница 1: ...M A N U A L D E I N S T R U C C I O N E S REFS 900104 CARRO MOMMY PLUS IMPORTANTE LEERDETENIDAMENTEYGUARDARLASPARAFUTURASCONSULTAS ESTE CARRO CUMPLE CON LA NORMA UNE EN 1888 2018...
Страница 2: ...N O P H Asa Para ajustar el asa Bot n de plegado Tira de plegado Bot n del reposa brazos Interfaz Bot n para ajustar el reposa pies Cesta Rueda trasera Rueda delantera Horquilla delantera Para orient...
Страница 3: ...je de estar fija Para montar la rueda trasera intro duzca la rueda como en la flecha para montarla Para quitar la rueda delantera aprie te el metal como indica la flecha para quitar la rueda introduzc...
Страница 4: ...olocar la silla introduzca la silla en la direcci n de las flechas Para desplegar el chasis tire del asa en la direcci n de la flecha y oir un claro chasquido que indica que el chasis est abierto Para...
Страница 5: ...5 5 INSTRUCCIONES Para ajustar el asiento apriete el bo t n luego s balo como se muestra en el dibujo para ajustar el ngulo dibujo 9 10 11 12 9 10 11 12...
Страница 6: ...ara ajustar el reposa pies apriete el bot n como se muestra en la flecha para ajustar el ngulo Para colocar el reposabrazos intro duzca el reposabrazos directamente en el agujero Para quitar el reposa...
Страница 7: ...o libera Importante debe activar el freno cuando no utilice el carro Para ajustar el asa apriete el bot n como se muestra en la flecha para ajustar el ngulo Para plegar el chasis apriete el bo t n com...
Страница 8: ...de la hebi lla del arn s luego tire de los lados de esta forma libera la hebilla Para colocar el Grupo 0 introduzca el grupo 0 como indica la flecha Para colocar la hebilla del arn s como se muestra...
Страница 9: ...a su perior y luego saque el avance de la anilla est rela Para alargarlo saque la anilla supe rior luego acorte la distancia con el avance de la anilla superior est rela Grupo 0 con base ISO FIX intro...
Страница 10: ...chasis Apriete las pesta as para quitar el cuco o capazo Importante 1 Este producto es s lo para ni os que no pueden quedarse sentados sin ayuda 2 S lo puede colocarlo en una superficie firme horizont...
Страница 11: ...la tela no est desgarrada si es preciso cambie las partes da adas por nuevas Al poner o quitar alguna pie za mire las instrucciones El tapizado no se puede poner a remojo cuando lo limpie debe fregarl...
Страница 12: ...la prueba de compra del producto que debe mostrar deta lladamente la direcci n de la tienda la fecha de compra del producto con el sello de la tienda y una firma indicando de que producto se trata o...
Страница 13: ...sabilidad por da os causada a las personas o a la propiedad otra que no sea el producto si el da o lo causa por no seguir las instrucciones consejos o precauciones que hay en el manual de instruccione...
Страница 14: ...IMPORTADO POR INNOVACIONES M S S L Pol Ind La Cava C Benig nim 9 46892 MONTAVERNER Valencia Spain Tel 96 229 76 70 Fax 96 229 76 76 INNOVACIONESMS COM...
Страница 15: ...IMPORTANT READCAREFULLYANDKEEPTHEMFORFUTURECONSULTATIONS I N S T R U C T I O N M A N U A L REFS 900104 BABY STROLLER MOMMY PLUS ESTE CARRO CUMPLE CON LA NORMA UNE EN 1888 2018...
Страница 16: ...A B C D E F G I J K L M N O P H handle handle adjustable plastic folding knob folding hook bumper button interface footrest adjustable button basket rear wheel front wheel front fork front wheel orie...
Страница 17: ...plastic as the arrow to unlock it rear wheel assemble insert wheel as arrow to assemble it front wheel disassemble press the metal as arrow to remove the wheel insert wheel as arrow to the plastic to...
Страница 18: ...TIONS unfold frame pull the hook as arrow assemble seat insert the seat as arrow unfold frame pull the handle as arrow and hear ka frame open disassemble seat pull the button as arrow and lift the sea...
Страница 19: ...19 19 INSTRUCTIONS seat adjust press the button then lift as picture to adjust angle photo 9 10 11 12 9 10 11 12...
Страница 20: ...20 seat reversible as photo 13 14 footrest adjust press the button as arrow to adjust angle bumper assemble insert the bum per to hole directlybumper disas semble press the button as arrow to remove i...
Страница 21: ...w 2 is relase brake attention you must step brake when you not use stroller handle adjust press the button as arrow to adjust angle fold frame press the button as photo 19 and pull the hook push the h...
Страница 22: ...le harness buckle as pic ture 24 press the button of harness buckle then pull buckle plug buckle released carseat assemble insert the carseat seat as arrow assemble harness buckle as picture 23 plug a...
Страница 23: ...e top ring then draw out trailer ring fastened adjustable length draw out the top ring then shorten the trailer ring fastened carseat with ISO FIX base insert the carseat verticality x the bar under c...
Страница 24: ...Push the triggers to remove the carrycot Note 1 This product is only suitable for a child who cannot sit up unaided 2 Only use on a rm horizontal level dry surface 3 The head of the child in the carr...
Страница 25: ...n Fabric cover can not be rinsed when you clean fabric cover please use brush or other clean ware to outwash splodge The rest parts washed please use soap or neutral cleaning mixure Warranty is one ye...
Страница 26: ...must not be modified and it clearly has to show the same information we have mentioned before The formal guarantee is valid for twenty four 24 months since the pur chase of the product During this pe...
Страница 27: ...instructions advices or warnings which are in the manual book of ins tructions by the owner or any person who is using the product Just an example never leave the child alone or the child has to wear...
Страница 28: ...IMPORTED BY INNOVACIONES M S S L Pol Ind La Cava C Benig nim 9 46892 MONTAVERNER Valencia Spain Tel 96 229 76 70 Fax 96 229 76 76 INNOVACIONESMS COM...
Страница 29: ...IMPORTANTE LEIACUIDADOSAMENTEEGUARDE ASPARACONSULTASFUTURAS I N S T R U E S D E M O N T A G E M REFS 900104 CARRINHO DE B B MOMMY PLUS ESTE CARRINHO DE B B COM PLICA SE COM O PADR O UNE EN 1888 2018...
Страница 30: ...ra ajustar a al a Bot o de fechamento Correia de fechamento Bot o do apoio de bra os Interface Bot o para ajustar o apoio de p s Cesta Roda traseira Roda dianteira Forquilha dianteira Para orientar a...
Страница 31: ...ara que esta se solte Para montar a roda traseira introdu za a roda como indicado pela seta para mont la Para remover a roda dianteira aper te o metal como indicado pela seta para remover a roda insir...
Страница 32: ...eta Para colocar a cadeira introduza a cadeira na dire o das setas Para desdobrar o chassi puxe a al a na dire o da seta at ouvir um claro click que indica que o chassi est aberto Para remover a cadei...
Страница 33: ...33 33 INSTRU ES Para ajustar o assento pressione o bot o em seguida suba o como mostrado no desenho para ajustar o ngulo desenhos 9 10 11 12 9 10 11 12...
Страница 34: ...a ajustar o apoio de p s pres sione o bot o como mostrado pela seta para ajustar o ngulo Para colocar o apoio de bra o intro duza o apoio de bra os diretamente no orif cio Para remover o apoio de bra...
Страница 35: ...te o Importante preciso ativar o freio quando o carrinho n o estiver sendo utilizado Para ajustar a al a pressione o bo t o como mostrado pela seta para ajustar o ngulo Para dobrar o chassi pressione...
Страница 36: ...da fivela do arn s e puxe os lados de modo a soltar a fivela Para colocar o Grupo 0 introduza o grupo 0 conforme indicado pela seta Para colocar a fivela do arn s como mostrado no desenho 23 engan che...
Страница 37: ...ire o anel superior e depois tire o ajuste do anel puxe o Para alongar tire o anel superior de pois encurte a dist ncia com o ajuste do anel superior Grupo 0 com base ISO FIX insira o Grupo 0 vertical...
Страница 38: ...s dois lados do chassi Aperte as abas para remover o mois s Importante 1 Este produto apenas para crian as que n o podem se sentar sem ajuda 2 Deve ser colocado em uma superf cie firme horizontal e se...
Страница 39: ...o soltos se n o h partes quebradas ou se o tecido n o est rasgado se necess rio substitua as pe as danificadas por novas Ao colocar ou retirar alguma pe a veja as ins tru es A capa de tecido n o pode...
Страница 40: ...IMPORTADO POR INNOVACIONES M S S L Pol Ind La Cava C Benig nim 9 46892 MONTAVERNER Valencia Spain Tel 96 229 76 70 Fax 96 229 76 76 INNOVACIONESMS COM...
Страница 41: ...IMPORTANT LISEZATTENTIVEMENTETCONSERVEZ LESPOURDEFUTURESCONSULTATIONS N o t i c e d e m o n t a g e STROLLER MOMMY PLUS CETTE STROLLER CON FORME LA NORME UNE EN 1888 2018 REFS 900104...
Страница 42: ...P H Poign e Pour r gler la poign e Bouton de pliage Bande de pliage Bouton de l accoudoir Interface Bouton de r glage du repose pieds Panier Roue arri re Roue avant Fourche avant Pour orienter la rou...
Страница 43: ...e Pour monter la roue arri re Pour d monter la roue arri re ins rez la roue suivant appuyez sur le m tal tel la fl che pour la monter Pour enlever la roue avant Pour enlever la roue avant par la fl ch...
Страница 44: ...i ge en place ins rez le si ge dans le sens des fl ches Pour d ployer le ch ssis tirez sur la poign e dans le sens de la fl che et Vous entendrez clairement un d clic indiquant que le ch ssis est d pl...
Страница 45: ...45 45 INSTRUCTIONS Pour r gler le si ge appuyez sur le bouton puis montez le tel qu indiqu sur le dessin afin de r gler l angle dessin 9 10 11 12 9 10 11 12...
Страница 46: ...essins 13 14 Pour r gler le repose pieds appuyez sur le bouton tel qu indiqu par la fl che pour r gler l angle Pour mettre en place l accoudoir ins rez l accoudoir directement dans l orifice Pour enle...
Страница 47: ...us devez actionner le frein lorsque vous n utilisez pas la poussette Pour r gler la poign e appuyez sur le bouton tel qu indiqu par la fl che pour r gler l angle Pour replier le ch ssis appuyez sur le...
Страница 48: ...arnais puis tirez sur les c t s afin de lib rer la boucle Pour mettre en place le Groupe 0 ins rez le groupe 0 tel qu indiqu par la fl che Pour mettre en place la boucle du harnais comme indiqu sur le...
Страница 49: ...sortez l l ment de d placement de l an neau tirez le Pour l allonger sortez l anneau sup rieur puis r duisez la distance avec l l ment de d placement de l anneau sup rieur tirez le Groupe 0 avec base...
Страница 50: ...z sur les languettes pour enlever le couffin ou la nacelle Important 1 Ce produit est uniquement destin aux enfants qui ne peuvent pas se tenir assis tout seuls 2 Il ne doit tre pos que sur une surfac...
Страница 51: ...mplacez les parties endommag es par d autres neuves Lors du mon tage ou d montage des pi ces consultez les instructions Ne faites pas tremper les pi ces en tissu pour leur nettoyage frottez les avec u...
Страница 52: ...IMPORT PAR INNOVACIONES M S S L Pol Ind La Cava C Benig nim 9 46892 MONTAVERNER Valencia Spain Tel 96 229 76 70 Fax 96 229 76 76 INNOVACIONESMS COM...
Страница 53: ...IMPORTANTE LEGGEREATTENTAMENTEECONSERVARLIPERCONSULTAZIONIFUTURE I S T R U Z I O N I D I M O N T A G G I O REFS 900104 PASSEGGINO MOMMY PLUS QUESTA PASSEGGINO CONFORME ALLA NORMA UNE EN 1888 2018...
Страница 54: ...brio Pulsante di chiusura Fascia di chiusura Pulsante del bracciolo Interfaccia Pulsante di regolazione del poggiapiedi Cestino portaoggetti Ruota posteriore Ruota anteriore Sterzo anteriore Per orien...
Страница 55: ...ccia Montaggio della ruota posteriore per montarla inserire la ruota come indicato dalla freccia Rimozione della ruota anteriore per rimuovere la ruota stringere l ele mento in metallo nel verso indic...
Страница 56: ...o collocare il seggiolino nella direzione indicata dalle frecce Apertura del telaio tirare il manubrio nella direzione indicata dalla freccia Quando il telaio completamente aperto sentirete un chiaro...
Страница 57: ...57 57 ISTRUZIONI Regolazione della seduta premere il pulsante quindi sollevare la seduta per regolare l inclinazione Figura 9 10 11 12 9 10 11 12...
Страница 58: ...Regolazione del poggiapiedi preme re il pulsante come mostrato dalla freccia e regolarlo a proprio piaci mento Posizionamento del bracciolo inse rire il bracciolo nell apposita cavit Per rimuovere il...
Страница 59: ...ssit Importante durante la sosta attiva re il freno Regolazione del manubrio preme re il pulsante come indicato dalla freccia quindi regolare il manubrio a seconda delle proprie necessit Chiusura del...
Страница 60: ...bia della cintura di sicurezza quindi tira re da entrambi i lati La fibbia stata rimossa Posizionamento del gruppo 0 inse rire il Gruppo 0 come indicato dalla freccia Posizionamento della fibbia della...
Страница 61: ...ssivamente rimuovere lo scorrimen to del fermo quindi distendere la cintura Per allungarla rimuovere il fermo superiore quindi accorciare la cintura utilizzando lo scorrimento del fermo Distenderla Gr...
Страница 62: ...del telaio Per rimuovere la navicella premere ai bordi 1 Questo prodotto pensato solo ed esclusivamente per bambini che non sono in grado di restare seduti da soli 2 Collocare il prodotto su una super...
Страница 63: ...rte sia danneggiata o che la tela non sia usurata Se cos fosse sostituire le parti danneggiate Far riferimento alle istruzioni quando si rimuo ve o si colloca qualsiasi componente Non mettere in ammol...
Страница 64: ...IMPORTATO DA INNOVACIONES M S S L Pol Ind La Cava C Benig nim 9 46892 MONTAVERNER Valencia Spain Tel 96 229 76 70 Fax 96 229 76 76 INNOVACIONESMS COM...
Страница 65: ...TTEAUFMERKSAM DIEGEBRAUCHSANLETUNGUND BEWAHRENSIESIEBITTEAUFFALLSSIEZUK NFTLICHDIESEKONSULTIERNM SSEN B E D I E N U N G S A N L E I T U N G REFS 900104 KINDERWAGEN MOMMY PLUS Europ ische Norm genehmig...
Страница 66: ...E F G I J K L M N O P H Behandeln Den Griff einstellen Faltknopf Faltstreifen Armlehnenknopf Schni ttstelle Taste zum Einstellen er ruht f e Korb Hinterrad Vorderrad Vorderradgabel Vorderrad ausrichte...
Страница 67: ...F r installieren Sie das Hinterrad Setzen Sie das Rad ein und ziehen Sie Der Pfeil um es zu montieren So entfernen Sie das Vorderrad Ziehen Sie das Metall wie durch den Pfeil angegeben fest um das Ra...
Страница 68: ...in deutliches Klicken So platzieren Sie den Stuhl Geben Sie ein Der Stuhl in Pfeilrichtung F r das Chassis bereitstellen ziehen die Griff in Richtung des Pfeils und Dass das Chassis offen ist So entfe...
Страница 69: ...69 ANLEITUNG So stellen Sie den Sitz ein Dr cken Sie die Klicken Sie auf die Schalt fl che und laden Sie sie wie gezeigt hoch in der Zeichnung um den Winkel einzustellen Zeichnung 9 10 11 12 9 10 11...
Страница 70: ...en Sie die Fu st tze ein dr cken Sie die Taste als im Pfeil gezeigte Stellen Sie den Winkel ein So platzieren Sie die Armlehne Geben Sie die Armlehn direkt in das So entfernen Sie die Armlehne Dr cken...
Страница 71: ...bt Wichtig Sie m ssen die Bremse aktivie ren wie Sie verwenden das Auto nicht So stellen Sie den Griff ein Dr cken den Knopf wie durch Pfeil 1 um die Probe Winkel Fahrgestell zusammenklappen fest zieh...
Страница 72: ...ng 24 gezei gt festziehen dann ziehen Sie die Seiten die Schnalle in der mittleren Schnalle los wenn Sie eine Form h ren So platzieren Sie die Gruppe 0 Geben die Gruppe 0 wie durch den Pfeil angedeute...
Страница 73: ...Sie den haken Sie den oben und ziehen Sie dann oben und ziehen Sie dann von dem Ring est rela Zum Verl ngern Den Ring entfernen Oben dann den hinte ren mit dem Vorr cken des oberen Rings est rela Gru...
Страница 74: ...Dr cken Sie die Wimpern zusammen um den Kuckuck oder die Tragetas che zu entfernen Wichtig 1 Dieses Produkt ist nur f r Kinder geeignet die nicht ohne Hilfe sitzen k n nen 2 Sie k nnen es nur auf ein...
Страница 75: ...l oder das Gewebe gebrochen ist zerrissen wenn n tig zu ndern l als besch digte Teile durch neue Beachten Sie beim An und Ausziehen die Anwei sungen Die Polster k nnen nicht eingeweicht werden wenn Si...
Страница 76: ...IMPORTIERT VON INNOVACIONES M S S L Pol Ind La Cava C Benig nim 9 46892 MONTAVERNER Valencia Spain Tel 96 229 76 70 Fax 96 229 76 76 INNOVACIONESMS COM...