TK 55528-2-PC-EN (Rev. 0, 08-12)
©Thermo King Corporation
Driver Guide to
OptiSet Plus
Operation
SR-2/SR-3
Smart Reefer 2/3
Microprocessor
For more information or tutorial
sessions, please contact your
Thermo King Service Manager
2
NOTE: If no keys are pressed for 30 seconds while in the Named Product Changer
Screens, the HMI will return to the Standard Display and the setpoint will remain at the
displayed setpoint.
NOTE: Pressing the EXIT soft key at any point will return to the Standard Display.
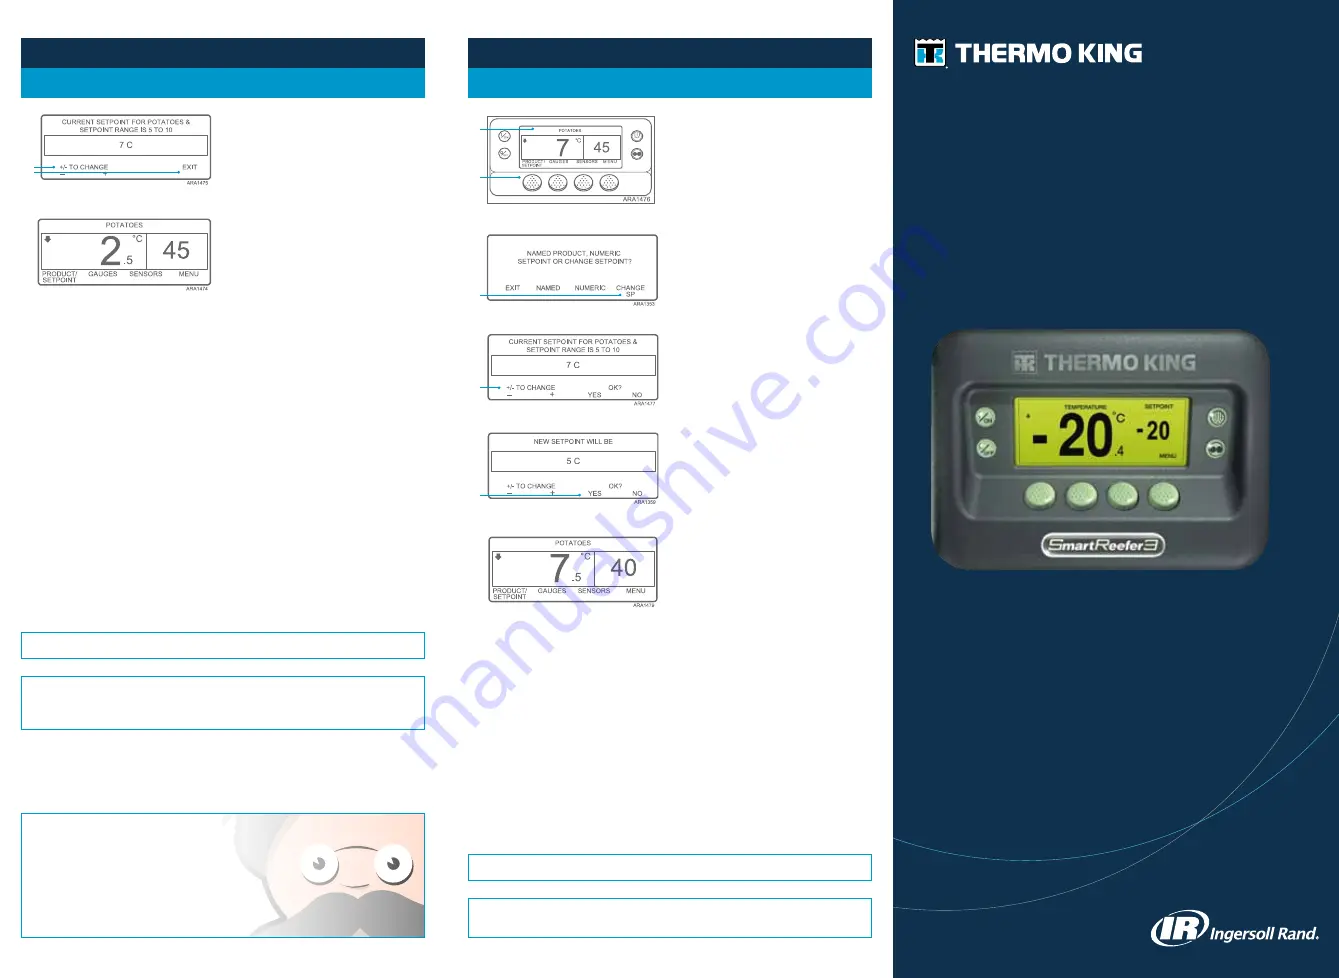
Selecting the Setpoint
For a named product
If the named product has been
programmed with a setpoint range,
the setpoint for the named product
can be changed. This example shows
the Standard Display with the
PRODUCT/SETPOINT soft key.
1
2
changing the Setpoint
For a named product
If the “Change Setpoint for Potatoes”
Screen appears after pressing the YES
soft key to select a named product, the
named product has been programmed
with a setpoint range. Complete the
following steps to select a setpoint for
the named product.
1. The “Change Setpoint for Potatoes”
Screen briefly appears, then the
“Current Setpoint of Potatoes &
Setpoint Range Is 40 to 50” Screen
will appear.
NOTE: If no keys are pressed for 30 seconds while in the Named Product Changer
Screens, the HMI will return to the Standard Display.
NOTE: Pressing the EXIT soft key at any point will return to the Standard Display.
2. Press the + /- or EXIT soft keys accordingly as described below.
• Press the + or - soft keys to change the current setpoint for the named
product. Go to step 6 under “Changing the Setpoint for a Named Product”
to continue.
OR
• Press the EXIT soft key to accept the current setpoint for the named product.
The Standard Display will
appear with the named product and setpoint.
1. Begin at the Standard Display. If
the Temperature Watch Display
is showing, press the MENU soft
key once to return to the Standard
Display.
2. Press the PRODUCT/SETPOINT
soft key on the Standard Display.
3. The “Named Product, Numeric
Setpoint or Change Setpoint?”
Screen will appear.
4. Press the CHANGE SP soft key.
5. The “Change Setpoint for Potatoes”
Screen briefly appears, then the
“Current Setpoint for Potatoes &
Setpoint Range Is 40 to 50” Screen
will appear.
6. Press the + or - soft keys to change
the setpoint.
7. Press the YES soft key to accept the
new setpoint.
• If the NO key is pressed the
named product setpoint change
made with the + or - soft keys
will not be accepted, the named
product setpoint will not be
changed and the display will
return to the Standard Display.
4
6
7
• If the YES soft key is pressed, the named product setpoint change made with
the + or - soft keys will be accepted, and the following screens will appear.
8. The “Programming New Setpoint for Potatoes” Screen will briefly appear.
9. The “New Setpoint Is 40” Screen briefly appears.
10. The Standard Display appears with the new setpoint.