infaco A3M V2.0 Скачать руководство пользователя страница 32

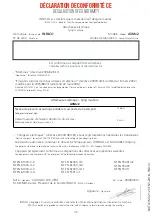
Déclaration de conformité ce

declaration of conformity

INFACO s.a.s. déclare que le matériel neuf désigné ci-après :

INFACO S.A.S. declares that the new equipment designated below:

Attacheuse électrique 

Tying machine 

De marque


– Brand name :


INFACO


Modèle 

- Model :


A3Mv2

N° de série 

– Serial no :


Année de fabrication


–  Year  of  manufacture  :       

Est conforme aux dispositifs des directives :

Complies with the provisions of the directives for:

- “Machines” (directive 2006/42/CEE).

   “Appliances” (directive 2006/42/CEE)

- “Emissions sonores machines utilisées en extérieur” directive 2000/14/CE (arrêté du 18 mars 2002)  

   modifiée par la 2005/88/CE (arrêté du 22 mai 2006).

    Directive 200/14/EC « on the noise emission by equipment for use outdoors » (order of 18 march 2002) modified by the directive    
    2005/88/EC (order of 22 may 2006).


- “Chargeurs électriques” (directive 2004/108/CEE) et aux réglementations nationales les transposant.

   “Electric chargers” (directive 2004/108/CEE) and with national legislation adapting them.

- La personne autorisée à constituer le dossier technique au sein d’INFACO est M.ALVAREZ Grégory.

   The person authorized to compile the technical file within the company INFACO is Mr. Gregory ALVAREZ.

L’appareil est également conforme aux dispositions des directives européennes suivantes : 

The equipment also complies with the provisions of the following European directives:

NF EN 61000-3-2

NF EN 61000-4-2

NF EN 61000-4-3

NF EN 61000-4-4

NF EN 61000-4-5

NF EN 61000-4-6

NF EN 61000-4-11

NF EN 55014-1

NF EN 550014-2

NF EN 55022

NF EN 55011

INFACO s’engage à fournir aux autorités nationales les informations pertinentes concernant la machine.

Fait à 

- Signed in :

 CAHUZAC SUR VÈRE 


Le 

– Date :

 28/08/2013

M. DELMAS Daniel, Président de la Société INFACO 

- INFACO President

Signature 

– Signature :

INFACO undertakes to provide national authorities with all relevant information concerning the machine.

NOT A3MV2 12V EN3-2018 - IND 01

32

72 dB(A)

Attacheuse électrique – Tying machine

A3Mv2

Niveau de pression acoustique pondéré A au poste de travail, LpA

Sond pressure level, LpA
 

Valeur mesurée d'émission vibratoire, ah

 (EN12096)


Measured value of vibratory emission, ah

5,3 m/s²

Содержание A3M V2.0

Страница 1: ...INSTRUCTIONS FOR USING THE A3M V2 0 12V TYING MACHINE...

Страница 2: ......

Страница 3: ...________________________________11 RECHARGING THE BATTERY _________________________________________13 DAILY MAINTENANCE _______________________________________________16 ANNUAL MAINTENANCE ___________...

Страница 4: ...all safety warnings and all instructions Failure to abide by warnings and instructions could lead to an electric shock fire and or serious injury ENVIRONMENTAL PROTECTION Follow the specific instruct...

Страница 5: ...HEAD UNLOCKING KEY 09 TYING HEAD 10 ADJUSTMENT WHEEL Adjusts the number of turns 3 to 6 twists 11 MULTIFUNCTION CONTROL SWITCH Short pressure controls the blade only Sustained pressure controls the ty...

Страница 6: ...to use the machine properly and achieve a good output It will take a day s use to acquire a sound knowledge of how to operate the machine Charger the battery for at least 3 hours before starting your...

Страница 7: ...ery exit cable 01 to the machine supply cable 02 The machine is switched on Short pressure on the switch 03 will control only the wire cutting function zone 04 Sustained pressure will launch the compl...

Страница 8: ...e it easier to feed through the machine Cut the end to obtain a wire with no bends in it Clip the lever 01 upwards 01 02 Smoothe the wire for at least 40 cm Clip the reel on to the machine between che...

Страница 9: ...ugh the ma chine IF THE WIRE STILL DOESN T COME OUT we recommend that you dis connect the tying head See chapter Operating problems P16 check that the wire isn t stuck and try to in sert it with the h...

Страница 10: ...ck on wire exit 01 to ensure that there is no wire remaining in the machine After the last tying operation it is possible that some wire may remain stuck in the tying head If it does not prevent you f...

Страница 11: ...ase the tying head the wire then wraps round the branch Press control switch 01 to complete the tie The knot is made more or less tight depending on how far you pull back the machine See next chapter...

Страница 12: ...the right or left Adjustments vary from 3 to 6 turns The standard knot adjustment is 4 twists Ask your retailer to help you choose the best compromise to suit your re gion the type of wire you are us...

Страница 13: ...2 Connect plug 04 on the charger to the 230 V 50 Hz supply in a well ventilated room free of inflammable products and sources of ignition Connect connector 01 on the charger to connector 02 on the bat...

Страница 14: ...e covered or close to a heat source Never try to open it for any reason whatsoever Never place it in contact with water Check that it is clean and dry before putting it on charge Environmental protect...

Страница 15: ...ication points shown below The following tasks should be carried out with the machine disconnected 15 DAILY MAINTENANCE LUBRICATE TO RESTRICT WEAR Spray the end of the head on the blade side Spray ins...

Страница 16: ...he reel We strongly recommend doing this when the wire becomes unpleasantly difficult to pull on during the typing operation During the off season recharge your battery at least once every two months...

Страница 17: ...in the circular orifice with your fingernail or using the supplied pliers The wire may be bent at exit 01 no need to disconnect the machine simply go through the cycle empty or run the knife only and...

Страница 18: ...erations If the wire does not emerge unclip lever 01 and pull it right out of the machine Thread the wire through until it emerges area 01 Switch the machine back on and press control switch 02 to car...

Страница 19: ...head 01 in to a central working position following the arrow below Then take hold of ring 02 and move it forwards and backwards until the push rod returns to its position be neath ring 02 Ring 02 is r...

Страница 20: ...tying head back on positioning guide pin 01 opposite its housing Then tighten screw 02 to complete the ope ration Use key 01 to loosen screw 02 by ap proximately 4 or 5 turns Once you have disconnect...

Страница 21: ...ren or visitors Never carry the charger by its cable Keep the cable away from heat oil and cutting edges Never use the machine at night or in poor light without setting up extra lighting This machine...

Страница 22: ...22...

Страница 23: ...23...

Страница 24: ...itial guarantee The guarantee covers factory labour costs on the condition that the machine has always been serviced but does not necessarily apply to retailer labour costs The guarantee on the machin...

Страница 25: ...advantage of the guarantee extension over the first 3 seasons you must opt for the servicing package from the end of the first and second season servicing carried out between April and late July If o...

Страница 26: ...Notes...

Страница 27: ...Notes...

Страница 28: ...Notes...

Страница 29: ...pruning shear If yes serial Observation Last name First name Company name Street address Zip code City Phone Fax E mail Purchase date Serial N Yes Yes Fruit growing Pruning Wine growing Landscaping No...

Страница 30: ...RETAILER TO BE KEPT BY THE RETAILER FOR THE INFACO CUSTOMER FILE INFACO S A S Bois de Rozi s 81140 CAHUZAC SUR VERE France...

Страница 31: ...nly They are in no circumstances contractually binding and may be modified for the purpose of improving the product without prior notice Patented equipment Indicates a risk of bodily harm danger of de...

Страница 32: ...ing them La personne autoris e constituer le dossier technique au sein d INFACO est M ALVAREZ Gr gory The person authorized to compile the technical file within the company INFACO is Mr Gregory ALVARE...

Отзывы: