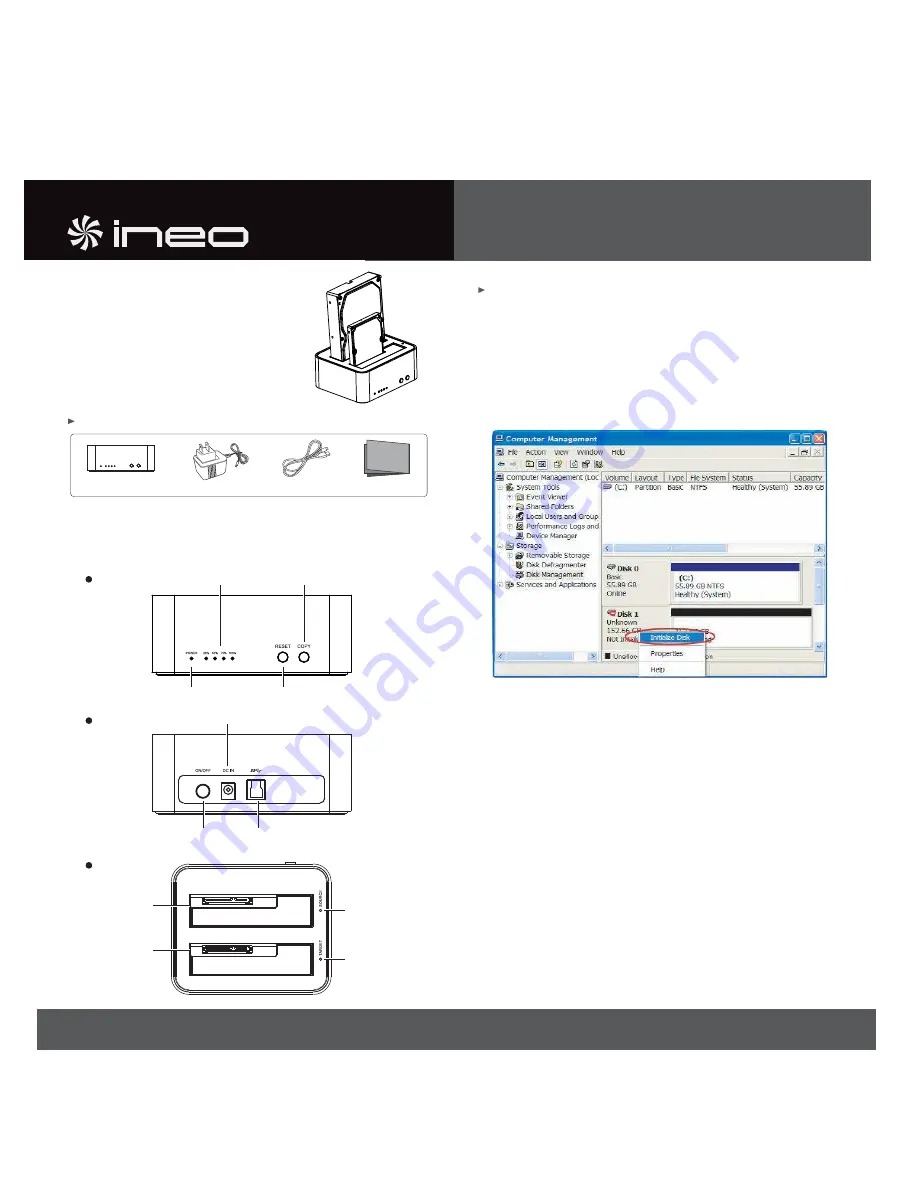
Package Contents
System Requirements
Windows 2000 / 2003 / XP / Vista / 7
Mac® OS X or higher
USB 3.0 to SATA III HDD/SSD
Docking Station
with Standalone Clone
User Manual
USB 3.0 Cable
Power Adapter
User Manual
I-NA321UPLUS
SATA Connector A
Source
Target
Top
3
SATA Connector B
Front
Reset button
Power LED
Clone button
Clone Progress LED
1
Back
2
Power Switch
USB 3.0 Port
Power Input
Using I-NA321UPLUS as Drive Dock
(1) Insert 1 or 2 SATA drives. They can be 2.5 or 3.5 inch, HDD or SSD.
(2) Connect power adapter to the jack labeled Power Input.
(3) Connect USB cable from you computer to the jack labeled USB 3.0 Port.
(4) Press the Power Switch to turn on.
(5) Windows & Mac computers will automatically detect this device. The I-NA321UPLUS does not require drivers.
Note:
a. Some SATA controllers may not be able to detect I-NA321UPLUS because they are not Plug and Play compliant.
This may be solved by installing the latest drivers specific to the SATA controllers in your computer.
You may need to contact the SATA controller manufacturer for their latest drivers.
b. New HDD & SSD needs to be initialized, partitioned and formatted by the OS in order to show up as usable drive
letters. For step by step instructions on how to format or partition a new drive please consult Windows or
Mac user manual.
Using I-NA321UPLUS as Standalone Duplicator (without PC)
1. Remove the USB cable. Do not connect USB to PC.
2. Insert Source Drive into SATA connector A (you will be copying from this drive).
Insert Target Drive into SATA connector B (you will be copying to this drive).
3. Press the Power Switch to turn on.
4. Press COPY (clone button) for 4 seconds to start cloning.
Notes:
a. Avoid power interruptions during cloning. Power interruptions will result in failed clones.
b. Cloning is possible only when the Source Drive is equal or smaller than Target Drive:
If Source Drive is larger than Target Drive, the Source LED will turn off and Target LED will blink.
If Source Drive is equal or smaller than Target Drive, the Source LED will turn on and Target LED will blink.
c. Clone Progress LED will blink from 25% to 100% during cloning.
Once cloning is completed, it will turn solid. You may remove drives or power off at this point.
d. To return to Drive Dock mode, you may either power off & on again or press the RESET button for 4 seconds.
You would reconnect the USB cable to PC.
e. Your PC may not be able to access both drives because they have the same drive letter. To separate the drives,
you must assign either drive to a new drive letter.
For step by step instructions on how to change drive letters please consult Windows or Mac user manual.
www.ineotechusa.com
I-NA321UPLUS

