


81
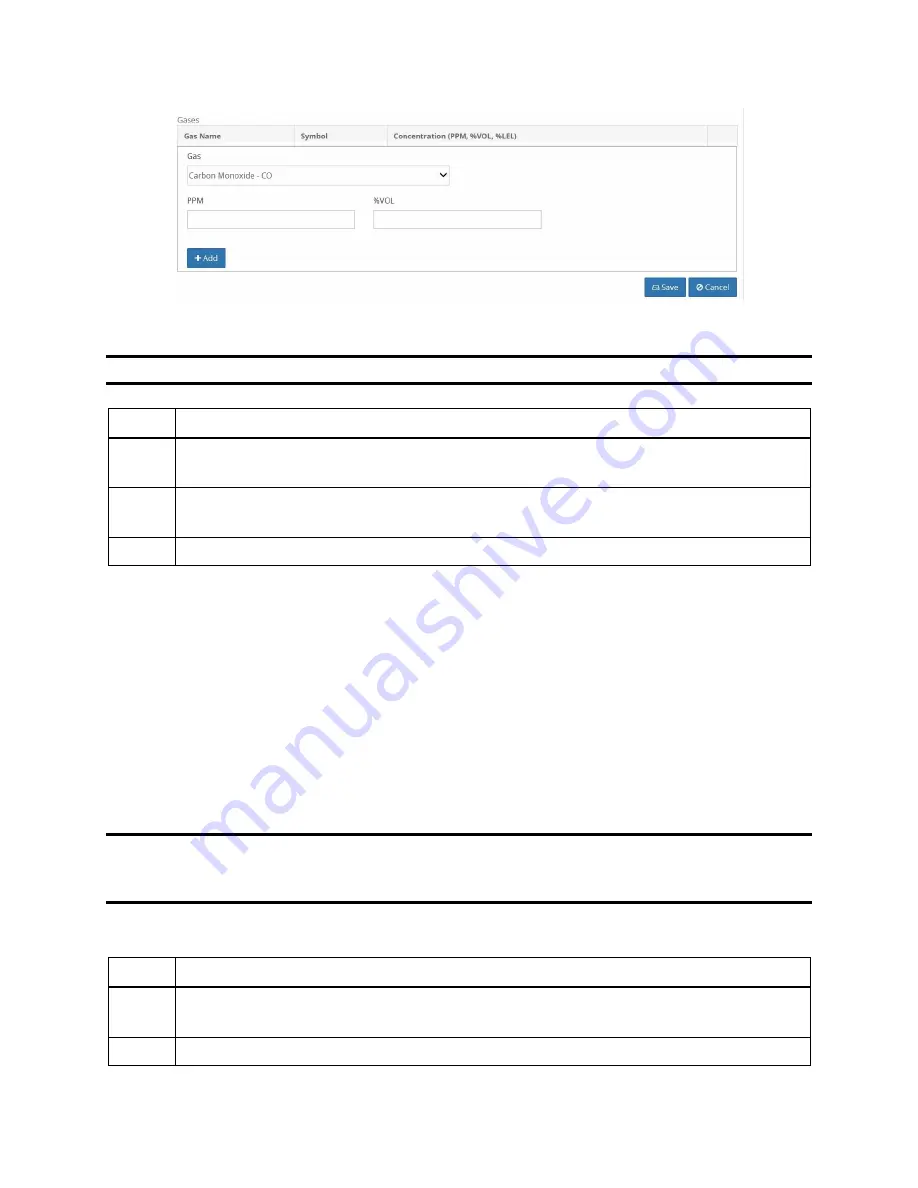
Figure 4-13. Gas Concentration
NOTE:
You cannot enter a value that would compute a %VOL greater than 100%.
Step
Instruction
6.
Click the Add button to add the current gas concentration to a working list of
cylinder gases.
7.
Repeat steps 5 and 6 for each gas concentration in your cylinder. If you want to
remove a gas from the list, click the trash can icon to the right of the gas information.
8.
Click the Save button to save your changes to the gas inlet.
4.9. Changing Gas Cylinders
When you change a gas cylinder on IDS, there is a specific set of steps that must be followed in a
certain order. First, you should disable the Gas In connection in the DSSAC. Then, disconnect
the gas cylinder from the IDS, and reconnect the new bottle. Finally, open the DSSAC
application and configure the Gas In connection to use the new gas.
The order of operations is important to prevent any calibration errors. For example, if a Gas In
connection is not disabled before disconnecting a gas cylinder, there is a chance that the system
might attempt a calibration while there is no gas connected. Disabling the Gas In connection
prevents this from occurring.
NOTE:
If you are using iGas, cylinder changes are automatically detected when you change
Smart Cards. Please refer to section 4.11 Using iGas for additional information about
configuring gas cylinders using iGas.
To change gas cylinders on an IDS, follow the instructions listed below.
Step
Instruction
1.
Log in to the DSSAC application. Click the Active Equipment or Docking Stations
option in the navigation pane.
2.
Click on the serial number of the IDS for which you are changing gas cylinders.
Содержание DSX-L
Страница 1: ...Start up Guide DSX L Local Server Mode Edition 9 January 24 2020 Part Number 17156008 ...
Страница 4: ...iv ...
Страница 8: ......
Страница 14: ......
Страница 21: ...17 3 For Installation Type choose Role based or feature based installation and click Next ...
Страница 24: ...20 ...
Страница 44: ...40 Step Instruction Figure 3 14 Entering the System Administrator Password 3 Start installation ...
Страница 64: ...60 13 Verify SQL has been added to the Exceptions list and click OK ...
Страница 83: ...79 Figure 4 11 Adding Gas from Industrial Scientific ...


