background image

IF 83 KC.A IX S

IF 83 KC.A S

IFG 83 KC.A

 English

Operating Instructions

OVEN

 Français

Mode d’emploi

FOUR

 Español

Manual de instrucciones

HORNO

 Italiano

Istruzioni per l’uso

FORNO

 Portuges

Instruções para a utilização

FORNO

Sommario

Istruzioni per l’uso,1

Avvertenze,3

Assistenza,6

Descrizione dell’apparecchio,8

Descrizione dell’apparecchio,10

Installazione,11

Avvio e utilizzo,13

Programmi,13

Il programmmatore di cottura elettronico*,15

Precauzioni e consigli,16

Manutenzione e cura,17

Contents

Operating Instructions,1

Warnings,3

Assistance,6

Description of the appliance,8

Description of the appliance,10

Installation,18

Start-up and use,20

Cooking modes,20

The electronic programmer*,22

Precautions and tips,23

Maintenance and care,24

Sommaire

Mode d’emploi,1

Avertissements,3

Assistance,6

Description de l’appareil,8

Description de l’appareil,10

Installation,25

Mise en marche et utilisation,27

Programmes,27

Le programmateur électronique*,29

Précautions et conseils,30

Nettoyage et entretien,31

Sumario

Manual de instrucciones,1

Advertencias,4

Asistencia,6

Descripción del aparato,8

Descripción del aparato,10

Instalación,32

Puesta en funcionamiento y uso,34

Programas,34

El programador electrónico*,36

Precauciones y consejos,37

Mantenimiento y cuidados,38

Índice

Instruções para a utilização,1

Advertências,4

Assistência,7

Descrição do aparelho,8

Descrição do aparelho,10

Instalação,39

Início e utilização,41

Programas,41

O programador electrónico*,43

Precauções e conselhos,44

Manutenção e cuidados,45

Содержание IF 83 KC.A IX S

Страница 1: ...modes 20 The electronic programmer 22 Precautions and tips 23 Maintenance and care 24 Sommaire Mode d emploi 1 Avertissements 3 Assistance 6 Description de l appareil 8 Description de l appareil 10 Installation 25 Mise en marche et utilisation 27 Programmes 27 Le programmateur électronique 29 Précautions et conseils 30 Nettoyage et entretien 31 Sumario Manual de instrucciones 1 Advertencias 4 Asis...

Страница 2: ...46 Inbetriebsetzung und Gebrauch 48 Programme 48 Der elektronische Garzeitprogrammierer 50 Vorsichtsmaßregeln und Hinweise 51 Reinigung und Pflege 52 Inhoud Gebruiksaanwijzing 2 Belangrijk 5 Service 7 Beschrijving van het apparaat 9 Beschrijving van het apparaat 10 Het installeren 53 Starten en gebruik 55 Programma s 55 Elektronische programmering 57 Voorzorgsmaatregelen en advies 58 Onderhoud en ...

Страница 3: ...m 8 years and above and persons with reduced physical sensory or mental capabilities or lack of experience and knowledge if they have been givensupervisionorinstructionconcerninguseofthe applianceinasafewayandunderstandthehazards involved Children shall not play with the appliance Cleaning and user maintenance shall not be made by children without supervision Do not use harsh abrasive cleaners or ...

Страница 4: ...ole queelaparatoestéapagadoparaevitarlaposibilidad de choques eléctricos Cuando introduzca la parrilla controle que el tope esté dirigido hacia arriba y en la parte posterior de la cavidad Advertências ATENÇÃO Este aparelho e as suas partes acessíveis aquecem muito durante a utilização É preciso ter atenção e evitar tocar os elementos que aquecem Manter afastadas as crianças com menos de 8 anos ca...

Страница 5: ...ich befindet Belangrijk PASOP Ditapparaatenzijnbereikbareonderdelen worden tijdens gebruik zeer heet Zorg ervoor de verwarmende elementen niet aan te raken Zorg ervoor dat kinderen die kleiner dan 8 jaar oud zijn nietdichtbijhetapparaatkunnenkomen tenzijonder constant toezicht Het huidige apparaat mag alleen doorkinderenvan8jaarenouderendoorpersonen met een beperkt lichamelijk sensorieel of geeste...

Страница 6: ...iama dal telefono fisso Per chi chiama da radiomobile le tariffe sono legate al piano tariffario dell operatore telefonico utilizzato Le suddette tariffe potrebbero essere soggette a variazione da parte dell operatore telefonico per maggiori informazioni consultare il sito www indesit com Assistance Never use the services of an unauthorised technician Please have the following information to hand ...

Страница 7: ...inen Fall an nicht autorisierte Techniker Geben Sie bitte Folgendes an die genaue Beschreibung des Fehlers das Gerätemodell Mod die Modellnummer S N Letztere Informationen können dem Typenschild das sich auf dem Gerät befindet entnommen werden Service Wendt u nooit tot niet erkende monteurs Dit dient u door te geven Het soort storing Het model apparaat Mod Het serienummer S N Deze laatste informat...

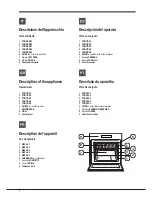
Страница 8: ... de l appareil Vue d ensemble 1 NIVEAU 1 2 NIVEAU 2 3 NIVEAU 3 4 NIVEAU 4 5 NIVEAU 5 6 GLISSIERES de coulissement 7 Support LECHEFRITE 8 Support GRILLE 9 Tableau de bord Descripción del aparato Vista en conjunto 1 POSICIÓN 1 2 POSICIÓN 2 3 POSICIÓN 3 4 POSICIÓN 4 5 POSICIÓN 5 6 GUÍAS de deslizamiento de las bandejas 7 Bandeja GRASERA 8 Bandeja PARRILLA 9 Panel de control Descrição do aparelho Vist...

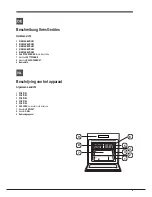
Страница 9: ...CHUBHÖHE 4 5 EINSCHUBHÖHE 5 6 GLEITFÜHRUNGEN für die Einschübe 7 Einschub FETTPFANNE 8 Einschub BACKOFENROST 9 Bedienfeld Beschrijving van het apparaat Algemeen aanzicht 1 POSITIE 1 2 POSITIE 2 3 POSITIE 3 4 POSITIE 4 5 POSITIE 5 6 GLEUVEN om roosters in te schuiven 7 Rooster LEKPLAAT 8 Rooster GRILL 9 Bedieningspaneel ...

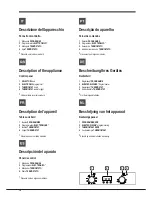
Страница 10: ...èles Descripción del aparato Panel de control 1 Mando de PROGRAMAS 2 Programador ELECTRÓNICO 3 Mando del TERMOSTATO 4 Piloto TERMOSTATO Presente sólo en algunos modelos Descrição do aparelho Painel de comandos 1 Selector PROGRAMAS 2 Programador ELECTRÓNICO 3 Selector do TERMOSTATO 4 Indicador luminoso do TERMOSTATO Há somente em alguns modelos Beschreibung Ihres Gerätes Bedienfeld 1 Reglerknopf PR...

Страница 11: ...re 560 mm 45 mm Centraggio e fissaggio Per fissare l apparecchio al mobile aprire la porta del forno e avvitare 4 viti a legno nei 4 fori posti sulla cornice perimetrale Tutte le parti che assicurano la protezione debbono essere fissate in modo tale da non poter essere tolte senza l aiuto di qualche utensile Collegamento elettrico I forni dotati di cavo di alimentazione tripolare sono predisposti ...

Страница 12: ...er modelli con guide imbutite Solo per modelli con guide in filo TARGHETTA CARATTERISTICHE Dimensioni larghezza cm 43 5 altezza cm 32 4 profondità cm 41 5 Dimensioni larghezza cm 45 5 altezza cm 32 4 profondità cm 41 5 Volume lt 59 Collegamenti elettrici tensione a 220 240V 50 60Hz vedi targhetta caratteristiche potenza massima assorbita 2800W Volume lt 62 Questa apparecchiatura è conforme alle se...

Страница 13: ...iunge e mantiene una temperatura di 40 C a prescindere dalla posizione della manopola TERMOSTATO Questo programma è ideale per la lievitazione degli impasti contenenti lievito naturale Programma FORNO TRADIZIONALE Siattivanoidueelementiriscaldantiinferioreesuperiore Conquestacottura tradizionaleèmeglioutilizzareunsoloripiano conpiùripianisihaunacattiva distribuzione della temperatura Programma FOR...

Страница 14: ... 1 1 1 1 250 200 220 200 200 180 220 12 20 30 35 25 35 25 30 15 20 Precotti Ali di pollo dorate 0 4 1 200 20 25 Cibi Freschi Biscotti di frolla Plum cake Salatini di sfoglia al formaggio 0 3 0 6 0 2 1 1 1 200 180 210 15 18 45 10 12 Multicottura Pizza su 2 ripiani Lasagne Agnello Pollo arrosto patate Sgombro Plum cake Bignè su 2 ripiani Biscotti su 2 ripiani Pan di spagna su 1 ripiano Pan di spagna...

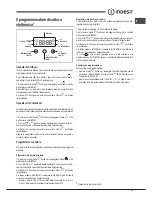
Страница 15: ...peggiano l icona e i tre digit numerici sul DISPLAY 2 con i tasti e regolare la durata desiderata se si tengono premuti i numeri scorrono più velocemente per facilitare l impostazione 3 attendere 10 sec oppure premere nuovamente il tasto per fissare l impostazione 4 a tempo scaduto sul DISPLAY compare la scritta END il forno termina la cottura e viene emesso un segnale acustico Esempio sono le 9 0...

Страница 16: ...dalla rete elettrica In caso di guasto in nessun caso accedere ai meccanismi interni per tentare una riparazione Contattare l Assistenza vediAssistenza Non appoggiare oggetti sulla porta del forno aperta Evitare che i bambini giochino con l apparecchio Non è previsto che l apparecchio venga utilizzato da persone bambini compresi con ridotte capacità fisiche sensoriali o mentali da persone inespert...

Страница 17: ...lizia più accurata è possibile smontare la porta del forno 1 aprirecompletamentelaporta vedifigura 2 alzare e ruotare le levette poste sulle due cerniere vedi figura 3 afferrare la porta ai due lati esterni richiudendola lentamente ma non del tutto Poitirarelaportaversodiséestraendoladalla sua sede vedi figura Rimontare la porta seguendo il procedimento in senso contrario Controllare le guarnizion...

Страница 18: ... with an opening of at least 45 x 560 mm see diagrams 560 mm 45 mm Centring and fixing Secure the appliance to the cabinet by opening the oven door and inserting 4 screws into the 4 holes on the outer frame All parts which ensure the safe operation of the appliance must not be removable without the aid of a tool Electrical connection Ovensequippedwithathree polepowersupplycablearedesignedtooperate...

Страница 19: ...ufacturer declines any liability should these safety measures not be observed APPLIANCE SPECIFICATIONS Dimensions width 43 5 cm height 32 4 cm depth 41 5 cm Volume 59 l Dimensions width 45 5 cm height 32 4 cm depth 41 5 cm Volume 62 l Electrical connections voltage 220 240V 50 60Hz see data plate maximum power absorbed 2800 W Only for models with drawn rails Only for models with wire rails ENERGY ...

Страница 20: ...he oven reaches and maintains a temperature of 40 C irrespective of the position of the THERMOSTAT knob This mode is ideal for leavening dough made with yeast TRADITIONAL OVEN mode Both the top and bottom heating elements will come on When using this traditional cooking mode it is best to use one cooking rack only If more than one rack is used the heat will be distributed unevenly BAKING mode The ...

Страница 21: ...acks Small cakes on 2 racks Cheese puffs on 2 racks Cream puffs on 3 racks Biscuits on 3 racks Meringues on 3 racks 0 5 1 0 7 0 5 1 2 0 6 0 4 0 7 0 7 0 5 3 2 or 3 3 3 2 and 4 2 and 4 2 and 4 1 and 3 and 5 1 and 3 and 5 1 and 3 and 5 15 15 15 15 15 15 15 15 15 15 180 180 180 160 200 190 210 180 180 90 20 30 40 45 40 50 25 30 30 35 20 25 15 20 20 25 20 25 180 Freasy Cook Frozen food Pizza Courgette ...

Страница 22: ...sh 2 Use the and buttons to set the desired duration if you press and hold either button the display will scroll through the values more quickly making it quicker and easier to set the value 3 Wait for 10 seconds or press the button again to finalise the setting 4 When the set time has elapsed the text END appears on the DISPLAY the oven will stop cooking and a buzzer sounds Press any button to st...

Страница 23: ... the event of malfunctions under no circumstances should you attempt toperformtherepairsyourself ContactanauthorisedServiceCentre see Assistance Do not rest objects on the open oven door Do not let children play with the appliance The appliance should not be operated by people including children with reduced physical sensory or mental capacities by inexperienced individuals or by anyone who is not...

Страница 24: ...causetheglasstocrack Formorethoroughcleaningpurposes theoven door may be removed 1 Open the oven door fully see diagram 2 Lift up and turn the small levers located on the two hinges see diagram 3 Grip the door on the two external sides and close it approximately half way Pull the door towards you lifting it out of its slot see diagram To replace the door reverse this sequence Inspecting the seals ...

Страница 25: ...ir figures 560 mm 45 mm Centrage et fixation Pour fixer l appareil au meuble ouvrir la porte du four et visser 4 vis à bois dans les 4 trous du cadre Toutes les parties qui servent de protection doivent être fixées de manière à ne pouvoir être enlevées qu avec l aide d un outil Raccordement électrique Les fours munis d un câble d alimentation tripolaire sont prévus pour un fonctionnement au couran...

Страница 26: ... PLAQUE SIGNALETIQUE Dimensions largeur 43 5 cm hauteur 32 4 cm profondeur 41 5 cm Volume L 59 Raccordements électriques tension 220 240V 50 60Hz voir plaque signalétique puissance maximum absorbée 2800W Dimensions largeur 45 5 cm hauteur 32 4 cm profondeur 41 5 cm Volume L 62 ENERGY LABEL Directive 2002 40 CE Sur l étiquette des fours électriques Norme EN 50304 Consommation énergie convection Nat...

Страница 27: ...f pour BARBECUE ilestconseillédanscecasdesélectionnerMAX GRATIN il est conseillé de ne pas dépasser 200 C Programme ETUVE Lefouratteintetmaintientunetempératurede40 Cquellequesoitlaposition du bouton THERMOSTAT Ce programme est idéal pour le levage de pâtes à base de levure de boulanger Programme FOUR TRADITION Mise en marche des résistances de voûte et de sole Pour cette cuisson traditionnelle mi...

Страница 28: ...2 2 250 200 220 200 200 180 220 12 20 30 35 25 35 25 30 15 20 Précuits Ailes de poulet dorées 0 4 2 200 20 25 Aliments Frais Biscuits pâte brisée Plum cake Friands au fromage 0 3 0 6 0 2 2 2 2 200 180 210 15 18 45 10 12 Multicuisson Pizza sur 2 niveaux Lasagnes Agneau Poulet rôti pommes de terre Maquereau Plum cake Profiteroles sur 2 niveaux Biscuits sur 2 niveaux Génoise sur 1 niveau Génoise sur ...

Страница 29: ...si les touches restent enfoncées les numéros défilent plus rapidement 3 attendre10secondesouappuyerànouveausurlatouche pourvalider 4 à expiration de la durée sélectionnée l AFFICHEUR affiche END le four stoppe la cuisson et un signal sonore retentit Pour l arrêter appuyer sur une touche quelconque Exemple ilest9h00etladuréeprogramméeestde1h15 Leprogramme s arrête automatiquement à 10h15 Programmer...

Страница 30: ...Contacterleserviced Assistance voirAssistance Ne pas poser d objets sur la porte du four ouverte Éviter que les enfants ne jouent avec l appareil Il n est pas prévu que cet appareil soit utilisé par des personnes enfants compris présentant des capacités physiques sensorielles ou mentales réduitesoun ayantpasl expérienceoulesconnaissancesindispensables à moins qu elles ne le fassent sous la surveil...

Страница 31: ...our nettoyer plus à fond il est possible de déposer la porte du four 1 ouvrir la porte complètement voir figure 2 soulever et faire pivoter les leviers situés sur les deux charnières voir figure 3 saisir la porte par les côtés la refermer lentement mais pas complètement Tirer ensuite la porte vers soi en la dégageant de son logement voir figure To replace the door reverse this sequence Contrôle de...

Страница 32: ...actos con las partes eléctricas El consumo declarado en la placa de características ha sido medido en una instalación de este tipo Aireación Paragarantizarunabuenaaireaciónesnecesarioeliminarlaparedposterior del hueco para el horno Es preferible instalar el horno apoyado sobre dos listeles de madera o sobre una superficie continua que tenga una abertura de 45 x 560 mm como mínimo ver las figuras 5...

Страница 33: ...cable debe ser revisado periódicamente y sustituido sólo por técnicos autorizados verAsistencia La empresa declina toda responsabilidad cuando estas normas no sean respetadas Sólo para modelos con guías embutidas Sólo para modelos con guías a ras PLACA DE CARACTERÍSTICAS Dimensiones ancho 43 5 cm altura 32 4 cm profundidad 41 5 cm Volumen litros 59 Conexiones eléctricas voltaje 220 240V 50 60Hz ve...

Страница 34: ...eratura superficial alta Utilice el horno con la puerta cerrada Programa GRATIN Se enciende el elemento calentador superior y se pone en funcionamiento el ventilador A la irradiación térmica unidireccional le agrega la circulación forzada del aire en el interior del horno Esto impide que se quemen superficialmentelosalimentosaumentandoelpoderdepenetracióndelcalor Utilice el horno con la puerta cer...

Страница 35: ...rtas pequeñas en 2 niveles Bizcochitos salados de hojaldre y queso en 2 niveles Hojaldre relleno con crema en 3 niveles Bizcochos en 3 niveles Merengue en 3 niveles 0 5 1 0 7 0 5 1 2 0 6 0 4 0 7 0 7 0 5 3 2 o 3 3 3 2 y 4 2 y 4 2 y 4 1 y 3 y 5 1 y 3 y 5 1 y 3 y 5 15 15 15 15 15 15 15 15 15 15 180 180 180 160 200 190 210 180 180 90 20 30 40 45 40 50 25 30 30 35 20 25 15 20 20 25 20 25 180 Freasy Coo...

Страница 36: ...g o bien presionar nuevamente el botón para fijar la programación 4 Una vez cumplido ese tiempo en el DISPLAY aparecerá la palabra END la cocción finalizará y se emitirá una señal sonora Para detenerlo presionar un botón cualquiera Ejemplo son las 9 00 horas y se programa una duración de 1 hora y 15 minutos El programa se detiene automáticamente a las 10 15 horas Programar el final de una cocción ...

Страница 37: ...o acceda nunca a los mecanismos internos para intentar una reparación Llame al Servicio de Asistencia Técnica ver Asistencia No apoye objetos sobre la puerta del horno abierta Evite que los niños jueguen con el aparato No está previsto que el aparato sea utilizado por personas incluidos los niños con capacidades físicas sensoriales o mentales disminuidas por personas inexpertas o que no tengan fam...

Страница 38: ... más profunda es posible desmontar la puerta del horno 1 para ello abra completamente la puerta ver la figura 2 alce y gire las palancas ubicadas en las dos bisagras ver la figura 3 sujete la puerta de los costados externos y ciérrela lenta pero no completamente Luego tirelapuertahaciasí extrayéndoladesulugar ver la figura Vuelvaacolocarlapuertasiguiendoelmismoprocedimientoperoensentido contrario ...

Страница 39: ...58 mm 547 mm min Depois de ter encaixado o aparelho não deve ser possível contacto com as partes eléctricas As declarações de consumo indicadas na placa das características foram medidas com este tipo de instalação Ventilação Para garantir uma boa ventilação é necessário eliminar a parede traseira do vão É preferível instalar o forno de maneira que apoie se sobre duas ripas de madeira ou sobre uma...

Страница 40: ...ões nem tomadas múltiplas Depois de ter instalado o aparelho o acesso ao cabo eléctrico e à tomada da corrente deve ser fácil O cabo não deve ser dobrado nem comprimido O cabo deve ser verificado periodicamente e substituído somente por técnicos autorizados veja aAssistência Técnica A empresa exime se de qualquer responsabilidade se estas regras não forem obedecidas Apenas para modelos com guias i...

Страница 41: ...emperatura de 200 C Programa de FERMENTAÇÃO Ofornochegaàumatemperaturade40 Cquemantém seindependentemente da posição do selector do TERMÓSTATO Este programa é ideal para a fermentação de massas que contêm lêvedo natural Programa de FORNO TRADICIONAL Activam se os dois elementos aquecedores inferior e superior Com esta cozedura tradicional é melhor utilizar uma única prateleira com mais de um tabul...

Страница 42: ... 4 0 4 2 2 2 2 2 2 2 250 200 220 200 200 180 220 12 20 30 35 25 35 25 30 15 20 Pré cozidos Asas de frango doiradas 0 4 2 200 20 25 Comidas Frescas Biscoitos de massa tenra Plum cake Salgadinhos folhados de queijo 0 3 0 6 0 2 2 2 2 200 180 210 15 18 45 10 12 Cozedura Múltipla Pizza em 2 prateleiras Lasanha Cordeiro Frango assado com batatas Cavala Plum cake Bignés em 2 prateleiras Biscoitos em 2 pr...

Страница 43: ...sarãomaisrapidamenteparafacilitaraconfiguração 3 Aguarde 10 segundos ou carregue novamente na tecla para fixar a programação 4 depois que terminar o prazo no VISOR aparecerá escrito END e tocará um sinal acústico Para interrompê lo carregue numa tecla qualquer Exemplo São 9 00 horas e é programada uma duração de cozedura de 1horae15minutos Oprograma iráterminarautomaticamenteàs10 15 Programar o fi...

Страница 44: ...as ContacteaAssistênciaTécnica vejaaAssistência técnica Não coloque objectos sobre a porta do forno aberta Evite que as crianças brinquem com o aparelho Não é previsto que este aparelho seja utilizado por pessoas incluso crianças com reduzidas capacidades físicas sensoriais ou mentais por pessoas inexperientes ou que não tenham familiaridade com o produto a não ser que seja vigiadas por uma pessoa...

Страница 45: ...é possível desmontar a porta do forno 1 abra a porta inteiramente veja a figura 2 levante e rode as alavancas situadas nas duas dobradiças veja a figura 3 segure a porta dos dois lados exteriores e feche a novamente devagar mas não inteiramente Em seguida puxe a porta para afrenteeretire adoseulugar vejaafigura Vuelvaacolocarlapuertasiguiendoelmismoprocedimientoperoensentido contrario Verificação ...

Страница 46: ... des Gerätes muss die Möglichkeit einer Berührung mit Strom führenden Teilen ausgeschlossen sein Die auf dem Typenschild enthaltenen Verbrauchsangaben wurden bei dieser Art der Installation ermittelt Belüftung Zur Gewährleistung einer einwandfreien Belüftung die Rückwand des Schrankumbaus entfernen Der Backofen sollte möglichst so installiert werden dass er auf zwei Holzleisten oder aber auf einer...

Страница 47: ...se oder den Netzstecker aus verwenden Sie keine Verlängerungen und Mehrfachsteckdosen Netzkabel und Steckdose müssen bei installiertem Gerät leicht zugänglich sein Das Netzkabel darf nicht gebogen oder eingeklemmt werden Das Kabel muss regelmäßig kontrolliert werden und darf nur durch autorisiertes Fachpersonal ausgetauscht werden siehe Kundendienst Der Hersteller lehnt jede Verantwortung ab falls...

Страница 48: ...e bedürfen Diese Garart bei geschlossener Backofentür durchführen Programm ÜBERBACKEN BRÄUNEN Das obere Heizelement schaltet sich ein und das Gebläse sowie der Drehspieß falls vorhanden werden in Betrieb gesetzt Zusätzlich zu der einseitigen Strahlungshitze zirkuliert Heißluft im Innern des Backofens HierdurchwirdeinVerbrennenderSpeiseoberflächenverhindertunddieHitze dringt tiefer in die Speisen e...

Страница 49: ...üllte Crêpes auf 2 Ebenen Kleingebäck auf 2 Ebenen Mit Käse gefülltes Blätterteiggebäck auf 2 Ebenen Windbeutel auf 3 Ebenen Gebäck auf 3 Ebenen Baisers auf 3 Ebenen 0 5 1 0 7 0 5 1 2 0 6 0 4 0 7 0 7 0 5 3 2 oder 3 3 3 2 und 4 2 und 4 2 und 4 1 und 3 und 5 1 und 3 und 5 1 und 3 und 5 15 15 15 15 15 15 15 15 15 15 180 180 180 160 200 190 210 80 180 90 20 30 40 45 40 50 25 30 30 35 20 25 15 20 20 25...

Страница 50: ...enSieerneutdieTaste umdieEinstellung zu bestätigen 4 Nach Ablauf der Zeit erscheint auf dem DISPLAY die Anzeige END Der Backofen schließt den Garvorgang ab und es ertönt ein akustisches Signal Um das Gerät anzuhalten drücken Sie eine beliebige Taste Beispiel Es ist 9 00 Uhr und es wird eine Programmdauer von 1 Std und 15 Min programmiert Das Programm stoppt automatisch um 10 15 Uhr Programmierung ...

Страница 51: ...eckdose Versuchen Sie bei etwaigen Störungen bitte keinesfalls Innenteile selbst zureparieren SetzenSiesichmitdemKundendienst sieheKundendienst in Verbindung Stellen Sie bitte keine Gegenstände auf der geöffneten Backofentür ab Dieses Gerät ist kein Spielzeug für Kinder Das Gerät ist nicht zur Verwendung durch Personen einschließlich Kinder miteingeschränktenkörperlichenodergeistigenFähigkeitenode...

Страница 52: ...en werden 1 Hierzu die Tür vollständig öffnen siehe Abbildung 2 klappen Sie die seitlich an den beiden Scharnieren befindlichen Hebel hoch und drehen Sie diese sieheAbbildung 3 fassen Sie die Tür an den beiden äußeren SeitenundschließenSiesielangsam jedoch nichtganz ZiehenSiedieTürdannzusichhin ausihrerLagerungheraus sieheAbbildung In umgekehrter Reihenfolge wird die Backofentür wieder angebracht ...

Страница 53: ...elopeenenkeleplankdieeen opening heeft van tenminste 45 x 560 mm zie afbeeldingen 560 mm 45 mm Centreren en bevestigen Om het apparaat aan het keukenkastje te bevestigen open de ovendeur en schroef de 4 houtschroeven in de 4 gaten in de zijrand Alle beschermende onderdelen moeten zodanig worden bevestigd dat ze niet kunnen worden verwijderd zonder gereedschap te gebruiken Elektrische aansluiting D...

Страница 54: ...prakelijkvoorwordengesteldalsdezenormen niet worden nageleefd Alleen voor modellen met diepgetrokken geleiders Alleen voor modellen met uitstekende geleiders TYPEPLAATJE Afmetingen breedte 45 5 cm hoogte 32 4 cm diepte 41 5 cm Inhoud liter 59 Elektrische aansluitingen spanning 220 240V 50 60Hz zie typeplaatje maximaal opgenomen vermogen 2800W Afmetingen breedte 43 5 cm hoogte 32 4 cm diepte 41 5 c...

Страница 55: ...n alleen MAX te gebruiken GRATINEREN hierbijishetaanbevolennietmeerdan200 Cintestellen Programma RIJZEN De oven bereikt en behoudt een temperatuur van 40 C onafhankelijk van de stand van de knop THERMOSTAAT Dit programma is ideaal voor het rijzen van beslag dat bakkersgist bevat Programma TRADITIONELE OVEN De onderste en bovenste verwarmingselementen gaan aan Met deze traditionele kookwijze is het...

Страница 56: ...200 200 180 220 12 20 30 35 25 35 25 30 15 20 Voorgekookte gerechten Kippenvleugels 0 4 2 200 20 25 Verse etenswaren Koekjes kruimeldeeg Plum cake Kaaskoekjes 0 3 0 6 0 2 2 2 2 200 180 210 15 18 45 10 12 Multikoken Pizza op 2 roosters Lasagne Lamsvlees Kip gebakken aardappels Makreel Plum cake Soesjes op 2 roosters Koekjes op 2 roosters Cake op 1 rooster Cake op 2 roosters Quiche 1 1 1 1 1 1 1 0 5...

Страница 57: ...de gewenste duur in te stellen als u ze ingedrukt houdt zullen de nummers sneller lopen en kunt u de tijd sneller instellen 3 wacht 10 seconden of druk nogmaals op de toets om de instelling te bevestigen 4 als de ingestelde duur is verstreken verschijnt op het DISPLAY het woord END beëindigt de oven de bereiding en klinkt een geluidssignaal Om hem te stoppen drukt u op een willekeurige toets B v h...

Страница 58: ...t Probeeringevalvanstoringennooitzelfdeinternemechanismenvanhet apparaat te repareren Neem contact op met de Technische Dienst zie Service Plaats geen voorwerpen op de open ovendeur Voorkom dat kinderen met het apparaat spelen Ditapparaatmagnietwordengebruiktdoorpersonen kindereninbegrepen met een beperkt lichamelijk sensorieel of geestelijk vermogen of personen die niet de nodige ervaring of kenn...

Страница 59: ...r een grondige reiniging de ovendeur verwijderen 1 open de deur volledig zie afbeelding 2 til de hendeltjes op die zich aan de twee scharnieren bevinden en draai ze zie afbeelding 3 pak de deur aan de zijkanten beet en sluit hemlangzaam maarniethelemaal Trekdan dedeurnaarutoeenhaalhemuitzijnvoegen zie afbeelding Zet de deur weer op zijn plaats door deze handelingen in omgekeerde volgorde uit te vo...

Страница 60: ...60 NL 195102276 02 02 2014 XEROX FABRIANO ...

Отзывы: