Страница 1: ...you have questions or if there are missing or damaged parts we will guarantee complete satis faction through direct assistance from our factory TO AVOID UNNECESSARY DE LAYS PLEASE CALL DIRECT TO OUR T...
Страница 2: ...TENANCE AND TROUBLE SHOOTING 18 CONDITIONING GUIDELINES 20 PART LIST 22 ORDERING REPLACEMENT PARTS 23 LIMITED WARRANTY Back Cover Note An EXPLODED DRAWING is attached at the center of this manual Save...
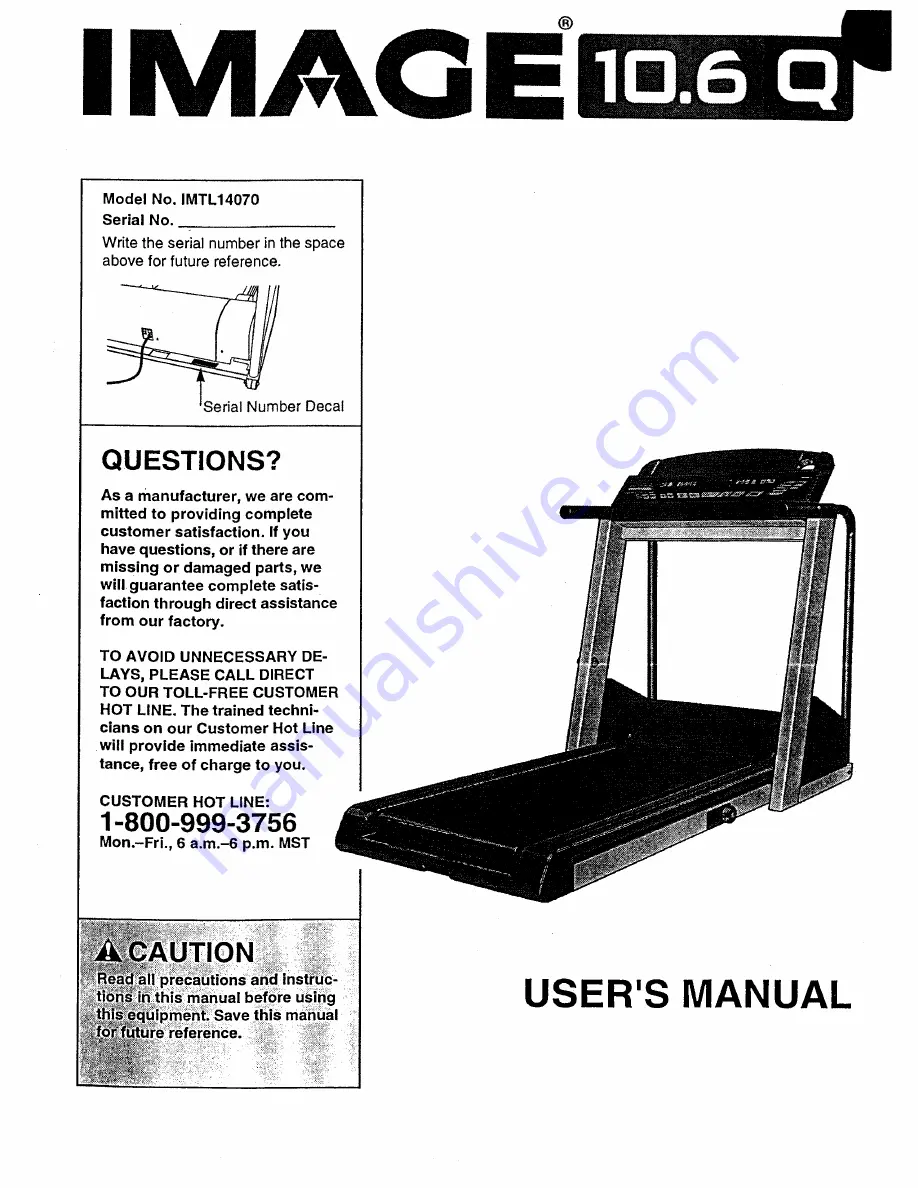
Страница 3: ...e right has been placed on the treadmill If the decal is missing or if it is not legible please call our Customer Service Department toll free to order a free replacement decal see ORDERING REPLACEMEN...
Страница 4: ...r Customer Service Department toll free at 1 800 999 3756 Monday through Friday 6 a m until 6 p m Mountain Time excluding holidays To help us assist you please note the product model number and serial...
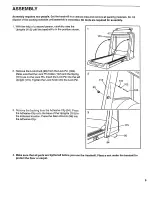
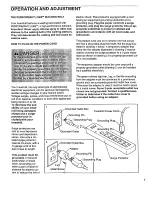
Страница 5: ...ve the Lock Knob 99 from the Lock Pin 103 Make sure that the Lock Pin Collar 102 and the Spring 101 are on the Lock Pin Insert the Lock Pin into the left Upright 115 Tighten the Lock Knob onto the Loc...
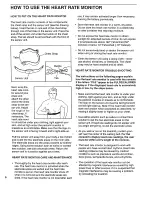
Страница 6: ...sture Do not expose the heart rate monitor to direct sunlight for extended periods of time do not expose it to temperatures above 122 Fahrenheit 50 Celsius or below 14 Fahrenheit 10 Celsius Do not exc...
Страница 7: ...an be installed by a qualified electrician Your treadmill like any other type of sophisticated electronic equipment can be seriously damaged by sudden voltage changes in your home s power Voltage surg...
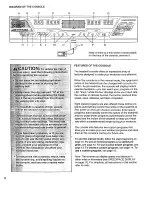
Страница 8: ...e the number of calories burned the incline workout time speed pace distance and laps completed Eight preset programs are also offered three incline pro grams automatically control the incline of the...
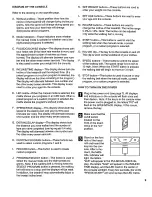
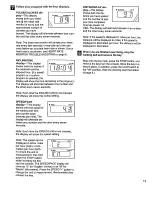
Страница 9: ...gin to move at 1 0 mph Q STOP buttonmThis button is used to pause or stop the walking belt when the manual mode a preset program or a custom program is selected HOW TO TURN ON THE POWER E F G H J LED...
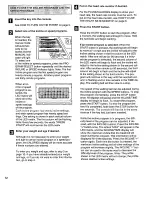
Страница 10: ...tor must be worn To put on the heart rate monitor see HOW TO USE THE HEART RATE MONITOR on page 6 Press the START button Press the START button to start the walking belt The LED track in the center of...
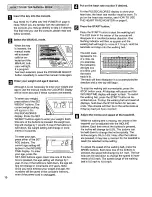
Страница 11: ...DISTANCE LAP 0 Note If the speed is displayed in miles per hour the distance will be displayed in miles if the speed is displayed in kilometers per hour the distance will be displayed in kilometers W...
Страница 12: ...o start the program After a moment the walking belt will begin to move Hold the handrails and begin walking If an incline program is selected When the START button is pressed the walking belt will beg...
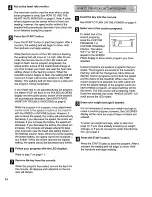
Страница 13: ...rease the difficulty level of the program Note The profile shown in the LED matrix will not change the profile shows relative speed settings Follow your progress with the LED displays Refer to step 7...
Страница 14: ...ease The console will always attempt to keep your heart rate near the heart rate setting shown in the flashing column Note When the incline reaches the lowest setting the speed cannot be increased any...
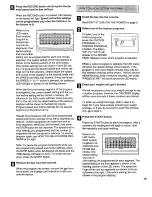
Страница 15: ...re than twenty minutes long only the first nineteen settings will be shown The first column will be flashing Note Every few seconds the words PRESS START will scroll across the LED matrix Enter your w...
Страница 16: ...s The console will then be in the same state as if the key had just been inserted B ollow your progress with the LED displays Refer to step 7 on page 11 Remove the key from the console When the progra...
Страница 17: ...readmill in the stor age position in temperatures above 85 Fahrenheit 1 2 HOW TO MOVE THE TREADMILL Before moving the treadmill convert the treadmill to the stor age position as described above rvlake...
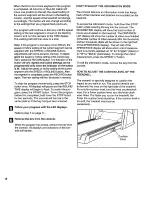
Страница 18: ...t the front of the treadmill near the power cord The switch must be in the on position 2 SYMPTOM THE POWER TURNS OFF DURING USE c Tripped Reset a Check the circuit breaker located on the treadmill fra...
Страница 19: ...ce the battery locate the battery cover on the back of the sen sor unit Insert a coin into the slot in the cover and turn the cover counterclock wise to the open position Remove the cover Remove the o...
Страница 20: ...after the first few minutes of exercise does your body begin to use stored fat calories for energy If your goal is to burn fat adjust the intensity of your exercise until your heart rate is near the...
Страница 21: ...of the opposite foot toward you and rest it against the inner thigh of your extended leg Reach toward your toes as far as possible Hold for 15 counts then relax Repeat 3 times for each leg Stretches H...
Страница 22: ...t 75 1 Console Plate 24 2 Motor Bracket Nut 76 6 Console Plate Screw 25 2 Motor Bracket Washer 77 1 Hood 26 3 Long Hood Bracket 78 5 Hood Screw 27 2 Belt Guide 79 1 Cushion Knob 28 1 Motor Tension Bol...
Страница 23: ...Female 9 Black Wire Male Female 8 Red Wire Male Female User s Manual Includes all parts shown in the box These parts are not illustrated ORDERING REPLACEMENT PARTS To order replacement parts call our...
Страница 24: ...7O 42 69 2O 118 97 125 120 121 75 116 99 115 74 I06 97 98 47 77 78 82 91 8O 81 21 86 o 71 9O 94 87 78 78 88 78 _...
Страница 25: ...AWING Model No IMTL14070 12 2 I 3 I 113 13 14 66 65 67 2 52 59 RO897A 4 124 19 30 31 o 21 28 26 54 Note To identifythe parts shown on this explo_ded drawing refer to the PART LIST on page 22 of the US...
Страница 26: ...faction WARRANTY REGISTRATIONwAttached is a registration card COMPLETE AND MAIL THE CARD IMMEDIATELY Our receipt assures that your name address and date of purchase are on file as a registered owner...