POC-W22A-H81 Medical Panel PC
Page 47
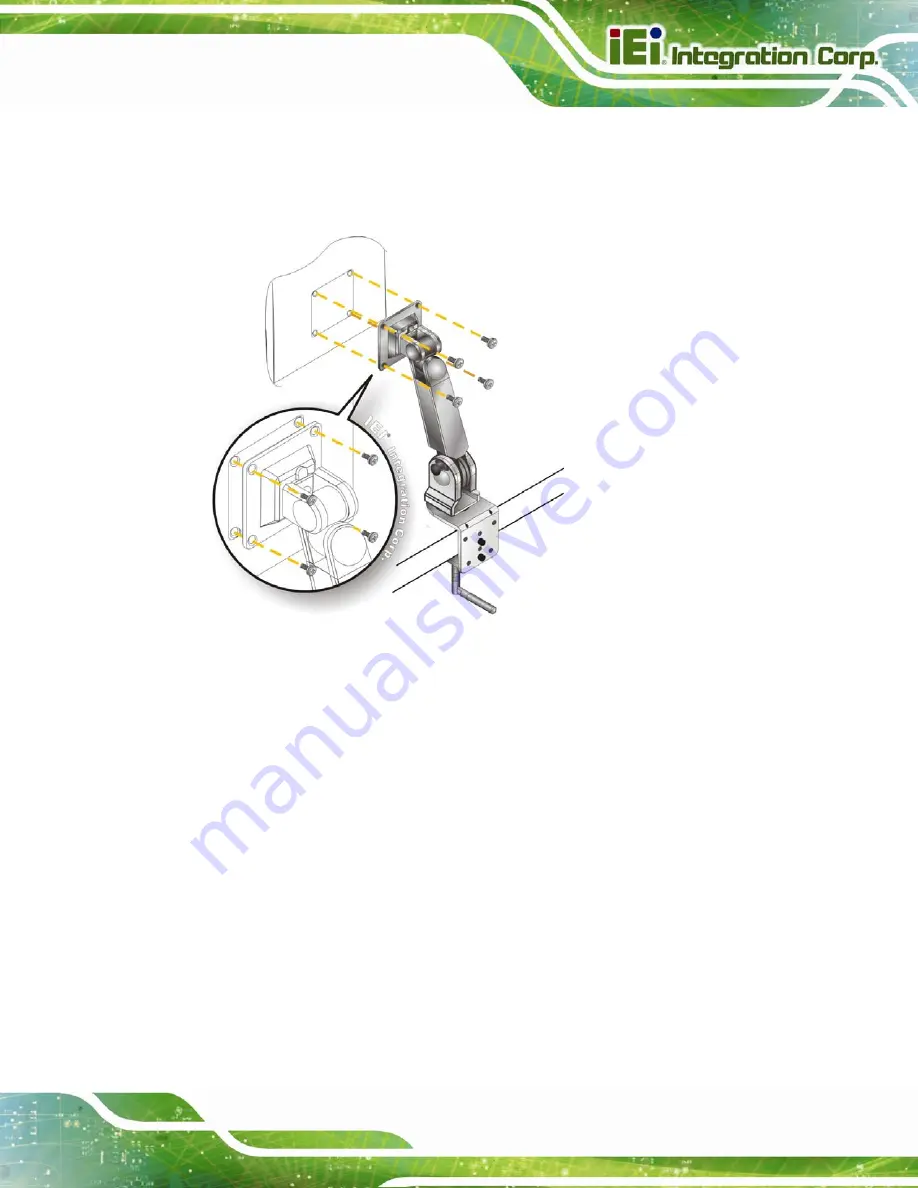
Step 4:
Secure the POC-W22A-H81 to the interface pad by inserting four retention
screws through the mounting arm interface pad and into the POC-W22A-H81.
S
te
p
0
:
Figure 3-36: Arm Mounting
3.14.3 Stand Mounting
To mount the POC-W22A-H81 using the EZ stand mounting kit, please follow the steps
below.
Step 1:
Locate the VESA mount screw holes on the rear of the POC-W22A-H81
(
). This is where the bracket will be attached.
Step 2:
Align the bracket with the screw holes.
Step 3:
To secure the bracket to the POC-W22A-H81 insert the retention screws into the
screw holes and tighten them.
Содержание POC-W22A-H81
Страница 14: ......
Страница 15: ...POC W22A H81 Medical Panel PC Page 1 1 Introduction Chapter 1 ...
Страница 28: ...POC W22A H81 Medical Panel PC Page 14 2 Unpacking Chapter 2 ...
Страница 34: ...POC W22A H81 Medical Panel PC Page 20 3 Installation Chapter 3 ...
Страница 64: ...POC W22A H81 Medical Panel PC Page 50 Chapter 4 4 Driver Installation ...
Страница 87: ...POC W22A H81 Medical Panel PC Page 73 Figure 4 33 Device Manager Window Barcode Reader Device ...
Страница 88: ...POC W22A H81 Medical Panel PC Page 74 5 BIOS Setup Chapter 5 ...
Страница 123: ...POC W22A H81 Medical Panel PC Page 109 6 System Maintenance Chapter 6 ...
Страница 129: ...POC W22A H81 Medical Panel PC Page 115 Appendix A A Regulatory Compliance ...
Страница 134: ...POC W22A H81 Medical Panel PC Page 120 B Safety Precautions Appendix B ...
Страница 140: ...POC W22A H81 Medical Panel PC Page 126 Appendix C C EMC Test Summary ...
Страница 146: ...POC W22A H81 Medical Panel PC Page 132 D BIOS Menu Options Appendix D ...
Страница 149: ...POC W22A H81 Medical Panel PC Page 135 Appendix E E Watchdog Timer ...
Страница 152: ...POC W22A H81 Medical Panel PC Page 138 Appendix F F Hazardous Materials Disclosure ...

