POC-W22A-H81 Medical Panel PC
Page 113
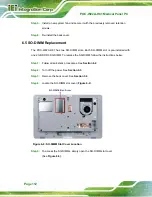
Figure 6-3: SO-DIMM Locations
Step 6:
Remove the SO-DIMM by releasing the arms on the SO-DIMM socket.
Step 7:
Align the new SO-DIMM with the socket. The SO-DIMM must be oriented in
such a way that the notch in the middle of the SO-DIMM must be aligned with
the plastic bridge in the socket (
Insert the SO-DIMM. Push the SO-DIMM chip into the socket at an angle
(
866
Figure 6-4: SO-DIMM Installation
Step 9:
Open the SO-DIMM socket arms. Gently pull the arms of the SO-DIMM socket
out and push the rear of the SO-DIMM down (See
866
Содержание POC-W22A-H81
Страница 14: ......
Страница 15: ...POC W22A H81 Medical Panel PC Page 1 1 Introduction Chapter 1 ...
Страница 28: ...POC W22A H81 Medical Panel PC Page 14 2 Unpacking Chapter 2 ...
Страница 34: ...POC W22A H81 Medical Panel PC Page 20 3 Installation Chapter 3 ...
Страница 64: ...POC W22A H81 Medical Panel PC Page 50 Chapter 4 4 Driver Installation ...
Страница 87: ...POC W22A H81 Medical Panel PC Page 73 Figure 4 33 Device Manager Window Barcode Reader Device ...
Страница 88: ...POC W22A H81 Medical Panel PC Page 74 5 BIOS Setup Chapter 5 ...
Страница 123: ...POC W22A H81 Medical Panel PC Page 109 6 System Maintenance Chapter 6 ...
Страница 129: ...POC W22A H81 Medical Panel PC Page 115 Appendix A A Regulatory Compliance ...
Страница 134: ...POC W22A H81 Medical Panel PC Page 120 B Safety Precautions Appendix B ...
Страница 140: ...POC W22A H81 Medical Panel PC Page 126 Appendix C C EMC Test Summary ...
Страница 146: ...POC W22A H81 Medical Panel PC Page 132 D BIOS Menu Options Appendix D ...
Страница 149: ...POC W22A H81 Medical Panel PC Page 135 Appendix E E Watchdog Timer ...
Страница 152: ...POC W22A H81 Medical Panel PC Page 138 Appendix F F Hazardous Materials Disclosure ...


