background image


DRPC-242-ADL-P 

Page  2 

1.1


Overview 


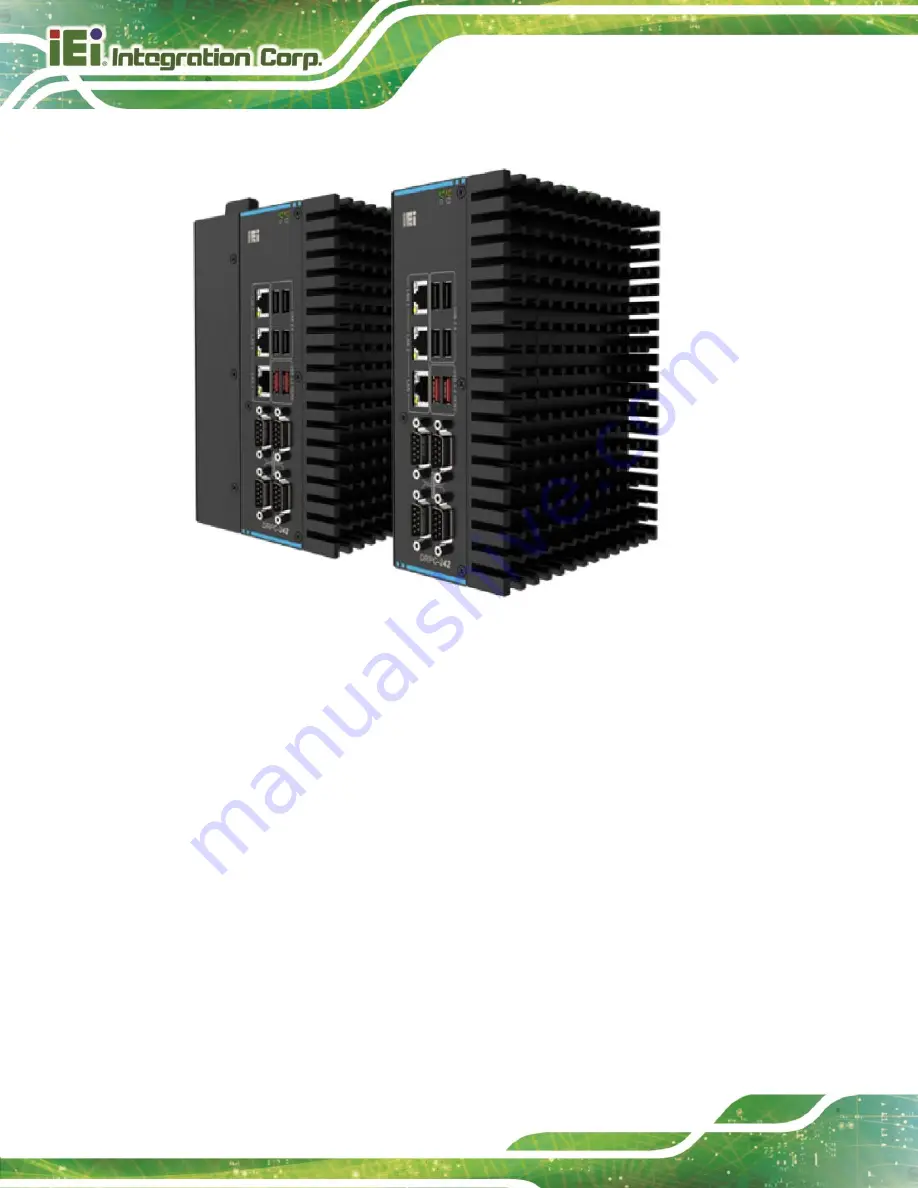
Figure 1-1: DRPC-242-ADL-P Series 

The DRPC-242-ADL-P Series is an embedded system with Intel® Alder Lake P processor 

and  two  DDR4  SO-DIMM  memory  (8GB  pre-installed).  It  is  designed  for  harsh 

environment applications, and supports DIN rail mounting method. 

The  DRPC-242-ADL-P  Series  accepts  a  wide  range  of  DC  power  input  (12V  ~  28V), 

allowing it to be powered anywhere. It is equipped with two USB 3.2 Gen2 (10Gb/s), four 

USB 2.0, three 2.5GbE, two isolation RS-232 ports, two isolation RS-422/485 ports, one 

HDMI  and  one  Disp+  to  provide  rich  I/O  options  for  various  applications.  Two 

RS-232 and two USB 2.0 are reserved inside for expansion 

Furthermore,  the  DRPC-242-ADL-P  also  has  a  PCIe  x4  slot  that  can  support  half-size 

expansion cards 

1.2


Features 

The DRPC-242-ADL-P Series features are listed below: 

Содержание DRPC-242-ADL-P Series

Страница 1: ...L NAME User Manual Embedded system supports 12th Gen Intel Alder Lake P on board processor dual channel DDR4 SO DIMMs HDMI DP 3 x 2 5GbE LAN 4 x COM 6 x USB 12 24V DC RoHS MODEL DRPC 242 ADL P Series...

Страница 2: ...DRPC 242 ADL P Page II MODEL NAME Revision Date Version Changes Sept 7 2023 1 00 Initial release...

Страница 3: ...es arising out of the use or inability to use the product or documentation even if advised of the possibility of such damages This document contains proprietary information protected by copyright All...

Страница 4: ...ION Cautionary messages should be heeded to help reduce the chance of losing data or damaging the product NOTE These messages inform the reader of essential but non critical information These messages...

Страница 5: ...NPACKING CHECKLIST 13 3 INSTALLATION 16 3 1 INSTALLATION PRECAUTIONS 17 3 2 BACK COVER REMOVAL 18 3 3 HDD DISK BRACKET REMOVAL 18 3 4 MEMORY INSTALLATION 19 3 5 STORAGE INSTALLATION 20 3 5 1 2 5 inch...

Страница 6: ...ower Mode Setting 41 4 SYSTEM MOTHERBOARD 43 4 1 OVERVIEW 44 4 1 1 Layout 44 4 2 PERIPHERAL INTERFACE CONNECTORS 45 4 2 1 RTC Battery Connector 46 4 2 2 SIM card Connector 48 4 2 3 Internal USB 2 0 Co...

Страница 7: ...2 1 Keyboard Navigation 79 5 1 2 2 Touch Navigation 80 5 1 3 Getting Help 81 5 1 4 Unable to Reboot after Configuration Changes 81 5 1 5 BIOS Menu Bar 81 5 2 MAIN 82 5 3 ADVANCED 85 5 3 1 CPU Configu...

Страница 8: ...4 2 1 PCI Express Configuration 124 5 4 2 1 1 PCI Express Root Port Setting 125 5 4 2 2 SATA Configuration 127 5 4 2 3 HD Audio Configuration 128 5 5 SECURITY 129 5 6 BOOT 131 5 6 1 Boot Configuratio...

Страница 9: ...the WLAN Module 23 Figure 3 9 Connecting RF Cables 23 Figure 3 10 Securing SMA Connector and External Antenna Installation 24 Figure 3 11 RS 232 Cable Installation 24 Figure 3 12 RS 232 DB9 Cable Ins...

Страница 10: ...gure 4 10 M 2 A key Slot Location 56 Figure 4 11 DDR4 SO DIMM Socket Location 58 Figure 4 12 PCIe x4 Slot Location 59 Figure 4 13 RS 232 Serial Port Connector Location 60 Figure 4 14 12V Power Output...

Страница 11: ...DRPC 242 ADL P Page XI MODEL NAME Figure 5 1 BIOS Starting Menu 78 Figure 5 2 BIOS Navigation Keys 79 Figure 5 3 BIOS On screen Navigation Keys 80...

Страница 12: ...lot Pinouts 55 Table 4 9 M 2 A Key Slot Pinouts 57 Table 4 10 RS 232 Serial Port Connector Pinouts 60 Table 4 11 12V Power Input Connector Pinouts 61 Table 4 12 SATA 6Gb s Drive Connector Pinouts 63 T...

Страница 13: ...DRPC 242 ADL P Page XIII MODEL NAME Table 5 1 BIOS Options and Configured USB Ports 123...

Страница 14: ...ration Menu 97 BIOS Menu 15 Serial Port 4 Configuration Menu 98 BIOS Menu 16 Serial Port 5 Configuration Menu 99 BIOS Menu 17 Serial Port 6 Configuration Menu 100 BIOS Menu 18 EC KB9068 H W Monitor 10...

Страница 15: ...IO Configuration 1 2 121 BIOS Menu 35 PCI IO Configuration 2 2 121 BIOS Menu 36 PCI Express Configuration 124 BIOS Menu 37 PCI Express Root Port Settings 125 BIOS Menu 38 SATA Configuration 127 BIOS...

Страница 16: ......

Страница 17: ...DRPC 242 ADL P Page 1 Chapter 1 1 Introduction...

Страница 18: ...epts a wide range of DC power input 12V 28V allowing it to be powered anywhere It is equipped with two USB 3 2 Gen2 10Gb s four USB 2 0 three 2 5GbE two isolation RS 232 ports two isolation RS 422 485...

Страница 19: ...ing heat dissipation PCIe x4 slot expansion optional DIN rail mounting support RoHS compliant 1 3 Model Variations Model No CPU DRPC 242 ADL P CCS Intel Celeron 7305 5 core 15W TDP DRPC 242 ADL P i3CS...

Страница 20: ...Ethernet 1 x 2 5GbE by Intel I225LM support iAMT 2 x 2 5GbE by Intel I225V colay I225LM COM 2 x RS 232 DB9 with 2 5KV isolation 2 x RS 232 optional 2 x RS 422 485 with AFC DB9 with 2 5KV isolation DI...

Страница 21: ...60 C with air flow SSD Storage Temp 40 C 85 C Humidity 10 95 non condensing Operating shock Half sine wave shock 5G 11ms 3 shocks per axis SSD Operating vibration 10 500 Hz 1 04 Grms random 1 hr axis...

Страница 22: ...DRPC 242 ADL P Page 6 1 5 Front Panel The front panel of the DRPC 242 ADL P Series has the following features Figure 1 2 Front Panel...

Страница 23: ...DRPC 242 ADL P Page 7 1 6 Top Panel The top panel of the DRPC 242 ADL P Series is shown below Figure 1 3 back Panel...

Страница 24: ...DRPC 242 ADL P Page 8 1 7 Right Side Panel The DRPC 242 ADL P Series right side panel contains one system fan connector Figure 1 4 DRPC 242 ADL P Right Side Panel...

Страница 25: ...DRPC 242 ADL P Page 9 1 8 Physical Dimensions The physical dimensions of the DRPC 242 ADL P Series are shown in Figure 1 5 Figure 1 5 Physical Dimensions...

Страница 26: ...DRPC 242 ADL P Page 10 With expansion layer Dimensions Figure 1 6 DRPC 242 ADL P Dimensions...

Страница 27: ...DRPC 242 ADL P Page 11 Chapter 2 2 Unpacking...

Страница 28: ...earing a simple anti static wristband can help to prevent ESD from damaging the board Self grounding Before handling the board touch any grounded conducting material During the time the board is handl...

Страница 29: ...IEI reseller or vendor you purchased the DRPC 242 ADL P Series from or contact an IEI sales representative directly To contact an IEI sales representative please send an email to sales ieiworld com T...

Страница 30: ...an be purchased separately Optional Wi Fi module P N EMB WIFI KIT02I3 R10 DIO cable P N 32031 000600 100 RS European Power Cord P N 32702 000200 100 RS Serial cable P N 32205 005401 100 RS Power adapt...

Страница 31: ...000200 100 RS Wall mount brackets P N 41020 0578C2 00 HF 2 1 slot expansion chassis with riser card P N TXC DRPC 240 1S R10 External fan module P N SF DRPC 240 R10 Each Wi Fi module needs two antenna...

Страница 32: ...DRPC 242 ADL P Page 16 Chapter 3 3 Installation...

Страница 33: ...is opened while the power cord is still connected to an electrical outlet Qualified Personnel The DRPC 242 ADL P Series must be installed and operated only by trained and qualified personnel Maintenan...

Страница 34: ...eps below to complete the task Step 1 Loosen the 5 screws on the top cover Step 2 Take off the back cover Figure 3 1 Figure 3 1 Remove the Cover 3 3 HDD Disk Bracket Removal The HDD bracket must be re...

Страница 35: ...by themselves the installation procedures are described below Step 1 Open the two handles of the memory slot Step 2 Remove the old memory module and insert a new memory module Carefully align the memo...

Страница 36: ...SD or 2 5 SSD HDD please follow the steps described in Section 3 3 to remove the HDD bracket 3 5 1 2 5 inch SSD Installation Step 1 Pace the HDD bracket onto the rear of the 2 5 inch hard disk Fasten...

Страница 37: ...lot See section 4 2 6 Step 2 Remove the retention screw secured on the motherboard Step 3 Line up the notch on the module with the notch on the slot Slide the M 2 module into the socket at an angle of...

Страница 38: ...to purchase an internal antenna longer than 200mm To install the Wi Fi module follow the steps below Step 1 Locate the M 2 A Key module slot See section 4 2 8 Step 2 Remove the retention screw secure...

Страница 39: ...ing RF Cables Step 6 Remove the nut and washer from the SMA connector at the other end of the RF cable Step 7 Knock out the reserved antenna holes on the chassis Insert the SMA connector to the antenn...

Страница 40: ...ptional cable or module are ready for purchase To install these expansion components follow the steps below 3 7 1 Serial Port Installation Step 1 Locate the Serial port connector See Section Step 2 Co...

Страница 41: ...tallation Step 1 Locate the GPIO port connector Step 2 Connect the GPIO cable to the GPIO connector on the mainboard Figure 3 13 Connect the GPIO cable to the GPIO connector Step 3 Knock out the reser...

Страница 42: ...ensure the fan wire inside the system will not be pressed or damaged adjust the wiring if necessary Align the riser card on the expansion chassis with the PCIe x4 slot inside the DRPC 242 Step 2 Once...

Страница 43: ...DRPC 242 ADL P Page 27 Figure 3 15 Expansion Chassis Installation...

Страница 44: ...tional external fan can help the DRPC 242 ADL P Series solve the thermal problem To install the optional external fan follow the steps below Step 1 Remove the 4 screws 2 on the front panel 2 on the re...

Страница 45: ...DL P Series comes with standard rail mounting bracket and supports optional wall mounting bracket Follow these steps to install 3 11 1 DIN Rail Installation Step 1 Turn the embedded system over Step 2...

Страница 46: ...p 3 Secure the brackets to the system by inserting retention screws Figure 3 19 Figure 3 19 DIN Rail Mounting Bracket Installation Step 4 Attach the upper edge of the mounting bracket at an angle Push...

Страница 47: ...allation DRPC 242 ADL P Series can be mounted by using the optional wall mount bracket follow the steps below to install Step 1 Turn the embedded system over Step 2 Align the retention screw holes in...

Страница 48: ...e 3 21 Align the retention screw holes Step 3 Secure the brackets to the system by inserting retention screws into each bracket Figure 3 22 Figure 3 23 Figure 3 22 Mounting Bracket Retention Screw Fig...

Страница 49: ...DP Connector To connect the HDMI DP devices please plug in HDMI DP connector in the right direction as shown below Figure 3 24 HDMI DP Connection 3 12 2 LAN Connectors The LAN connectors allow connec...

Страница 50: ...or has two status LEDs one green and one yellow The green LED indicates activity on the port and the yellow LED indicates the port is linked Figure 3 26 RJ 45 Ethernet Connector Activity Link LED Spee...

Страница 51: ...to the internal electronic components and may also cause injury to the user The power of the system needs more than 12V5A Step 1 Connect the power source to the power input jack Step 2 Push the power...

Страница 52: ...DRPC 242 ADL P Page 36 Figure 3 28 Power HDD LED...

Страница 53: ...nter to find all the relevant software utilities and documentation IEI Resource Download Center 3 14 1 Driver Download To download drivers from IEI Resource Download Center follow the steps below Step...

Страница 54: ...following window You can download the entire ISO file or click the small arrow to find an individual driver and click the file name to download NOTE To install software from the downloaded ISO image f...

Страница 55: ...tep 3 Make the jumper settings in accordance with the settings described and defined in the following sections 3 15 1 Flash Descriptor Security Override Jumper CN Label ME_FLASH1 CN Type 2 pin header...

Страница 56: ...ep 3 Remove the metal clip on the Flash Descriptor Security Override jumper to its default setting Step 4 Restart the system The system will reboot 2 3 times to complete the ME firmware update 3 15 2...

Страница 57: ...15 3 AT ATX Power Mode Setting CN Label J_ATX_AT1 CN Type 3 pin switch CN Location See Figure 3 31 The AT ATX power mode selection is made through the AT ATX power mode switch which is shown in PIN NO...

Страница 58: ...DRPC 242 ADL P Page 42 Figure 3 31 AT ATX Power Mode Setting Location...

Страница 59: ...DRPC 242 ADL P Page 43 Chapter 4 4 System Motherboard...

Страница 60: ...ctors and jumpers of the system motherboard are listed in the following sections 4 1 1 Layout The following diagram shows the locations of the internal external connectors and jumpers on the motherboa...

Страница 61: ...connector 8 pin header USB2_CN1 M 2 3042 52 80 B key slot M 2 B key slot M2_B1 SIM card slot SIM slot SIM1 Edge card socket 64 pin socket PCIEX4_1 Power Management ROM connector 3 pin header J1 DDR4...

Страница 62: ...T1 Flash descriptor override setting jumper 2 pin header ME_FLASH1 Fan connector 4 pin wafer CPU FAN1 I2C connector 4 pin wafer I2C1 SMBus connector 4 pin wafer J_SMB1 EC debug connector 6 pin wafer E...

Страница 63: ...N Type 2 pin wafer p 1 25 mm CN Location See Figure 4 3 CN Pinouts See Table 4 2 The battery connector is connected to the system battery The battery provides power to the system clock to retain the t...

Страница 64: ...TC battery and press the button for about 3 seconds This will set back to normal operation mode 4 2 2 SIM card Connector CN Label SIM1 CN Type 7 pin SIM holder CN Location See Figure 4 4 CN Pinouts Se...

Страница 65: ...to provide WWAN communication 4 2 3 Internal USB 2 0 Connectors CN Label USB2_CN1 CN Type 8 pin header p 2 00 mm CN Location See Figure 4 5 CN Pinouts See Table 4 4 Each USB connector provides two US...

Страница 66: ...USB DATA 7 GND 8 VCC Table 4 4 Internal USB 2 0 Connectors Pinouts 4 2 4 Fan Connector CN Label CPU FAN1 CN Type 4 pin wafer p 2 54 mm CN Location See Figure 4 6 CN Pinouts See Table 4 5 The fan conn...

Страница 67: ...tput Connector CN Label J_DIO1 CN Type 14 pin header p 2 00 mm CN Location See Figure 4 7 CN Pinouts See Table 4 6 The Digital I O connector provides programmable input and output for external device...

Страница 68: ...t 1 14 Input 0 Table 4 6 Digital I O Connector Pinouts 4 2 6 M 2 M key Slot CN Label M2_M1 CN Type M 2 M key slot CN Location See Figure 4 8 CN Pinouts See Table 4 7 The M 2 M key 2280 slot with PCIe...

Страница 69: ...C 35 PCIE_TXN5_C 36 NC 37 PCIE_TXP5_C 38 M_1_SSD_SLP 39 GND 40 M 2_SMCLK 41 PCIE_RXN4 42 M 2_SMDAT 43 PCIE_RXP4 44 NC 45 GND 46 NC 47 PCIE_TXN4 48 NC 49 PCIE_TXP4 50 PLT_RST_N 51 GND 52 PLT_RST_N 53 C...

Страница 70: ...B1 CN Type M 2 B key slot CN Location See Figure 4 9 CN Pinouts See Table 4 8 The M 2 B key 2242 slot with SATA signal Figure 4 9 M 2 B key Slot Location Pin Description Pin Description 1 GND 2 V3 3_B...

Страница 71: ...NC 29 NC 30 NC 31 NC 32 NC 33 GND 34 NC 35 NC 36 NC 37 NC 38 NC 39 GND 40 M 2_SMCLK 41 SATA_RX0 42 M 2_SMDAT 43 SATA_RX0 44 NC 45 GND 46 NC 47 SATA_RX0 48 NC 49 SATA_RX0 50 PLT_RST_N 51 GND 52 NC 53 N...

Страница 72: ...d in the A position and accepts 2230 size of M 2 modules The M 2 slot supports PCIe x1 and USB 2 0 signals Figure 4 10 M 2 A key Slot Location Pin Description Pin Description 1 GND 2 3 3V 3 USB2_DP 4...

Страница 73: ...6 GND 37 PCIE_TX_DN 38 WLAN_CL_RST_N 39 GND 40 WLAN_CL_DATA 41 PCIE_RX_DP 42 WLAN_CL_CLK 43 PCIE_RX_DN 44 NC 45 GND 46 NC 47 PCIE_CLK 48 NC 49 PCIE_CLK 50 NC 51 GND 52 PLT_RST 53 NC 54 BT_ON 55 PCH_WA...

Страница 74: ...slot CN Location See 791HFigure 4 11 The SO DIMM slots are for installing the DDR4 SO DIMM Figure 4 11 DDR4 SO DIMM Socket Location CAUTION For dual channel configuration always install two identical...

Страница 75: ...P Page 59 4 2 10 PCIe x4 Slot CN Label PCIEX4_1 CN Type PCIe x4 Slot CN Location See Figure 4 12 The PCIe x4 slot enables a PCIe x4 expansion module to be connected to the board Figure 4 12 PCIe x4 S...

Страница 76: ...p 2 00 mm CN Location See Figure 4 13 CN Pinouts See Table 4 10 The serial connector provides RS 232 connection Figure 4 13 RS 232 Serial Port Connector Location PIN NO DESCRIPTION PIN NO DESCRIPTION...

Страница 77: ...pin Molex p 4 2 mm CN Location See Figure 4 14 CN Pinouts See Table 4 11 This 12V power input connector supports the 12V power supply Figure 4 14 12V Power Output Connector Location Pin Description P...

Страница 78: ...Table 4 12 The SATA 6Gb s drive connector is connected to a SATA 6Gb s drive The SATA 6Gb s drive transfers data at speeds as high as 6Gb s Figure 4 15 SATA 6Gb s Drive Connectors Location PIN NO DES...

Страница 79: ...onnector Pinouts 4 2 14 I2C Connector CN Label I2C1 CN Type 4 pin wafer p 1 25 mm CN Location See Figure 4 16 CN Pinouts See Table 4 13 The I2C connector is used to connect I2C bus devices to the main...

Страница 80: ...nnector CN Label J_SMB1 CN Type 4 pin wafer p 1 25 mm CN Location See Figure 4 17 CN Pinouts See Table 4 14 The SMBus is a two wire bus used for communication with low bandwidth devices on a motherboa...

Страница 81: ...Connector Pinouts 4 2 16 Flash SPI ROM Connector CN Label J_SPI1 CN Type 6 pin wafer p 1 25 mm CN Location See Figure 4 18 CN Pinouts See Table 4 15 The 6 pin Flash SPI ROM connector is used to flash...

Страница 82: ...ROM Connector Pinouts 4 2 17 Chassis Intrusion Connector CN Label J_CHASSIS1 CN Type 2 pin header p 2 54 mm CN Location See Figure 4 19 CN Pinouts See Table 4 16 Figure 4 19 Chassis Intrusion Connect...

Страница 83: ...cation See Figure 4 20 CN Pinouts See Table 4 17 The 8 pin Flash EC ROM connector is used to flash the EC internal ROM Figure 4 20 Flash EC ROM Connector Location Pin Description Pin Description 1 SPI...

Страница 84: ...Type 6 pin header CN Location See Figure 4 21 CN Pinouts See Table 4 18 The EC debug connector is used for EC debug Figure 4 21 EC Debug Connector Location Pin Description Pin Description 1 NC 4 EDICL...

Страница 85: ...nnector CN Label J1 CN Type 3 pin header p 2 54mm CN Location See Figure 4 22 CN Pinouts See Table 4 19 Figure 4 22 PMBUS Connector Location PIN NO DESCRIPTION PIN NO DESCRIPTION 1 PM_SCL 2 PM_SDA 3 G...

Страница 86: ...22 485 serial port connector DB9 COM1 1 RS 232 serial port connector DB9 COM3 1 Power connector 4 pin Molex PWR1 Power button connector 3 pin wafer terminal blocks PWR_BTN1 Power switch 2 pin switch P...

Страница 87: ...DRPC 242 ADL P Page 71 Pressing this switch will power on the system Figure 4 23 Power Switch Location...

Страница 88: ...on See Figure 4 24 CN Pinouts See Table 4 21 The reset button connector is connected to a reset switch on the system chassis to enable users to reboot the system when the system is turned on Figure 4...

Страница 89: ...nectors can connect to HDMI devices Pin Description Pin Description 1 HDMI_DATA2 2 GND 3 HDMI_DATA2 4 HDMI_DATA1 5 GND 6 HDMI_DATA1 7 HDMI_DATA0 8 GND 9 HDMI_DATA0 10 HDMI_CLK 11 GND 12 HDMI_ CLK 13 N...

Страница 90: ...00MM CN Location See Figure 4 26 CN Pinouts See Table 4 23 The system fan connector can provide 12V 500mA to a system fan Figure 4 26 System Fan Connector Pinout Locations PIN NO DESCRIPTION 1 GND 2 V...

Страница 91: ...D 12 DATA_3N 3 DATA_0N 13 CONFIG1 4 DATA_1P 14 CONFIG2 5 GND 15 AUX_P 6 DATA_1N 16 GND 7 DATA_2P 17 AUX_N 8 GND 18 DP HPD 9 DATA_2N 19 GND 10 DATA_3P 20 DP PWR Table 4 24 DP Connector Pinouts Figure 4...

Страница 92: ...Figure 4 28 DB 9 RS 232 422 485 Serial Port Connectors Locations PIN NO RS232 RS422 RS485 1 DCD TX TX 2 RXD TX TX 3 TXD RX 4 DTR RX 5 GND 6 DSR 7 RTS 8 CTS 9 RI Table 4 25 RS 232 COM1 1 RS 422 485 CO...

Страница 93: ...DRPC 242 ADL P Page 77 Chapter 5 5 BIOS...

Страница 94: ...ce 5 1 1 Starting Setup The UEFI BIOS is activated when the computer is turned on The setup program can be activated in one of two ways 1 Using keyboard Press the DEL or F2 as soon as the system is tu...

Страница 95: ...m on the right hand side Increase the numeric value or make changes Decrease the numeric value or make changes Page Up Move to the previous page Page Dn Move to the next page Esc Main Menu Quit and no...

Страница 96: ...Button Function Previous Values Load the last value you set Optimized Defaults Load the factory default values in order to achieve the best performance Back Return to the previous menu Soft kbd Displ...

Страница 97: ...clear CMOS button described in Chapter 4 5 1 5 BIOS Menu Bar The menu bar on top of the BIOS screen has the following main items Main Changes the basic system configuration Advanced Changes the advan...

Страница 98: ...Page 82 5 2 Main The Main BIOS menu BIOS Menu 1 BIOS Menu 2 appears when the BIOS Setup program is entered The Main menu gives an overview of the basic system information BIOS Menu 1 Main 1 2 BIOS Me...

Страница 99: ...Processor Information cannot be changed The items shown in the system overview include Name Displays the Processor Details Type Displays the Processor Type Speed Displays the Processor Speed ID Displ...

Страница 100: ...ID and Read Status Clock Frequency ME FW Version Displays the ME Firmware Version ME Firmware SKU Displays the ME Firmware SKU PMC FW Version Displays the PMC Firmware Version The System Overview fiel...

Страница 101: ...BIOS Menu 3 BIOS Menu 4 to configure the CPU and peripheral devices through the following sub menus WARNING Setting the wrong values in the sections below may cause the system to malfunction Make sur...

Страница 102: ...DRPC 242 ADL P Page 86 BIOS Menu 3 Advanced 1 2 BIOS Menu 4 Advanced 2 2...

Страница 103: ...Configuration Use the CPU Configuration menu BIOS Menu 5 BIOS Menu 6 BIOS Menu 7 to view detailed CPU specifications or enable the Intel Virtualization Technology BIOS Menu 5 CPU Configuration 1 3 BI...

Страница 104: ...ion displays the E core Information L1 Data Cache 32 KB x 8 L1 Instruction Cache 64 KB x 8 L2 Cache 2048 KB x 2 L3 Cache 18 MB Performance core Information The Performance core Information displays th...

Страница 105: ...sor package All DEFAULT Enable all cores in the processor package 1 Enable one core in the processor package 2 Enable two cores in the processor package 3 Enable three cores in the processor package A...

Страница 106: ...EFAULT Enables more than two frequency ranges C states Disabled Use C states option to enable or disable CPU Power Management Allows CPU to go to C states when it s not 100 utilized Disabled DEFAULT D...

Страница 107: ...ode Enabled Use the Turbo Mode option to enable or disable Turbo Mode which requires Intel Speed Step or Intel Speed Shift to be available and enabled Disabled Disables Turbo Mode Technology Enabled D...

Страница 108: ...able to access MEBx Setup Unconfigure ME The Unconfigure ME with resetting MEBx Password to default on next boot 5 3 3 Trusted Computing Use the Trusted Computing menu BIOS Menu 9 to configure settin...

Страница 109: ...ration for the security device None DEFAULT TPM information is previous S TPM Clear TPM information is cleared 5 3 4 RTC Wake Settings Use the RTC Wake Settings menu BIOS Menu 10 to enable or disable...

Страница 110: ...2 ADL P Page 94 5 3 5 F81966 Super IO Configuration Use the F81966 Super IO Configuration menu BIOS Menu 11 to set or change the configurations for the serial ports BIOS Menu 11 F81966 Super IO Config...

Страница 111: ...t 1 Configuration Menu Serial Port Enabled Use the Serial Port option to enable or disable the serial port Disabled Disable the serial port Enabled DEFAULT Enable the serial port Device Settings The D...

Страница 112: ...t 2 Configuration Menu Serial Port Enabled Use the Serial Port option to enable or disable the serial port Disabled Disable the serial port Enabled DEFAULT Enable the serial port Device Settings The D...

Страница 113: ...led Use the Serial Port option to enable or disable the serial port Disabled Disable the serial port Enabled DEFAULT Enable the serial port Device Settings The Device Settings option shows the serial...

Страница 114: ...uration menu BIOS Menu 15 to configure the serial port 4 BIOS Menu 15 Serial Port 4 Configuration Menu Serial Port Enabled Use the Serial Port option to enable or disable the serial port Disabled Disa...

Страница 115: ...e option to set RS 422 485 mode RS422 Serial Port Mode is RS422 mode RS485 Serial Port Mode is RS485 mode 5 3 5 5 Serial Port 5 Configuration Use the Serial Port 3 Configuration menu BIOS Menu 16 to c...

Страница 116: ...address and interrupt address IO 2C0h IRQ 10 Serial Port I O port address is 2C0h and the interrupt address is IRQ10 5 3 5 6 Serial Port 6 Configuration Use the Serial Port 3 Configuration menu BIOS...

Страница 117: ...rt address and interrupt address IO 2C8h IRQ 10 Serial Port I O port address is 2C8h and the interrupt address is IRQ10 5 3 6 EC KB9068 H W Monitor The EC KB9068 H W Monitor menu BIOS Menu 18 contains...

Страница 118: ...peratures o System Temperature1 o System Temperature2 CPU_FAN1 Speed SYS_FAN1 Speed Voltages o VCCCORE o V5S o V12S o DDR o DC_IN Tcc Activation Offset 0 Offset from factory set Tcc activation tempera...

Страница 119: ...Configuration Use the Smart Fan Mode Configuration submenu BIOS Menu 19 BIOS Menu 20 to configure the CPU system fan start off temperature and control mode BIOS Menu 19 Smart Fan Mode Configuration 1...

Страница 120: ...set this option the fan speed change to be lowest To set a value Use the or key to change the value or enter a decimal number between 1 and 100 CPU_FAN Start PWM 30 Use the CPU_FAN1 Start PWM option...

Страница 121: ...number between 1 and 100 FAN2 Start PWM 30 Use the FAN2 Start PWM option to set the PWM start value Use the or key to change the value or enter a decimal number between 1 and 100 Auto mode fan slope P...

Страница 122: ...rection menu BIOS Menu 21 BIOS Menu 22 BIOS Menu 23 allows the console redirection options to be configured Console Redirection allows users to maintain a system remotely by re directing keyboard inpu...

Страница 123: ...t Console Redirection 2 3 BIOS Menu 23 Serial Port Console Redirection 3 3 Console Redirection Disabled Use Console Redirection option to enable or disable the console redirection function Disabled DE...

Страница 124: ...Disabled Console Redirection port is Disabled 5 3 7 1 Console Redirection Settings The following options are available in the Console Redirection Settings submenu BIOS Menu 24 when the COM Console Red...

Страница 125: ...9200 38400 Sets the serial port transmission speed at 38400 57600 Sets the serial port transmission speed at 57600 115200 DEFAULT Sets the serial port transmission speed at 115200 Data Bits 8 Use the...

Страница 126: ...s always 0 T This option does not allow for error detection Stop Bits 1 Use the Stop Bits option to specify the number of stop bits used to indicate the end of a serial data packet Communication with...

Страница 127: ...DRPC 242 ADL P Page 111 5 3 8 NVMe Configuration Use the NVMe Configuration BIOS Menu 25 menu to display the NVMe controller and device information BIOS Menu 25 NVMe Configuration...

Страница 128: ...the Chipset menu BIOS Menu 26 to access the PCH IO and System Agent SA configuration menus WARNING Setting the wrong values for the Chipset BIOS selections in the Chipset BIOS menu may cause the syst...

Страница 129: ...nt SA Configuration menu BIOS Menu 27 to configure the System Agent SA parameters BIOS Menu 27 System Agent SA Configuration VT d Enabled Use the VT d option to enable or disable the VT d capability D...

Страница 130: ...DRPC 242 ADL P Page 114 5 4 1 1 Memory Configuration Use the Memory Configuration submenu BIOS Menu 28 to view memory information BIOS Menu 28 Memory Configuration...

Страница 131: ...nfiguration Primary Display Auto Use the Primary Display option to select the primary graphics controller the system uses The following options are available Auto Default IGFX PEG PCI SG Internal Grap...

Страница 132: ...IGFX Auto Auto mode Disabled Disables IGFX Enabled Default Enables IGFX 5 4 1 3 VMD setup menu RAID Mode Use the VMD setup menu RAID Mode BIOS Menu 30 to configure the VMD settings and RAID Mode sett...

Страница 133: ...DRPC 242 ADL P Page 117 5 4 1 4 PEG Port Configuration Use the PEG Port Configuration submenu BIOS Menu 31 to configure the PEG ports BIOS Menu 31 PEG Port Configuration...

Страница 134: ...M1 option to control the PCI Express Root Port Disabled Control PCI Express Root Port disabled Enabled DEFAULT Control PCI Express Root Port enabled PCIe Speed Auto Use the PCIe Speed option to specif...

Страница 135: ...ort BIOS Menu 33 PCIEX4_1 Slot PCIEX4_1 Solt Enabled Use the PICE4X_1 Solt option to control the PCI Express Root Port Enabled DEFAULT Control PCI Express Root Port disabled Disabled Control PCI Expre...

Страница 136: ...Configure PCIe Speed to Gen3 Detect Non Compliance Device Disabled Use the Detect Non Compliance Device option to detect the Non Compliance PCI Express Device in PEG Enabled The Non Compliance PCI Ex...

Страница 137: ...ADL P Page 121 5 4 2 PCH IO Configuration Use the PCI IO Configuration menu BIOS Menu 34 BIOS Menu 35 to configure the PCH Parameters BIOS Menu 34 PCI IO Configuration 1 2 BIOS Menu 35 PCI IO Configur...

Страница 138: ...Power Saving Function EUP Disabled Use the Power Saving Function EUP BIOS option to enable or disable the power saving function Disabled DEFAULT Power saving function is disabled Enabled Power saving...

Страница 139: ...SB power source to 5V USB Power SW4 5V DUAL Use the USB Power SW4 BIOS option to configure the USB power source for the corresponding USB connectors Table 5 1 BIOS Options Configured USB Ports USB Pow...

Страница 140: ...DRPC 242 ADL P Page 124 5 4 2 1 PCI Express Configuration Use the PCI Express Configuration submenu BIOS Menu 36 to configure the PCI Express slots BIOS Menu 36 PCI Express Configuration...

Страница 141: ...speed Configuration options are listed below Auto DEFAULT Auto mode Gen1 Configure PCIe Speed to Gen1 Gen2 Configure PCIe Speed to Gen2 Gen3 Configure PCIe Speed to Gen3 Detect Non Compliance Device...

Страница 142: ...DRPC 242 ADL P Page 126 Enabled Detect if a non compliance PCI Express device is connected to the PCI Express port...

Страница 143: ...uration SATA Mode Selection AHCI Use the SATA Mode Selection option to determine how the SATA devices operate AHCI DEFAULT Configures SATA devices as AHCI device Serial ATA Port 0 Empty Hot Plug Disab...

Страница 144: ...nfigure the HD Audio device settings BIOS Menu 39 HD Audio Configuration HD Audio Enabled Use the HD Audio option to enable or disable the High Definition Audio controller Disabled The onboard High De...

Страница 145: ...DRPC 242 ADL P Page 129 5 5 Security Use the Security menu BIOS Menu 40 BIOS Menu 41 to set system and user passwords BIOS Menu 40 Security 1 2 BIOS Menu 41 Security 2 2...

Страница 146: ...DRPC 242 ADL P Page 130 Administrator Password Use the Administrator Password to set or change administrator password User Password Use the User Password to set or change a user password...

Страница 147: ...Quiet Boot BIOS option to select the screen display when the system boots Disabled Normal POST messages displayed Enabled DEFAULT OEM Logo displayed instead of POST messages Launch PXE OpROM Disabled...

Страница 148: ...the BIOS options and reset the system Discard Changes and Reset Use the Discard Changes and Reset option to exit the system without saving the changes made to the BIOS configuration setup program Rest...

Страница 149: ...DRPC 242 ADL P Page 133 Restore User Defaults Use the Restore User Defaults option to restore the user defaults to all the setup options...

Страница 150: ...DRPC 242 ADL P Page 134 Appendix A A Safety Precautions...

Страница 151: ...nnected when moving installing or modifying the system Do not apply voltage levels that exceed the specified voltage range Doing so may cause fire and or an electrical shock Electric shocks can occur...

Страница 152: ...242 ADL P Series is opened and any of the electrical components are handled the following anti static precautions are strictly adhered to Wear an anti static wristband Wearing a simple anti static wri...

Страница 153: ...to instructions and local regulations Outside the European Union If you wish to dispose of used electrical and electronic products outside the European Union please contact your local authority so as...

Страница 154: ...c reactions to solvents or chemicals used when cleaning the DRPC 242 ADL P Series A 2 2 Cleaning Tools Some components in the DRPC 242 ADL P Series may only be cleaned using a product specifically des...

Страница 155: ...w in the DRPC 242 ADL P Series and cause its circuitry to corrode Swabs Swaps moistened with rubbing alcohol or water are excellent tools for wiping hard to reach areas Whenever possible it is best to...

Страница 156: ...DRPC 242 ADL P Page 140 Appendix B B Regulatory Compliance...

Страница 157: ...n Corp 1999 5 esky Czech IEI Integration Corp t mto prohla uje e tento za zen je ve shod se z kladn mi po adavky a dal mi p slu n mi ustanoven mi sm rnice 1999 5 ES Dansk Danish IEI Integration Corp e...

Страница 158: ...ere relevante bepalingen van richtlijn 1999 5 EG Malti Maltese IEI Integration Corp jiddikjara li dan prodott jikkonforma mal ti ijiet essenzjali u ma provvedimenti o rajn relevanti li hemm fid Dirret...

Страница 159: ...a sit koskevien direktiivin muiden ehtojen mukainen Svenska Swedish IEI Integration Corp f rklarar att denna utrustningstyp st r I verensst mmelse med de v sentliga egenskapskrav och vriga relevanta b...

Страница 160: ...terference to radio communications Operation of this equipment in a residential area is likely to cause harmful interference in which case the user will be required to correct the interference at his...

Страница 161: ...DRPC 242 ADL P Page 145 Appendix C C BIOS Menu Options...

Страница 162: ...ficient cores All 89 Hyper Threading Enabled 90 Intel R SpeedStep tm Enabled 90 C states Disabled 90 Power Limit 1 0 90 Power Limit 2 0 90 Power Limit 1 Time Window 0 91 Turbo Mode Enabled 91 Intel AM...

Страница 163: ...ole Redirection Disabled 107 iAMT SOL COM7 Pci Bus0 Dev0 Func0 Disabled 108 Terminal Type ANSI 108 Bits per second 115200 109 Data Bits 8 109 Parity None 109 Stop Bits 1 110 VT d Enabled 113 Primary D...

Страница 164: ...5 Detect Non Compliance Device Disabled 125 SATA Mode Selection AHCI 127 Serial ATA Port 0 Empty 127 Hot Plug Disabled 127 HD Audio Enabled 128 Administrator Password 130 User Password 130 Quiet Boot...

Страница 165: ...DRPC 242 ADL P Page 149 Appendix D D Hazardous Materials Disclosure...

Страница 166: ...Diphenyl Ethers PBDE Bis 2 ethylhexyl phthalate DEHP Butyl benzyl phthalate BBP Dibutyl phthalate DBP Diisobutyl phthalate DIBP Housing O O O O O O O O O O Display O O O O O O O O O O Printed Circuit...

Страница 167: ...age 151 D 2 China RoHS RoHS RoHS Pb Hg Cd CR VI PBB PBDE O O O O O O O O O O O O O O O O O O O O O O O O O O O O O O O O O O O O O O O O O O O O O O O O O SJ T11364 2014 GB T26572 2011 X SJ T11364 201...

Отзывы: