background image


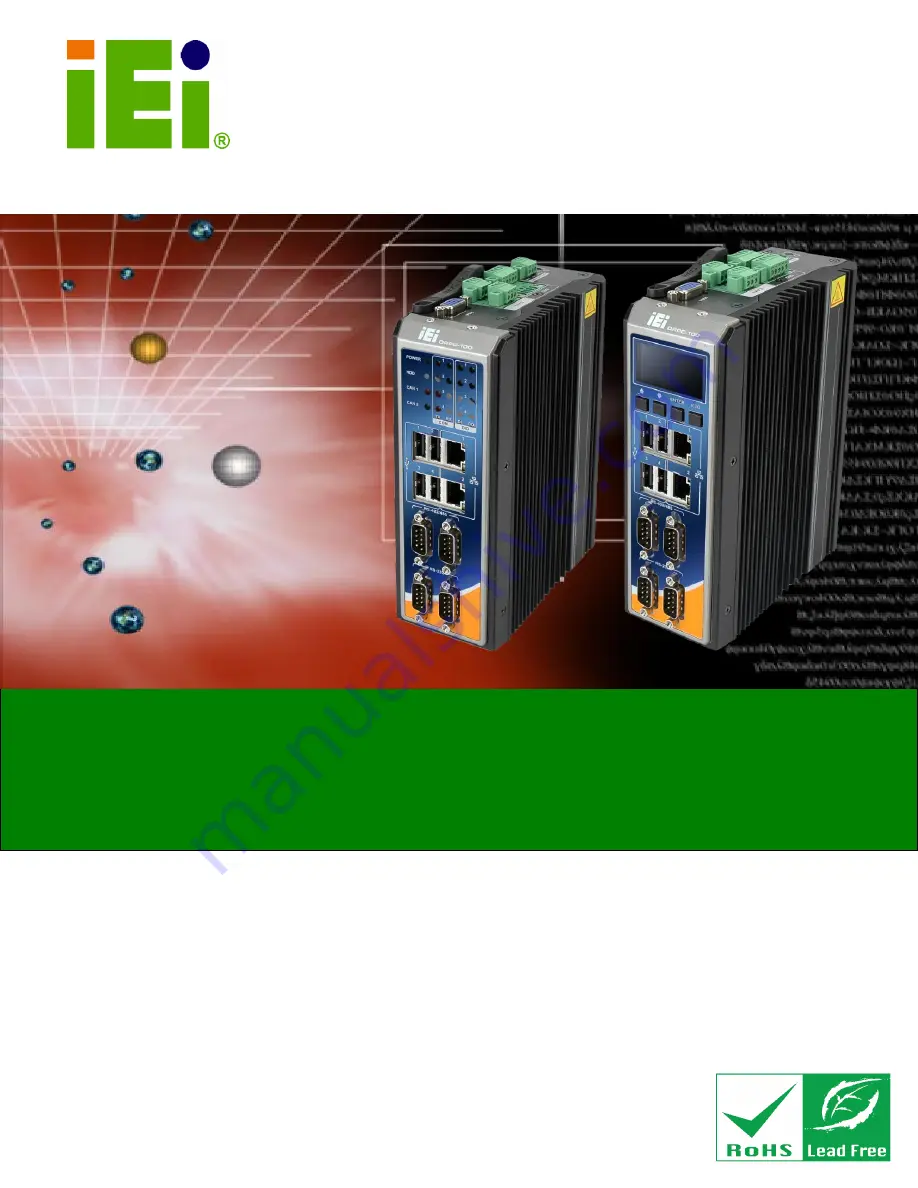
DRPC-100 Embedded System 

Page i 

IEI Technology Corp. 

User Manual 


MODEL: 

DRPC-100 

Fanless Embedded System with Intel® Atom™ N2800 CPU,   

DIN Rail Mounting Support, OLED Display or LED Indicators, Dual 

GbE, USB, DIO, CAN-bus, Serial Ports,   

9V~28V DC Power Input, RoHS Compliant 

Rev. 1.01 – 22 January, 2016 

Содержание DRPC-100

Страница 1: ...ogy Corp User Manual MODEL DRPC 100 Fanless Embedded System with Intel Atom N2800 CPU DIN Rail Mounting Support OLED Display or LED Indicators Dual GbE USB DIO CAN bus Serial Ports 9V 28V DC Power Inp...

Страница 2: ...PC 100 Embedded System Page ii Revision Date Version Changes 22 January 2016 1 01 Updated the operating temperature range packing list and DIN rail mounting method 16 November 2012 1 00 Initial releas...

Страница 3: ...es arising out of the use or inability to use the product or documentation even if advised of the possibility of such damages This document contains proprietary information protected by copyright All...

Страница 4: ...UNPACKING 10 2 1 ANTI STATIC PRECAUTIONS 11 2 2 UNPACKING PRECAUTIONS 11 2 3 UNPACKING CHECKLIST 12 3 INSTALLATION 14 3 1 INSTALLATION PRECAUTIONS 15 3 1 1 High Surface Temperature 15 3 2 CF CARD INST...

Страница 5: ...DUCTION 42 5 1 1 Starting Setup 42 5 1 2 Using Setup 42 5 1 3 Getting Help 43 5 1 4 Unable to Reboot After Configuration Changes 43 5 1 5 BIOS Menu Bar 43 5 2 MAIN 44 5 3 ADVANCED 45 5 3 1 ACPI Settin...

Страница 6: ...INTERFACE CONNECTORS 82 7 2 INTERNAL PERIPHERAL CONNECTORS 83 7 2 1 Battery Connector CN1 83 7 2 2 Burn in CAN bus Firmware Connector CN4 84 7 2 3 Burn in MCU Firmware Connector JP5 84 7 2 4 CompactF...

Страница 7: ...OWS 97 A 2 1 Hardware and BIOS Setup 98 A 2 2 Create Partitions 98 A 2 3 Install Operating System Drivers and Applications 102 A 2 4 Build up Recovery Partition 103 A 2 5 Create Factory Default Image...

Страница 8: ...ls 137 B 1 4 Product Disposal 138 B 2 MAINTENANCE AND CLEANING PRECAUTIONS 138 B 2 1 Maintenance and Cleaning 138 B 2 2 Cleaning Tools 139 C DIGITAL I O INTERFACE 140 C 1 INTRODUCTION 141 C 2 DIO CONN...

Страница 9: ...he PCIe Mini Card into the Socket 20 Figure 3 10 Securing the PCIe Mini Card 21 Figure 3 11 Clear CMOS Jumper Location 23 Figure 3 12 AT ATX Switch Location 23 Figure 3 13 DIN Rail Mounting Bracket 24...

Страница 10: ...ram Front Side 82 Figure 7 2 Main Board Layout Diagram Solder Side 82 Figure A 1 IEI One Key Recovery Tool Menu 94 Figure A 2 Launching the Recovery Tool 99 Figure A 3 Recovery Tool Setup Menu 99 Figu...

Страница 11: ...e Confirmation 114 Figure A 28 Image Creation Complete 114 Figure A 29 Press any key to continue 114 Figure A 30 IEI Feature 115 Figure A 31 Partitions for Linux 116 Figure A 32 System Configuration f...

Страница 12: ...nouts 35 Table 5 1 BIOS Navigation Keys 43 Table 7 1 Peripheral Interface Connectors 83 Table 7 2 Battery Connector CN1 Pinouts 83 Table 7 3 Burn in CAN bus Firmware Connector CN4 Pinouts 84 Table 7 4...

Страница 13: ...outs 90 Table 7 19 RS 422 485 Serial Port Pinouts 90 Table 7 20 USB 2 0 Connectors LAN USB1 LAN USB2 Pinouts 91 Table 7 21 VGA Connector VGA1 Pinouts 91 Table 7 22 Jumpers 91 Table 7 23 Clear CMOS Jum...

Страница 14: ......

Страница 15: ...DRPC 100 Embedded System Page 1 4Chapter 1 1 Introduction...

Страница 16: ...upports DIN rail mounting method The DRPC 100 accepts a wide range of DC power input 9V 28V allowing it to be powered anywhere Four USB 2 0 two GbE two RS 232 two RS 422 485 two CAN bus and one 8 bit...

Страница 17: ...080p decoding Supports 1066 MHz DDR3 SO DIMM up to 4 GB Supports one mSATA one SATA DOM and one CompactFlash Wide range DC power input 9V 28V Extended temperature fanless design supports 25 C 65 C wit...

Страница 18: ...el contains 2 x RJ 45 Gigabit LAN ports 2 x RS 232 serial ports with isolation 2 x RS 422 485 serial ports with isolation 4 x USB 2 0 ports LED or OLED indicators Function keys DRPC 100 CV OLED only A...

Страница 19: ...8V DC power terminal block 1 x Power button 1 x Reset button 1 x VGA connector 2 x CAN bus Phoenix terminal block with 3KV isolation protection 1 x 8 bit digital I O Phoenix terminal block with 3KV is...

Страница 20: ...Blinking Storage device accessing Off Storage device not accessing CAN 1 2 Green On Active Off Inactive COM TX 1 4 Yellow On COM port is transmitting data Off COM port is not transmitting data COM RX...

Страница 21: ...L8111E controllers Storage SATA mSATA and SATA DOM support CompactFlash 1 x CompactFlash card slot I O and Indicators Ethernet 2 x RJ 45 ports RS 232 2 x DB 9 serial ports with 3KV isolation protectio...

Страница 22: ...al Mounting DIN rail desktop Operating Temperature 25 C 65 C with SSD Storage Temperature 25 C 70 C Humidity 5 95 non condensing Chassis Construction Extruded aluminum alloy for fanless support Chassi...

Страница 23: ...DRPC 100 Embedded System Page 9 1 8 Dimensions The physical dimensions are shown below Figure 1 5 Physical Dimensions millimeters...

Страница 24: ...DRPC 100 Embedded System Page 10 Chapter 2 2 Unpacking...

Страница 25: ...c wristband Wearing a simple anti static wristband can help to prevent ESD from damaging the board Self grounding Before handling the board touch any grounded conducting material During the time the b...

Страница 26: ...purchased the DRPC 100 from or contact an IEI sales representative directly To contact an IEI sales representative please send an email to sales iei com tw The DRPC 100 is shipped with the following...

Страница 27: ...ts the optional items that can be purchased separately Optional Power adapter P N 63000 FSP036RAB610 RS Power cord European standard 1830 mm P N 32000 000002 RS Power cord American standard 1830 mm P...

Страница 28: ...DRPC 100 Embedded System Page 14 Chapter 3 3 Installation...

Страница 29: ...lation Make sure there is sufficient air circulation when installing the DRPC 100 The DRPC 100 s cooling vents must not be obstructed by any objects Blocking the vents can cause overheating of the DRP...

Страница 30: ...TOOL or lock and key or other means of security and is controlled by the authority responsible for the location 3 2 CF Card Installation To install the CF card please follow the steps below Step 1 Lo...

Страница 31: ...etention screw Figure 3 3 Figure 3 3 Replacing the CF Card Slot Cover 3 3 Motherboard Removal Before the jumper settings can be configured and the mSATA SSD can be installed the motherboard must be re...

Страница 32: ...Screws Step 2 Remove the hex nuts on the front panel Figure 3 5 Gently pull the front panel out of the DRPC 100 Figure 3 5 Hex Nuts on the Front Panel Step 3 Remove the hex nuts on the top panel Figu...

Страница 33: ...der side of the motherboard Figure 3 7 Retention Screws on the Motherboard 3 4 mSATA SSD Installation The DRPC 100 has one PCIe Mini slot on the motherboard for mSATA SSD installation To install the m...

Страница 34: ...ngle Line up the notch on the card with the notch on the connector Slide the PCIe Mini card into the socket at an angle of about 20 Figure 3 9 Figure 3 9 Inserting the PCIe Mini Card into the Socket S...

Страница 35: ...etal clip often protected by a plastic cover that slides over the pins to connect them To CLOSE SHORT a jumper means connecting the pins of the jumper with the plastic clip and to OPEN a jumper means...

Страница 36: ...BIOS settings the clear CMOS jumper clears the CMOS data and resets the system BIOS information To do this use the jumper cap to close the pins for a few seconds then remove the jumper clip If the CM...

Страница 37: ...in 552HFigure 3 11 below Figure 3 11 Clear CMOS Jumper Location 3 6 AT ATX Mode Selection AT and ATX power modes can both be used on the DRPC 100 The selection is made through an AT ATX switch on the...

Страница 38: ...tach the supplied DIN rail mounting bracket to the rear panel of the embedded system Secure the bracket to the embedded system with there retention screws 7 6 2 H 7 6 2 H Figure 3 13 Figure 3 13 DIN R...

Страница 39: ...eral Interface Connectors The DRPC 100 has the following connectors Detailed descriptions of the connectors can be found in the subsections below 8 bit DIO CAN bus Ethernet Power input RS 232 RS 422 4...

Страница 40: ...N bus Terminal Block Pinout Location 3 8 2 Digital Input Output Terminal Block CN Label DIO CN Type 2 x 5 pin terminal block CN Location See Figure 1 3 CN Pinouts See Table 3 4 and Figure 3 17 The dig...

Страница 41: ...e Figure 1 2 CN Pinouts See Table 3 5 The LAN connectors allow connection to an external network Step 1 Locate the RJ 45 connectors The locations of the RJ 45 connectors are shown in Figure 1 2 Step 2...

Страница 42: ...tor into the on board RJ 45 connector Pin Description Pin Description 1 MD0 5 MD2 2 MD0 6 MD2 3 MD1 7 MD3 4 MD1 8 MD3 Table 3 5 LAN Pinouts Figure 3 19 RJ 45 Ethernet Connector The RJ 45 Ethernet conn...

Страница 43: ...8 4 Power Input 3 pin Terminal Block CN Type 3 pin terminal block CN Location See Figure 1 3 CN Pinouts See Table 3 7 and Figure 3 20 Connect the leads of a 9V 28V DC power supply into the terminal bl...

Страница 44: ...anel Step 1 Locate the DB 9 connector The locations of the DB 9 connectors are shown in Figure 1 2 Step 2 Insert the serial connector Insert the DB 9 connector of a serial device into the DB 9 connect...

Страница 45: ...abel COM3 and COM4 CN Type DB 9 connectors CN Location See Figure 1 2 CN Pinouts See Table 3 9 and Figure 3 24 RS 422 485 serial port devices can be attached to the DB 9 ports on the front panel Step...

Страница 46: ...rial device connector to the external interface by tightening the two retention screws on either side of the connector Pin Description Pin Description 1 RS422TX RS485D 6 NC 2 RS422TX RS485D 7 NC 3 RS4...

Страница 47: ...al devices to the system Step 1 Locate the USB connectors The locations of the USB connectors are shown in Figure 1 2 Step 2 Align the connectors Align the USB device connector with one of the connect...

Страница 48: ...ects to a monitor that accepts VGA video input Step 1 Locate the female DB 15 connector The location of the female DB 15 connector is shown in Figure 1 3 Step 2 Align the VGA connector Align the male...

Страница 49: ...from the VGA monitor to the external interface by tightening the two retention screws on either side of the connector Figure 3 27 VGA Connector Pin Description Pin Description 1 RED 2 GREEN 3 BLUE 4...

Страница 50: ...o change without prior notice Visit the IEI website or contact technical support for the latest updates The following drivers can be installed on the system Chipset VGA LAN To install the drivers inse...

Страница 51: ...DRPC 100 Embedded System Page 37 Chapter 4 4 System Maintenance...

Страница 52: ...ling to do so may cause severe damage to the DRPC 100 and injury to the user WARNING Please take antistatic precautions when working with the internal components The interior of the DRPC 100 contains...

Страница 53: ...1 SO DIMM Module Location Step 3 Release the SO DIMM module by pulling both the spring retainer clips outward from the socket Step 4 Grasp the SO DIMM module by the edges and carefully pull it out of...

Страница 54: ...stem Page 40 Figure 4 2 SO DIMM Module Installation Step 7 Push the new SO DIMM module until it engages and the white plastic end clips click into place Make sure the end clips are fully secured after...

Страница 55: ...DRPC 100 Embedded System Page 41 Chapter 5 5 BIOS...

Страница 56: ...ssage appears on the screen If the message disappears before the DEL or F2 key is pressed restart the computer and try again 5 1 2 Using Setup Use the arrow keys to highlight items press ENTER to sele...

Страница 57: ...To exit the Help Window press ESC or the F1 key again 5 1 4 Unable to Reboot After Configuration Changes If the computer cannot boot after changes to the system configuration are made CMOS defaults U...

Страница 58: ...e Tab to switch between Data elements Select Screen Select Item Enter Select Change Opt F1 General Help F2 Previous Values F3 Optimized Defaults F4 Save Exit ESC Exit Version 2 14 1219 Copyright C 201...

Страница 59: ...tion Make sure that the settings made are compatible with the hardware Aptio Setup Utility Copyright C 2011 American Megatrends Inc Main Advanced Chipset Boot Security Save Exit ACPI Settings CPU Conf...

Страница 60: ...Previous Values F3 Optimized Defaults F4 Save Exit ESC Exit Version 2 14 1219 Copyright C 2011 American Megatrends Inc BIOS Menu 3 ACPI Configuration ACPI Sleep State S3 Suspend to RAM Use the ACPI S...

Страница 61: ...er Threading Technology Select Screen Select Item Enter Select Change Opt F1 General Help F2 Previous Values F3 Optimized Defaults F4 Save Exit ESC Exit Version 2 14 1219 Copyright C 2011 American Meg...

Страница 62: ...011 American Megatrends Inc Advanced SATA Port0 Not Present SATA Port1 IEI Technology 4 2GB Configure SATA as AHCI SATA Port 0 Hot Plug Enabled SATA Port 1 Hot Plug Enabled Select a configuration for...

Страница 63: ...eyboard 1 Mouse Legacy USB Support Enabled USB Support Parameters Select Screen Select Item Enter Select Change Opt F1 General Help F2 Previous Values F3 Optimized Defaults F4 Save Exit ESC Exit Versi...

Страница 64: ...ge the configurations for the serial ports Aptio Setup Utility Copyright C 2011 American Megatrends Inc Advanced F81866 Super IO Configuration F81866 Super IO Chip F81866 Serial Port 1 Configuration S...

Страница 65: ...s F3 Optimized Defaults F4 Save Exit ESC Exit Version 2 14 1219 Copyright C 2011 American Megatrends Inc BIOS Menu 8 Serial Port n Configuration Menu 5 3 5 1 1 Serial Port 1 Configuration Serial Port...

Страница 66: ...address is IRQ3 4 5 6 7 10 11 12 IO 2E8h IRQ 3 4 5 6 7 10 11 12 Serial Port I O port address is 2E8h and the interrupt address is IRQ3 4 5 6 7 10 11 12 5 3 5 1 2 Serial Port 2 Configuration Serial Po...

Страница 67: ...12 IO 3E8h IRQ 3 4 5 6 7 10 11 12 Serial Port I O port address is 3E8h and the interrupt address is IRQ3 4 5 6 7 10 11 12 IO 2E8h IRQ 3 4 5 6 7 10 11 12 Serial Port I O port address is 2E8h and the i...

Страница 68: ...erial Port I O port address is 2F8h and the interrupt address is IRQ3 4 5 6 7 10 11 12 IO 3E8h IRQ 3 4 5 6 7 10 11 12 Serial Port I O port address is 3E8h and the interrupt address is IRQ3 4 5 6 7 10...

Страница 69: ...upt address are automatically detected IO 2E8h IRQ 7 Serial Port I O port address is 2E8h and the interrupt address is IRQ7 IO 3F8h IRQ 3 4 5 6 7 10 11 12 Serial Port I O port address is 3F8h and the...

Страница 70: ...rial Port option to enable or disable the serial port Disabled Disable the serial port Enabled DEFAULT Enable the serial port Change Settings Auto Use the Change Settings option to change the serial p...

Страница 71: ...12 Serial Port I O port address is 2E8h and the interrupt address is IRQ3 4 5 6 7 10 11 12 IO 2F0h IRQ 3 4 5 6 7 10 11 12 Serial Port I O port address is 2F0h and the interrupt address is IRQ3 4 5 6 7...

Страница 72: ...3 264 V Smart Fan Mode Select Select Screen Select Item Enter Select Change Opt F1 General Help F2 Previous Values F3 Optimized Defaults F4 Save Exit ESC Exit Version 2 14 1219 Copyright C 2011 Ameri...

Страница 73: ...Select Screen Select Item Enter Select Change Opt F1 General Help F2 Previous Values F3 Optimized Defaults F4 Save Exit ESC Exit Version 2 14 1219 Copyright C 2011 American Megatrends Inc BIOS Menu 10...

Страница 74: ...n Enable or Disable Select Screen Select Item Enter Select Change Opt F1 General Help F2 Previous Values F3 Optimized Defaults F4 Save Exit ESC Exit Version 2 14 1219 Copyright C 2011 American Megatre...

Страница 75: ...erial port transmission speed at 115200 Data Bits 8 Use the Data Bits option to specify the number of data bits 7 Sets the data bits at 7 8 DEFAULT Sets the data bits at 8 Parity None Use the Parity o...

Страница 76: ...access the Host Bridge and Southbridge configuration menus WARNING Setting the wrong values for the Chipset BIOS selections in the Chipset BIOS menu may cause the system to malfunction Aptio Setup Uti...

Страница 77: ...F2 Previous Values F3 Optimized Defaults F4 Save Exit ESC Exit Version 2 14 1219 Copyright C 2011 American Megatrends Inc BIOS Menu 13 Host Bridge Configuration 5 4 1 1 Intel IGD Configuration Use the...

Страница 78: ...ton Status Disabled High Precision Event Timer Configuration High Precision Timer Enabled Power Saving Function ERP Disabled Restore AC Power Loss Last State Enabled or Disabled the High Precision Eve...

Страница 79: ...n Last State DEFAULT The system returns to its previous state If it was on it turns itself on If it was off it remains off 5 5 Boot Use the Boot menu BIOS Menu 16 to configure system boot options Apti...

Страница 80: ...Off Does not enable the keyboard Number Lock automatically To use the 10 keys on the keyboard press the Number Lock key located on the upper left hand corner of the 10 key pad The Number Lock LED on t...

Страница 81: ...s only asked for when entering Setup If ONLY the User s password is set then this is a power on password and must be entered to boot or enter Setup In Setup the User will have Administrator rights The...

Страница 82: ...Select Change Opt F1 General Help F2 Previous Values F3 Optimized Defaults F4 Save Exit ESC Exit Version 2 14 1219 Copyright C 2011 American Megatrends Inc BIOS Menu 18 Save Exit Save Changes and Rese...

Страница 83: ...ge 69 Save as User Defaults Use the Save as User Defaults option to save the changes done so far as user defaults Restore User Defaults Use the Restore User Defaults option to restore the user default...

Страница 84: ...DRPC 100 Embedded System Page 70 Chapter 6 6 Programmable OLED Display DRPC 100 CV OLED Only...

Страница 85: ...in text format The following sections will introduce these two programs 6 2 OLED Image Editor The OLED Image Editor allows displaying information in graphic format 6 2 1 OLED Image Editor Installation...

Страница 86: ...100 Embedded System Page 72 Figure 6 1 OLED Image Editor Setup Wizard Step 4 Select a folder for OLED Image Editor Installation in Figure 6 2 Click Next to continue Figure 6 2 Select Installation Fol...

Страница 87: ...k Next to confirm the installation Figure 6 3 Confirm Installation Step 6 The system starts installing the OLED Image Editor Step 7 When the OLED Image Editor is successfully installed the following w...

Страница 88: ...r To launch the OLED Image Editor double click the OLED Image Editor icon on the desktop Figure 6 5 OLED Image Editor 6 2 3 Function List The OLED Image Editor provides picture drawing function Users...

Страница 89: ...Sets the pen color to black or white 6 2 4 OLED Control The OLED Control allows setup to the OLED module Refer to the DRPC100 OLED UART Protocol reference manual packaged in the driver CD for detaile...

Страница 90: ...ed page number Clear Screen Clicks to clear the OLED screen 6 2 5 OLED Erase Page The OLED Erase Page allows erasing the images in the indicated page numbers The range of page number is 0 511 Besides...

Страница 91: ...ference manual packaged in the driver CD for detailed setup The DRPC100 Demo Program allows displaying information in text format To launch the DRPC100 double click the DRPC100_OLED_DEMO file located...

Страница 92: ...3 1 Dialog Menu The Dialog menu allows clearing the OLED screen and getting ID Figure 6 10 Dialog Menu Get ID Clicks to get ID Clr OLED Clicks to clear the OLED screen Close Clicks to return to the m...

Страница 93: ...LCD Menu The LCD menu allows entering text to be displayed on the OLED display Figure 6 11 LCD Menu Send Clicks to send the input text to be displayed on the OLED display Clear Clears the input text C...

Страница 94: ...DRPC 100 Embedded System Page 80 6 3 3 DEMO Menu The DEMO menu lists the activities of the function keys Click Close to return to the main menu Figure 6 12 DEMO Menu...

Страница 95: ...DRPC 100 Embedded System Page 81 Chapter 7 7 Interface Connectors...

Страница 96: ...nnectors and configuration jumpers The connector locations are shown in Figure 6 1 and Figure 6 2 The Pin 1 locations of the on board connectors are also indicated in the diagrams The connector pinout...

Страница 97: ...bus firmware connector 8 pin header CN4 Burn in MCU firmware connector 5 pin wafer JP5 CompactFlash card slot solder side CF slot CF1 CPU Fan connector 3 pin wafer CPU_FAN1 Indicator connector 6 pin w...

Страница 98: ...Slot CF1 PIN NO DESCRIPTION PIN NO DESCRIPTION 1 GROUND 26 S_IDE_Detect 2 S_D3 27 S_D11 3 S_D4 28 S_D12 4 S_D5 29 S_D13 5 S_D6 30 S_D14 6 S_D7 31 S_D15 7 S_DCS1 32 S_DCS3 8 GROUND 33 GROUND 9 GROUND...

Страница 99: ...1 S_RST 17 GROUND 42 S_IORDY 18 S_DA2 43 S_DRQ 19 S_DA1 44 S_DACK 20 S_DA0 45 SIDE_LED 21 S_D0 46 S_PCBLID 22 S_D1 47 S_D8 23 S_D2 48 S_D9 24 NC 49 S_D10 25 CFD2 50 GROUND Table 7 5 CompactFlash Card...

Страница 100: ...D 8 RESET Table 7 8 OLED LED Signal Connector OLED1 Pinouts 7 2 8 PCIe Mini Card Slot M_PCIE1 PIN NO DESCRIPTION PIN NO DESCRIPTION 1 PCIE_WAKE 2 VCC3 3 N C 4 GND 5 N C 6 1 5V 7 N C 8 N C 9 GND 10 N C...

Страница 101: ...LK 31 PETN2 32 SMBDATA 33 PETP2 34 GND 35 GND 36 USBD 37 N C 38 USBD 39 N C 40 GND 41 N C 42 N C 43 N C 44 N C 45 N C 46 N C 47 N C 48 1 5V 49 N C 50 GND 51 N C 52 VCC3 Table 7 9 PCIe Mini Card Slot M...

Страница 102: ...CAN bus terminal block 2 x 3 pin terminal block CAN1 Digital I O terminal block 2 x 5 pin terminal block J1 Power input terminal block 3 pin terminal block DC_CN1 RJ 45 LAN and USB 2 0 connectors RJ 4...

Страница 103: ...3 CAN1L 4 CAN2L 5 CAN1_GROUND 6 CAN2_GROUND Table 7 14 CAN bus Terminal Block CAN1 Pinouts 7 3 2 Digital I O Terminal Block J1 PIN NO DESCRIPTION PIN NO DESCRIPTION 1 DGI_0 2 DGO_0 3 DGI_1 4 DGO_1 5...

Страница 104: ...LAN Connector Pinouts 7 3 5 RS 232 Serial Ports COM1 2 PIN NO DESCRIPTION PIN NO DESCRIPTION 1 DCD 6 DSR 2 RXD 7 RTS 3 TXD 8 CTS 4 DTR 9 RI 5 GND Table 7 18 RS 232 Serial Port Pinouts 7 3 6 RS 422 485...

Страница 105: ...PIN NO DESCRIPTION 1 RED 2 GREEN 3 BLUE 4 NC 5 GND 6 GND 7 GND 8 GND 9 VCC 10 GND 11 NC 12 DDC DAT 13 HSYNC 14 VSYNC 15 DDCCLK Table 7 21 VGA Connector VGA1 Pinouts 7 4 Jumper Settings The JP3 and JP4...

Страница 106: ...Table 7 23 Clear CMOS Jumper JP1 Settings 7 4 2 CAN bus 1 Long Wire Transmitting Jumper JP3 Pin Description 1 CAN1H 2 CAN1L Table 7 24 C CAN bus 1 Long Wire Transmitting Jumper JP3 Settings 7 4 3 CAN...

Страница 107: ...DRPC 100 Embedded System Page 93 Appendix A A One Key Recovery...

Страница 108: ...re from the factory default image after encountering a Blue Screen of Death BSoD or a hang for around 10 minutes Please refer to Section A 3 for the detailed setup procedure The IEI One Key Recovery t...

Страница 109: ...used with IEI products The software will fail to run and a warning message will appear when used on non IEI hardware To create the system backup the main storage device must be split into two partitio...

Страница 110: ...y installed A 1 2 Supported Operating System The recovery CD is compatible with both Microsoft Windows and Linux operating system OS The supported OS versions are listed below Microsoft Windows o Wind...

Страница 111: ...recovery tool to fail A 2 Setup Procedure for Windows Prior to using the recovery tool to backup or restore a few setup procedures are required Step 1 Hardware and BIOS setup see Section A 2 1 Step 2...

Страница 112: ...BIOS Step 6 Select the connected optical disk drive as the 1 st boot device Boot Boot Device Priority 1 st Boot Device Step 7 Save changes and restart the computer Continue to the next section for in...

Страница 113: ...DRPC 100 Embedded System Page 99 Figure A 2 Launching the Recovery Tool Step 3 The recovery tool setup menu is shown as below Figure A 3 Recovery Tool Setup Menu Step 4 Press 6 then Enter...

Страница 114: ...other is for saving recovery files and images which will be an invisible partition Press Enter after entering each line below system32 diskpart DISKPART list vol DISKPART sel disk 0 DISKPART create p...

Страница 115: ...DRPC 100 Embedded System Page 101 Figure A 5 Partition Creation Commands...

Страница 116: ...onto the unlabelled partition The partition labeled Recovery is for use by the system recovery tool and should not be used for installing the operating system or any applications NOTE The operating sy...

Страница 117: ...cal drive Step 2 Start the system Step 3 Boot the system from recovery CD When prompted press any key to boot from the recovery CD It will take a while to launch the recovery tool Please be patient Fi...

Страница 118: ...configuring the system to build a recovery partition In this process the partition created for recovery files in Section A 2 2 is hidden and the recovery tool is saved in this partition Figure A 8 Bui...

Страница 119: ...driver and application installations To create a factory default image please follow the steps below Step 1 Turn on the system When the following screen displays 776H776HFigure A 10 press the F3 key...

Страница 120: ...ge 106 Figure A 11 Recovery Tool Menu Step 3 The About Symantec Ghost window appears Click OK button to continue Figure A 12 About Symantec Ghost Window Step 4 Use mouse to navigate to the option show...

Страница 121: ...ct the local source drive Drive 1 as shown in 779H779HFigure A 14 Then click OK Figure A 14 Select a Local Source Drive Step 6 Select a source partition Part 1 from basic drive as shown in 780H780HFig...

Страница 122: ...ive and enter a file name called iei 781H781HFigure A 16 Click Save The factory default image will then be saved in the selected recovery drive and named IEI GHO WARNING The file name of the factory d...

Страница 123: ...gh to make the image file smaller Figure A 17 Compress Image Step 9 The Proceed with partition image creation window appears click Yes to continue Figure A 18 Image Creation Confirmation Step 10 The S...

Страница 124: ...e recovery tool main menu window is shown as below Press any key to reboot the system S t e p 0 Figure A 21 Press Any Key to Continue A 3 Auto Recovery Setup Procedure The auto recovery function allow...

Страница 125: ...ing driver and application installations Step 1 Follow the steps described in Section A 2 1 Section A 2 3 to setup BIOS create partitions and install operating system Step 2 Install the auto recovery...

Страница 126: ...omatically restart Click OK to save the settings and exit See Figure A 23 Figure A 23 Disable Automatically Restart Step 4 Reboot the system from the recovery CD When prompted press any key to boot fr...

Страница 127: ...m to build an auto recovery partition In this process the partition created for recovery files in Section A 2 2 is hidden and the auto recovery tool is saved in this partition Figure A 26 Building the...

Страница 128: ...st starts to create the factory default image Figure A 28 Figure A 28 Image Creation Complete Step 9 After completing the system configuration press any key in the following window to restart the syst...

Страница 129: ...hanges and restart the system If the system encounters a Blue Screen of Death BSoD or a hang for around 10 minutes it will automatically restore from the factory default image Step 0 A 4 Setup Procedu...

Страница 130: ...rve enough space for partition 3 for saving recovery images Figure A 31 Partitions for Linux Step 3 Create a recovery partition Insert the recovery CD into the optical disk drive Follow Step 1 Step 3...

Страница 131: ...e Symantec Ghost window appears and starts configuring the system to build up a recovery partition After completing the system configuration press any key to reboot the system Eject the recovery CD Fi...

Страница 132: ...2 5 to create a factory default image A 5 Recovery Tool Functions After completing the initial setup procedures as described above users can access the recovery tool by pressing F3 while booting up t...

Страница 133: ...be saved in the hidden partition 3 Restore your last backup Restore the last system backup image 4 Manual Enter the Symantec Ghost window to configure manually 5 Quit Exit the recovery tool and restar...

Страница 134: ...the main menu Step 2 The Symantec Ghost window appears and starts to restore the factory default A factory default image called iei GHO is created in the hidden Recovery partition Figure A 36 Restore...

Страница 135: ...n menu Step 2 The Symantec Ghost window appears and starts to backup the system A backup image called iei_user GHO is created in the hidden Recovery partition Figure A 38 Backup System Step 3 The scre...

Страница 136: ...Type 3 and press Enter in the main menu Step 2 The Symantec Ghost window appears and starts to restore the last backup image iei_user GHO Figure A 40 Restore Backup Step 3 The screen is shown as in 79...

Страница 137: ...t Window Step 3 When backup or recovery is completed press any key to reboot the system S t e p 0 A 6 Restore Systems from a Linux Server through LAN The One Key Recovery allows a client system to aut...

Страница 138: ...Setup a client system for auto recovery The detailed descriptions are described in the following sections In this document two types of Linux OS are used as examples to explain the configuration proce...

Страница 139: ...copy the DHCP server sample to etc dhcpd conf cp usr share doc dhcp 3 0 5 dhcpd conf sample etc dhcpd conf vi etc dhcpd conf Debian vi etc dhcpd conf Edit etc dhcpd conf for your environment For exam...

Страница 140: ...ting the etc xinetd d tftp file and make it use the remap file The vvv is optional but it could definitely help on getting more information while running the remap file For example CentOS vi etc xinet...

Страница 141: ...very CD to the system server side Step 2 Extract the recovery package to cp RecoveryR10 tar bz2 cd tar xvjf RecoveryR10 tar bz2 Step 3 Copy pxelinux 0 from syslinux and install to tftboot cp usr lib s...

Страница 142: ...a yum install samba Step 2 Create a shared directory for the factory default image mkdir share cd share mkdir image cp iei gho image WARNING The file name of the factory default image must be iei gho...

Страница 143: ...tname vi etc hostname Modify RecoveryServer A 6 6 Setup a Client System for Auto Recovery Step 1 Disable the automatically restart function before creating the factory default image Go to My Computer...

Страница 144: ...on Priorities BIOS option of the client system Boot Option 1 remain the default setting to boot from the original OS Boot Option 2 select the boot from LAN option Step 4 Save changes and exit BIOS men...

Страница 145: ...rt the client system from LAN If the system encounters a Blue Screen of Death BSoD or a hang for around 10 minutes it will automatically restore from the factory default image The following screens wi...

Страница 146: ...trollers such as ALi M5283 or VIA VT6421A the SATA RAID AHCI driver must be installed before using one key recovery Please follow the steps below to install the SATA RAID AHCI driver Step 1 Copy the S...

Страница 147: ...DRPC 100 Embedded System Page 133 Step 5 When the following window appears press S to select Specify Additional Device...

Страница 148: ...overy tool setup menu Continue to follow the setup procedure from Step 4 in Section A 2 2 Create Partitions to finish the whole setup process S t e p 0 A 7 2 System Memory Requirement To be able to ac...

Страница 149: ...DRPC 100 Embedded System Page 135 Appendix B B Safety Precautions...

Страница 150: ...when moving installing or modifying the system Do not apply voltage levels that exceed the specified voltage range Doing so may cause fire and or an electrical shock Electric shocks can occur if open...

Страница 151: ...unding Before handling any electrical component touch any grounded conducting material During the time the electrical component is handled frequently touch any conducting materials that are connected...

Страница 152: ...left must be disposed of separately from normal household waste This includes monitors and electrical accessories such as signal cables or power cords When you need to dispose of your display products...

Страница 153: ...list of items to use when cleaning the DRPC 100 Cloth Although paper towels or tissues can be used a soft clean piece of cloth is recommended when cleaning the DRPC 100 Water or rubbing alcohol A clot...

Страница 154: ...DRPC 100 Embedded System Page 140 Appendix C C Digital I O Interface...

Страница 155: ...heet for the Super I O chipset C 2 DIO Connector Pinouts The following table describes how the DIO connector pins are connected to the Super I O GPIO port 1 Pin Description Super I O Pin Super I O Pin...

Страница 156: ...ital I O input functions is listed below MOV AX 6F08H Sets the digital port as input INT 15H Initiates the INT 15H BIOS call C 3 2 Enable the DIO Output Function The BIOS interrupt call INT 15H contro...

Страница 157: ...DRPC 100 Embedded System Page 143 Appendix D D Hazardous Materials Disclosure...

Страница 158: ...e presences of small quantities of certain materials in the product and is applicable to China RoHS only A label will be placed on each product to indicate the estimated Environmentally Friendly Use P...

Страница 159: ...it Board X O O O O X Metal Fasteners X O O O O O Cable Assembly X O O O O X Fan Assembly X O O O O X Power Supply Assemblies X O O O O X Battery O O O O O O O This toxic or hazardous substance is cont...

Страница 160: ...DRPC 100 Embedded System Page 146 RoHS RoHS Pb Hg Cd CR VI PBB PBDE X O O O O X X O O O O X X O O O O X X O O O O O X O O O O X X O O O O X X O O O O X O O O O O O O SJ T11363 2006 X SJ T11363 2006...

Отзывы: