


AFL3-W07A-BT Panel PC
Page 25
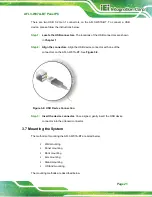
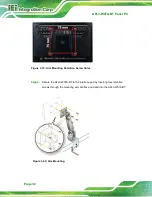
3.7.2 Panel Mounting
To mount the AFL3-W07A-BT flat bezel panel PC into a panel, please follow the steps
below.
Step 1:
Select the position on the panel to mount the flat bezel panel PC.
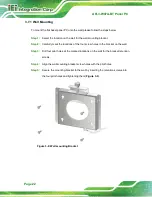
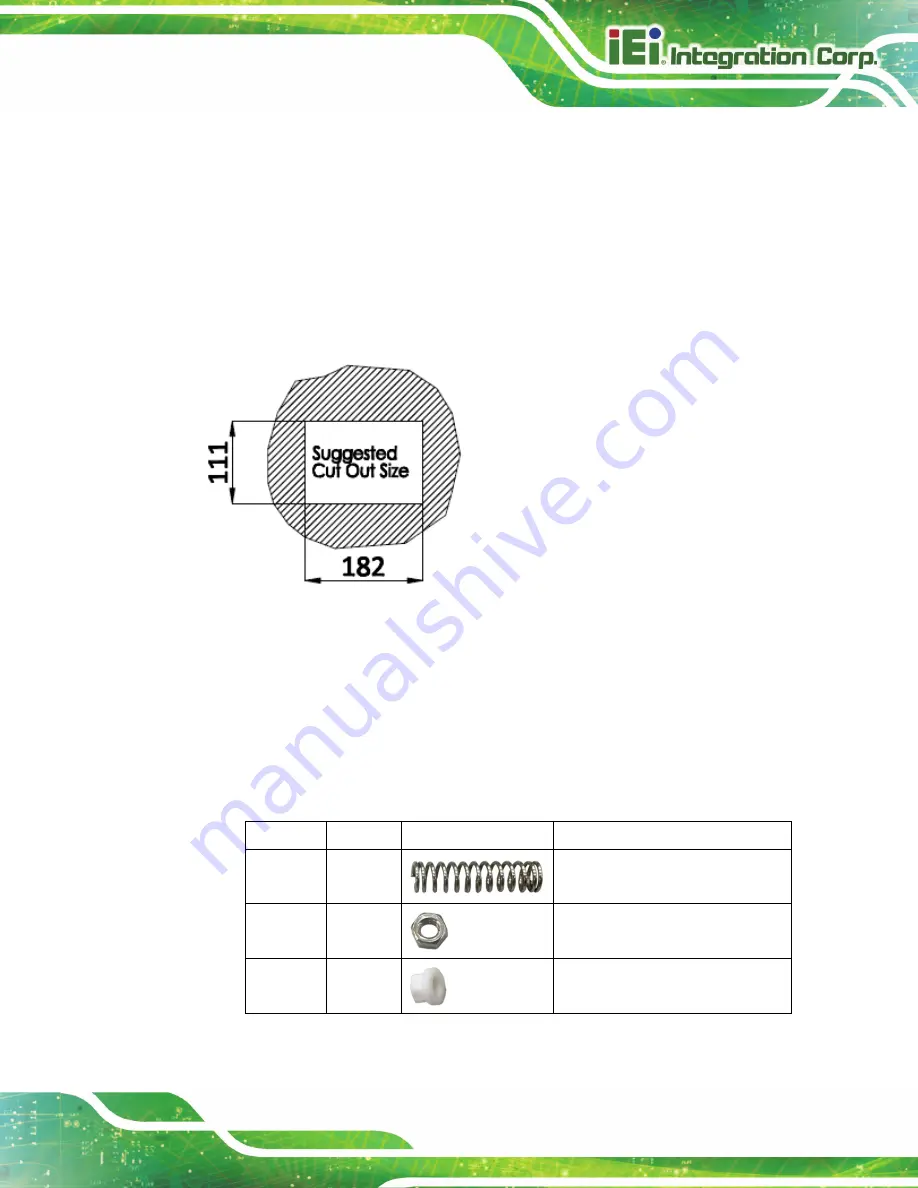
Step 2:
Cut out a section corresponding to the size shown below. The size must be
smaller then the outer edge.
Figure 3-12: Cutout Dimensions
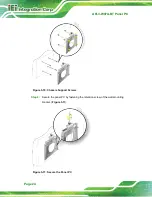
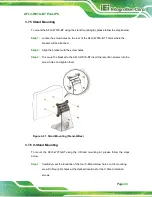
Step 3:
Slide the flat bezel panel PC through the hole until the frame is flush against the
panel.
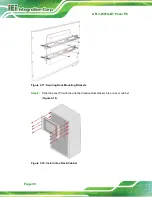
Step 4:
Insert a M5*50 screw into the screw hole on the side of the panel mounting
bracket. Then, install the following components onto the screw in sequence.
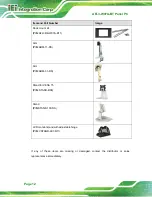
See
Sequence Item
Photo
Instruction
1
Spring
Install a spring onto the screw.
2
Nut
Tighten a nut until the spring is
compressed enough for plastic cap.
3
Plastic
cap
Tighten a plastic cap onto the end of
screw thread.
Содержание AFL3-W07A-BT-N1/PC/2G-R20
Страница 13: ...AFL3 W07A BT Panel PC Page 1 1 Introduction Chapter 1 ...
Страница 21: ...AFL3 W07A BT Panel PC Page 9 2 Unpacking Chapter 2 ...
Страница 25: ...AFL3 W07A BT Panel PC Page 13 3 Installation Chapter 3 ...
Страница 54: ...AFL3 W07A BT Panel PC Page 42 4 BIOS Setup Chapter 4 ...
Страница 82: ...AFL3 W07A BT Panel PC Page 70 5 System Maintenance Chapter 5 ...
Страница 88: ...AFL3 W07A BT Panel PC Page 76 6 Interface Connectors Chapter 6 ...
Страница 99: ...AFL3 W07A BT Panel PC Page 87 Appendix A A Regulatory Compliance ...
Страница 104: ...AFL3 W07A BT Panel PC Page 92 B Safety Precautions Appendix B ...
Страница 109: ...AFL3 W07A BT Panel PC Page 97 C BIOS Menu Options Appendix C ...
Страница 112: ...AFL3 W07A BT Panel PC Page 100 Appendix D D Watchdog Timer ...
Страница 115: ...AFL3 W07A BT Panel PC Page 103 E Hazardous Materials Disclosure Appendix E ...