background image

Part 3 - Search

62

9

 Camera Menu

• 

Zoom

: Zoom and choosing the camera number 

zooms the current playback image of the selected 
camera on the screen.

• 

Audio

: Audio toggles audio playback On and 

Off.  Recorded audio will be played when the DVR 
displays a camera with recorded audio in full screen 
mode.

• 

Edit Group

: Enter to the Edit Group mode in the 

split screen layout. 

The Camera Menu also can be displayed by clicking 
the right mouse button on the screen while in the 
search mode.

0

 Export

• 

A-B Clip Copy

: Designate a start point and an end 

point and copy the data in between.

• 

Clip Copy

: Open up the Clip Copy Setup window 

for designating points A and B.

• 

Print:

 Print a selected image.

!

 Status

• 

Allow you to check the status of the DVR’s system, 
event status and storage.

Selecting Status will only be enabled for a user who 
has System Check authority.

@

 Data Source 

• 

Record

: Search recording data contained in the 

main recording device. 

• 

Other

: Search data recorded while disks used in 

other systems were connected. 

#

 Exit

Exit the search mode and enter the live monitoring 
mode.

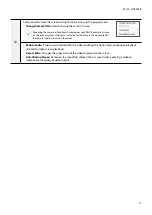
Context Menu

Right-click on the Camera screen to access the context 
menu.

• 

Zoom

: Zoom in.

• 

Edit Group

: Enter to the Edit Group mode in the split 

screen layout.

• 

Go to Main:

 The selected camera goes to the main 

screen in the 1+5 and 1+7 modes.

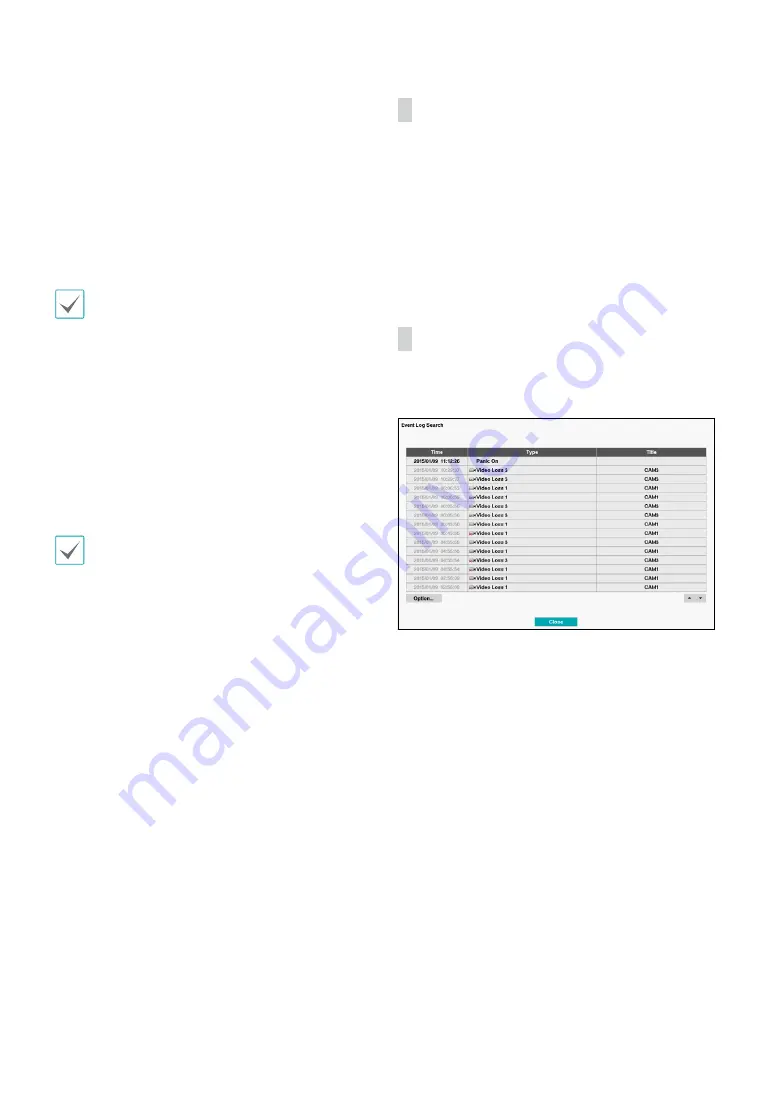
Event Log Search

Select 

Event Log Search

 from the Search menu to bring 

up the Event Log Search Setup window.

Select an event to display the recording made on the 
selected time and date (paused state). Select the Play 
button in the middle of the screen to start playing back 
the recording. Use the screen form to load recordings 
from other cameras.

Содержание TR-4308

Страница 1: ...Digital Video Recorder Operation Manual TR 4308 TR 4316 TR 4308R TR 4316R ...

Страница 2: ...ividuals who are not familiar with its use seek technical assistance from their retailer regarding product installation and use If you need to disassemble the product for functionality expansion or repair purposes you must contact your retailer and seek professional assistance Both retailers and users should be aware that this product has been certified as being electromagnetically compatible for ...

Страница 3: ...ug this equipment from the wall outlet and refer servicing to qualified service personnel under the following conditions A When the power supply cord or the plug has been damaged B If liquid is spilled or objects have fallen into the equipment C If the equipment has been exposed to rain or water D If the equipment does not operate normally by following the operating instructions adjust only those ...

Страница 4: ...NCE AT THEIR OWN EXPENSE WARNING CHANGES OR MODIFICATIONS NOT EXPRESSLY APPROVED BY THE PARTY RESPONSIBLE FOR COMPLIANCE COULD VOID THE USER S AUTHORITY TO OPERATE THE EQUIPMENT THIS CLASS OF DIGITAL APPARATUS MEETS ALL REQUIREMENTS OF THE CANADIAN INTERFERENCE CAUSING EQUIPMENT REGULATIONS WEEE Waste Electrical Electronic Equipment Correct Disposal of This Product Applicable in the European Union...

Страница 5: ...respective owners The information in this manual is believed to be accurate as of the date of publication even though explanations of some functions may not be included We are not responsible for any problems resulting from the use thereof The information contained herein is subject to change without notice Revisions or new editions to this publication may be issued to incorporate such changes The...

Страница 6: ...17 Context Menu Access 18 Video Recording 19 Panic Recording 19 Audio Recording 19 Video Recording Playback 19 All Channel Playback 19 Triplex Playback 20 Remote Control Buttons during Playback 20 Context Menu 20 Part 2 Configuration 21 Menu Use 21 Text Input via Virtual Keyboard 21 Batch Assignment 22 Mouse 22 System Setup 22 General 22 Date Time 28 User 29 System Event 32 General 34 ...

Страница 7: ...n 43 Camera Setup 44 General 44 Image 45 PTZ 46 Clip Privacy 46 Privacy Masking 47 Device Setup 47 Audio 47 Alarm Out 48 Remote Control 48 Network Setup 49 General 49 LAN 50 FEN 51 RTSP 52 IDIS Web 53 VNC 53 NetFS 54 Notification Setup 56 Callback 56 Mail 56 FTP 57 Schedule 58 Display Setup 59 OSD 59 Main Monitor 60 Spot Monitor 60 ...

Страница 8: ... Menu 62 Event Log Search 62 Record Table Search 64 Motion Search 65 Text In Search 66 Thumbnail Search 67 Bookmarks 67 Clip Copy 68 Print 69 Overlapped Recording Search 70 Part 4 IDIS Web 71 Web Live Mode 73 Web Search Mode 75 Part 5 Appendix 78 Index 78 3 4 5 ...

Страница 9: ...password Select a user and enter the E mail address and click Get Verification Code 4 Enter the verification code you receive by e mail and click OK If you do not know the password click the button for guidance Leaving the admin account unassigned with a password poses a security risk Please assign a password at your earliest convenience A warning message will continue to be displayed until a pass...

Страница 10: ...ut state the login icon is shown Monitor Selects the monitor between Main and Spot You can select the screen format and sequence monitoring of the selected monitor Display Used to change the screen layout to single screen PIP 2x2 1 5 1 7 3x3 or 4x4 Camera OSD Status OSD Camera OSD or Status OSD On and Off Previous Next Group Loads the previous next screen group Freeze Freezes the screen Select Fre...

Страница 11: ... covert cameras If the user does not have permission to view feeds from the cameras Camera Menu PTZ Allows you to control the selected camera as long as it has Pan Tilt and Zoom capabilities It is the same as pressing the PTZ button Zoom Zooms the current image of the selected camera on the screen It is the same as pressing the ZOOM button Selecting Zoom again in the Camera Menu again exits the Zo...

Страница 12: ...tatus icons Indicates remote control receptivity Indicates connection to the DVR from a remote program Indicates two way audio connection Indicates connection to the DVR using the VNC service Indicates a zoomed in state Indicates Freeze is in use Indicates Sequence is in use 1 2 Indicates the current screen s group Indicates an event monitoring Indicates HDD use The icon to the left is shown if us...

Страница 13: ...ppear the selected camera on the spot monitor Edit Group Enter to the Edit Group mode in the split screen layout Triplex The DVR supports the Triplex function monitoring recording and playing back at the same time Information Displays the camera s information and recording status Edit Group Edit Group lets you customize split screen pages in both Live and Search modes 1 While displaying a split sc...

Страница 14: ...DVR s front panel or remote control to display the PTZ camera selection window Select the camera you wish to control The icon will begin to flash on the selected camera s OSD window Use the Arrow buttons to pan and tilt the camera up down left and right Use the and buttons to zoom in out Use the and buttons to shift focus from nearby to far and vice versa Use the button to load the preset window U...

Страница 15: ...vanced Settings In PTZ mode select a camera Clicking Menu button and selecting Advanced PTZ loads the Advanced PTZ screen as shown below You can load the Advanced PTZ screen also by pressing the MENU button and then Play Pause button on the front panel This menu lists Speed Auto Pan and other advanced PTZ camera control options available for the camera Options that are not available for the select...

Страница 16: ...ure navigate to Menu Display Main Monitor and enable Event Monitoring Event Monitoring remains in effect throughout the entire Linked Recording Time After that the DVR will return to the previous screen if a new event does not take place Pressing the Layout or a Camera button before the end of the Linked Recording Time reverts the system to Live mode Covert Camera Use this feature to assign Covert...

Страница 17: ... on page 32 Fan Error Event is indicated when the cooling fan cannot reach a certain RPM or fails for longer than 50 seconds No Storage Found It will be highlighted when no recordable storage device has been found Disk Almost Full Disk Full If the storage device is not in Recycle status event status is displayed when the amount of disk space specified under System Monitoring is reached and when th...

Страница 18: ...amage within 24 hours Context Menu Access You can display the ContextMenu window by pressing the MENU button and then PLAY PAUSE button on the front panel Alternatively right click on the mouse to access the Context menu PTZ Access PTZ controls Zoom Zoom in Color Control Select a channel to display its Color Control window Adjust the selected camera s brightness contrast saturation and hue setting...

Страница 19: ...from Record Setup General applies to all Panic Recording videos Panic Recording will not take place if recording mode is not set to Recycle and the HDD has reached 100 of its capacity Audio Recording If the Record Audio option under Record Setup General has been enabled the camera will record audio along with video For more information refer to the Record Setup on page 34 Check your local laws and...

Страница 20: ...ch on page 61 Remote Control Buttons during Playback 1 Camera Button Displays the selected recording in full screen 2 Zoom Button Allows you to zoom in on a specific area of the recording 3 Layout Button Cycle between 2x2 1 5 1 7 3x3 4x4 and PIP modes Context Menu While in Search mode right click on the mouse to access the Context Menu Zoom Zoom in Edit Group Enter to the Edit Group mode in the sp...

Страница 21: ...on Setup 8 Display Setup 2 Use the remote control s arrow buttons to select an option and then press the remote control s button or left click on the option using the mouse 3 Change the setting and then select Save to save the change To apply default settings select the Default button located on the left bottom corner of the setup window Text Input via Virtual Keyboard Use the remote control s arr...

Страница 22: ...er to the Menu Use on page 21 for basic information on using the Setup menus General This Setup menu contains general system options Site Used to enter a description about the system s installation site no description by default You can edit the information using the virtual keyboard System ID Used to identify the DVR apart from other DVRs System ID is also used to control the DVR with the remote ...

Страница 23: ...one and Use Daylight Saving Time Export Exports the current system settings to a storage device connected to the system s USB port or the registered FTP site in NetFS You can designate a File Name for the export file For USB flash memory devices the DVR supports the FAT16 and FAT32 files format Show System Log Displays a searchable list of 5 000 most recent system log entries For more information ...

Страница 24: ...ng Reporting Generates a report to troubleshoot any issues and exports the report Wizard Lets you configure basic settings required for operating the system 1 Select the desired Setup Wizard option and click Next Select Cancel from any of the Wizard screen to cancel the setup process and return to the main setup menu Quick Wizard 1 Select Quick Wizard 2 Specify the current date and time and then c...

Страница 25: ... follows High Video Quality Priority Profile Standard Recording Profile Longer Recording Time Priority Profile Motion Event Record 30 ips Very high Very high 15 ips High Very High 5 ips Standard High Continuous Motion Event Record Time Event 30 ips Very High Very High Time 15 ips High High Event 30 ips Very High Very High Time 5 ips Standard High Event 15 ips High High Continuous 30 ips Very high ...

Страница 26: ...figuration and then click Test to test the system s current network configuration This test must be performed before proceeding to the next step If the DVR is on a network connected to a network that has a DHCP server selecting Auto Configuration retrieves LAN settings such as IP and DNS addresses automatically Selecting Manual Configuration on the other hand lets you specify the settings manually...

Страница 27: ... the registration process The Finish button will then become activated You will be prompted with an error message if you do not enter a name for the DVR or enter a name already registered on the FEN server Depending on the network environment FEN services may not be active and therefore prevent the DVR from connecting to the network In this case you will need to manually configure the ports For mo...

Страница 28: ...rver s IP address or domain name or select and then choose a server from the list of registered time servers 3 Specify the server synchronization Interval 4 Select OK to apply and exit If you have configured the DNS Server setting under Network IP Address you can enter the time server s domain name instead of its IP address Selecting Run as Server sets the current DVR as a time server for other DV...

Страница 29: ...red using the virtual keyboard For more information on using the virtual keyboard refer to the Text Input via Virtual Keyboard on page 21 To delete a registered user or group select the icon on the right of the corresponding user group Group Administrator and User admin cannot be deleted Select the icon next to Group User on the top of the screen to delete all groups and users except Group Adminis...

Страница 30: ...cess covert cameras in Live and Search modes Search Clip Copy The user who has permission for Clip Copy can perform Clip Copy If the user does not have permission Clip Copy is not allowed but only search is allowed Setup System Time Change May change the system s date and time settings Data Clear May clear data stored in the system PTZ Setup May configure PTZ settings Alarm Out Setup May configure...

Страница 31: ... Select Format to prepare the disk as a storage for data recording Disks formatted with Use As set to Not Using will not be used for data recording This DVR supports SATA2 HDDs Mirror This function is not suppported on TR 4208 and TR 4216 recorders The DVR suppports function that records the same data on the two disks at the same time Up to two Mirrors are supported This function only works if the...

Страница 32: ...ronization Only one command is available among Mirror Resync and Stop For example if Mirror is selected for Internal 1 2 Resync and Stop are not available for Internal 3 4 Do not remove the disk during resynchronization otherwise the disk may be damaged Information Indicates if the installed disk is being used for mirroring or Resync purposes Select information about mirroring to check the disk s ...

Страница 33: ... active Disk Almost Full Generates an event if the disk reaches the specified capacity 80 to 99 Disk Full Generates an event when all disks reach their maximum capacity Disk Bad Generates an event when the specified percentage of the disk becomes damaged Set to between 10 and 90 in 10 intervals Disk Temperature Specify the threshold temperature Once any disk reaches this threshold the system will ...

Страница 34: ...ou can store event recording data for longer If you do not wish to use Limit Time Lapse Recording select Never This function is activated when data has been stored for longer than as configured because the recording disk has sufficient capacity and saves new data by overwriting Time Lapse Recording data that are older than as specified under Recycle mode If the recording stored on the disk is shor...

Страница 35: ...the Panic Record button is pressed no recording will take place during the scheduled time frames on the scheduled days Time The icon appears on the upper left corner of the screen The icon appears at scheduled times to indicate recording is in progress Event The icon appears on the upper left corner of the screen The icon appears when the specified event occurs to indicate recording is in progress...

Страница 36: ...curs Upper tier schedule s settings apply to unconfigured channels If multiple events take place on a specific channel and different ips Quality Resolution and Dwell Time settings apply highest settings apply to all event linked recordings The resolution can be set up at a time for each event or separately for each channel of an event When setting up at a time for each event the following options ...

Страница 37: ...Lower bitrate when motion is undetected Dynamic ROI Select Motion to keep bitrate high for regions with motion detection Select Motion Detail to keep bitrate high for regions with motion detection or complicated details GOP Group Of Pictures A group of compressed image frames which consists of I frame one complete image and P frame differences from the previous frame only Normally since I frmae ha...

Страница 38: ... the zone and then select clear or reverse the selection From the zone selection screen press the button on the remote control or right click on the mouse to open up the Zone Setup menu Select Confirm the block selection in the selection window Clear Clear the block selection in the selection window Reverse Clear the blocks selected within the selection window and select all unselected blocks with...

Страница 39: ...tion recording Actions Specify which actions to take when motion is detected Record Specify which cameras to begin linked recording on when an event occurs If the schedule is set to Event or Time Event mode the selected cameras will begin linked recording when an event occurs Alarm Out Designate event triggered alarm out channels and beeps Notify Configure to be notified of events by Mail LAN1 thr...

Страница 40: ...ected inward motion from outside the selection area When in the motion viewing mode the detection zone of video will be displayed The detected inward motion from the outside of the zone will be displayed in blue Tripzone Ignoring Time The system does not produce event log entries or issues remote notifications regarding Tripzone detected during the specified time following the initial Tripzone det...

Страница 41: ... does not produce event log entries or issues remote notifications regarding video loss detected during the specified time following the initial video loss detection Set a value between 0 1 sec and 15 secs or choose Never Actions Specify which actions to take when a Video Loss event occurs Record Specify which cameras to begin linked recording on when an event occurs If the schedule is set to Even...

Страница 42: ...Actions Specify which actions to take when video blind events occur Record Specify which cameras to begin linked recording on when an event occurs If the schedule is set to Event or Time Event mode the selected cameras will begin linked recording when an event occurs Alarm Out Designate event triggered alarm out channels and beeps Notify Configure to be notified of events by Mail LAN1 through 5 FT...

Страница 43: ...Transaction End has been designated the system will recognize the specified string as the end of a transaction Select 0 more line s next to Transaction End and specify a value between 1 and 10 The system will recognize the specified Transaction End string plus the number of lines as being the end of a transaction Line Delimiter Designate a string to mark the end of a line You can enter control str...

Страница 44: ...gure to be notified of events by Mail LAN1 through 5 FTP Push and or Alert Window PTZ Moves the PTZ camera to a specific preset position when an event occurs In order to use the Callback feature the DVR must be registered on the remote program Camera Setup Refer to the Menu Use on page 21 for basic information on using the Setup menus General Enable disable the covert view and rename cameras No Tu...

Страница 45: ...r 1 2 channel is used in the real time monitoring mode and search mode When selecting Auto the 720 HD Full HD 3MP 18 4MP 15 4MP Half 25 30 and 5MP 12 mode are supported The input resolution is applied without rebooting the system If the camera s width resolution is 960 and Mode is set to Auto 720 mode will be applied For the 1 2 channel 16 channel devices use 8 channels and 8 channel devices use 4...

Страница 46: ...tor on the back of the DVR following the camera manufacturer s instructions Configure the port s setting based on the PTZ camera manufacturer s instructions Clip Privacy Configure privacy masking zone for CLIP COPY No Turn on off the camera number Privacy Zone Display the full screen live mode of the channel and you can configure the privacy zone area by dragging on the area with the mouse The pri...

Страница 47: ...te the all privacy masking area Save Save the changes and exit the privacy masking area options screen Cancel Exit the privacy masking area options without saving the changes For SD images the masking area is restricted to 4 5 of the screen width due to the chip restrictions When masking the entire screen area at least two masking area settings are required Device Setup Refer to the Menu Use on pa...

Страница 48: ...nt occurs On Alarm out is always on Off Alarm out is always off Channels Configure alarm out port and beep settings Remote Control Port Select None RS232 or RS485 and then click the Setup button and then select the correct Baud Rate Parity Data Bits and Stop Bits for the device you are connecting to the DVR You can select the device from the Remote Control Product list If the RS232 port and RS485 ...

Страница 49: ...Depending on the network environment this speed may not be achieved Network Bandwidth Limit Configure the bandwidth to limit If you configured the Network Bandwidth Limit the live video may not be displayed smoothly in a remote program Remote Audio Channel Transmits the selected channel s audio to the remote program Select Select From Client to stream audio of the channel selected on the remote pr...

Страница 50: ...he UPnP Universal Plug and Play feature select Use UPnP If using an IP router or NAT UPnP service allows the device to automatically forward the port to the DVR This port is used to access a port that has a private IP address In order to use the UPnP service the IP router or NAT must support UPnP port forwarding and have the relevant options enabled Port number cannot be changed with Use UPnP sele...

Страница 51: ...ed to connect remotely at the same time Contact the service center for more information FEN If using a dynamic IP address FEN service makes it easy to connect to the DVR from a remote program without having to configure dynamic IP or router settings Use FEN Check if you wish to use FEN service FEN Server Enter the FEN server s IP address or domain name If you have configured the DNS Server setting...

Страница 52: ...ext time you access the FEN Setup screen RTSP RTSP service allows you to monitor real time using the Real Time Streaming Protocol RTSP Port Set the port number of the RTSP server obtained from your system administrator RTP Port Set the start end port number of the RTP server obtained from your system administrator Use Mobile Access a remote DVR using a Blackberry or other mobile devices When using...

Страница 53: ...Down arrow buttons to increase or decrease the numbers VNC VNC service allows you to access the DVR and control it remotely using a PC or mobile devices via Ethernet Use VNC Enable disable VNC You will be able to change the settings if Use VNC is enabled Port Configure the port number of the VNC server Password Configure the Password to use when connecting to the DVR from a remote locale Up to thr...

Страница 54: ...etween different display formats It is the same as pressing the LAYOUT button on the front panel c or Home Pressing the c or Home key allows you to copy video clips While in the playback mode it is the same as pressing and holding the MENU button on the front panel for three or more seconds F5 Pressing the F5 key refreshes the current VNC screen NetFS It allows you to register NetFS sites for the ...

Страница 55: ...FS site Print It allows you to save images as a PDF file on the NetFS site Site Enter NetFS site information When you delete a FTP site in the NetFS setup screen on the Network menu the FTP site in the FTP setup screen on the Eventupload will be deleted too When you change the usage to other than ALL or Clip Copy a FTP notification function will be disabled Select the icon to delete the existing N...

Страница 56: ... select among CBF JPG and MP4 When selecting CBF the DVR will attach an event detected video clip to an email When selecting JPG the DVR will attach the event detected image file JPEG format to an email When selecting MP4 the DVR will attach the event detected video clip MP4 format to an email Mail Add a mail recipient Assign the Recipient to a Group and enter the Recipient s Display Name Enter th...

Страница 57: ...symbol If user authentication is required by the SMTP server select Use and then enter the User and Password information 2 Select OK to apply and exit This product contains content developed by OpenSSL Project for use in Open SSL Toolkit http www openssl org FTP The FTP feature uploads event detected image or video clip on the FTP site when an event occurs Select the icon at the bottom of the list...

Страница 58: ...ill be deleted too If many event occurs during a short period images may not be uploaded on the FTP site The FTP notification is not supported for system events If upload fails several times it deletes the images or video clips When the DVR boots it deletes all images and video clips even if they were not uploaded yet Schedule Select the icon at the lower left corner of the screen to add a notific...

Страница 59: ...and time User Name Displays the name of the current user logged in Background Panel Displays the background panel at the bottom of the screen in translucent black Camera No Displays the camera number on the upper left corner of the camera screen Title Displays the camera name on the upper left corner of the camera screen Record Displays recording and schedule icons Audio Displays the icon on chann...

Страница 60: ...toring on page 16 Resolution Select 1920 x 1080 1440 x 900 1280 x 1024 3840 x 2160 Set Resolution to Manual Mode Set the resolution manually regardless of the resolution supported by the monitor Supported resolutions may be restricted depending on the monitor We recommend that you use 1920 x 1080 resolution Monitor Resolution Displays the resolution information of monitors currently connected to t...

Страница 61: ...lays the first recorded image Go to the Last Displays the last recorded image Go to the Date Time Displays the Go to the Date Time screen 3 Bookmarks Add the current playback point to the bookmark list The maximum number of bookmarks that can be saved is 64 4 Display Used to change the screen layout to single screen PIP 2x2 1 5 1 7 3x3 or 4x4 OSD On Off Enables disables the OSD feature 5 6 Previou...

Страница 62: ... DVR s system event status and storage Selecting Status will only be enabled for a user who has System Check authority Data Source Record Search recording data contained in the main recording device Other Search data recorded while disks used in other systems were connected Exit Exit the search mode and enter the live monitoring mode Context Menu Right click on the Camera screen to access the cont...

Страница 63: ...ected events from the entire From and To range will be searched Camera Filter Alarm In Select which channels to search alarm in events in Motion Select which channels to search motion detection events in Tripzone Select which channels to search tripzone detection events in Video Loss Select which channels to search video loss events in Video Blind Select which channels to search video blind events...

Страница 64: ...ing 2 Zoom Select zoom in to compose recording data in 1 minute segments and select zoom out to compose recording data in 3 minute segments Selecting zoom out displays more time in one screen than zoom in screen If recording from points in time prior or after the time frame displayed on the screen is available scrolls appear on both ends of the date and time information line Scroll using the arrow...

Страница 65: ... from the Search menu to bring up the Motion Search Setup window Motion Search cannot be performed while using a split screen layout Select Single Screen mode Select Option to configure Motion Search options Select First under From and Last under To to search the recording from start to finish Alternatively you can uncheck the First and Last options and specify the search time frame manually Type ...

Страница 66: ...it the setup window by selecting Close Text In Search Select Text In Search from the Search menu to bring up the Text In Search window Select a Transaction to display the video recording that corresponds to the selected time and date paused state Text in information is superimposed on the screen at normal playback speed The information is not shown under any other playback speed Select Option to c...

Страница 67: ...a certain date from the channel which had an interlocked recording Select at the bottom or the button to change the precision of the images by day hour minute Select from the arrows at the bottom or the button to search backward or forward through the day hour minute images When there is no matching images on the selected date the message NO IMAGE is displayed Double click on the image to change t...

Страница 68: ...e volume as 30GB regardless of the actual disk volume and the maximum size limit on Clip Copy files is 30GB If the video clip is uploaded after being clip copying video clips will be deleted If there are same files the video clips cannot be copied While copying video clips on the DVD RW the number of recorded images might decrease File name Designate a name for the file The name may be up to 63 ch...

Страница 69: ...malfunction or critically damage the external USB device s file system You may be prompted with an error message when trying to back up on the device If so you will need to restart the DVR If the USB hard disk s file system has been damaged restarting the DVR will not solve the problem and the aforementioned error message will continue to be displayed each time you attempt a backup If this is the ...

Страница 70: ...5 00 6 00 Segment 1 Segment 2 When searching overlapped video recordings you can choose a specific point in time or a time frame If you use the Go to the Date Time option and select a point within the overlapped time period 4 o clock for example you must specify 4 o clock in which of the two existing segments If you use the Event Log Search or Motion Detection option and select a time frame within...

Страница 71: ...ernet Explorer Ver 7 0 or above 32 Bit IDIS Web only works with Microsoft Internet Explorer and will NOT work with other browsers IDIS Web does not work in Microsoft Windows 8 metro UI 1 Launch Internet Explorer and then enter the following information in the address bar http IP Address Port Number DVR system s IP address and IDIS Web port number configured under Network General Default Value 1208...

Страница 72: ...llow websites to open windows without address or status bars Enable To use IDIS Web on Microsoft Windows Vista or above launch Internet Explorer by right clicking on the icon and selecting the Run as administrator option Otherwise certain IDIS Web functions might not be available Launching a new version of IDIS Web for the first time can cause Internet Explorer to load information from the previou...

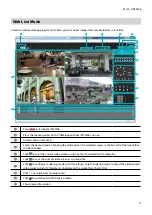
Страница 73: ...e places the selected camera in the first cell of the layout that will be changed 5 Click to print the current video screen using a printer connected to the computer 6 Click to save the current video screen as an image file 7 Click TYPE 1 to configure rendering mode and OSD settings Select rendering mode to adjust the video output rate or select which OSD elements to display on the screen from the...

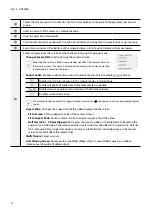
Страница 74: ...smission of audio to the remote locale via microphone Enables playback of audio from the remote locale on speakers Enables two way audio communication with the remote locale Disables audio transmission If the remote locale connected to supports audio transmission icon appears on the corresponding camera screen Aspect Ratio Changes the aspect ratio of the video displayed on the screen Fit to Screen...

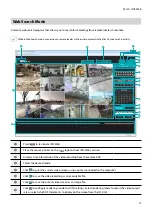
Страница 75: ...nter on the logo to check IDIS Web s version 3 Displays time information of the video recording from the remote DVR 4 Select the desired mode 5 Click to print the current video screen using a printer connected to the computer 6 Click to save the video recording as an executable file 7 Click to save the current video screen as an image file 8 Click TYPE 1 to configure rendering mode and OSD setting...

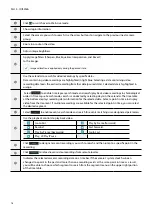
Страница 76: ...lendar The time table at the bottom displays recording data information for the selected date Select a point in time to display video from that moment If multiple recordings are available for the selected point in time you can select the desired segment Select to enable event search mode and search for events matching user designated parameters Use the playback controls to play back video TYPE 1 G...

Страница 77: ...ystem If no name is entered for the camera the name used at the remote locale is shown on the screen Enable Audio If audio was recorded with the video enabling this option plays audio upon playback limited to single screen playback Aspect Ratio Changes the aspect ratio of the video displayed on the screen Anti Aliasing Screen Removes stair step effect blocks that is caused when zooming a video to ...

Страница 78: ... E Event Monitoring 16 F FEN 51 L LAN 50 Login 9 M Motion Search 62 64 Mouse 22 O OSD 59 P Panic Recording 19 Pre Event 37 Print 69 R Recording 19 S Search 61 Storage 31 T Text In 43 Text In Search 66 V Video Analytics 38 39 W Wizard 9 Part 5 Appendix V4 3 ...

Страница 79: ...IDIS Co Ltd For more information please visit at www idisglobal com ...

Отзывы: