Part 1 - Getting Started
12
Camera Menu
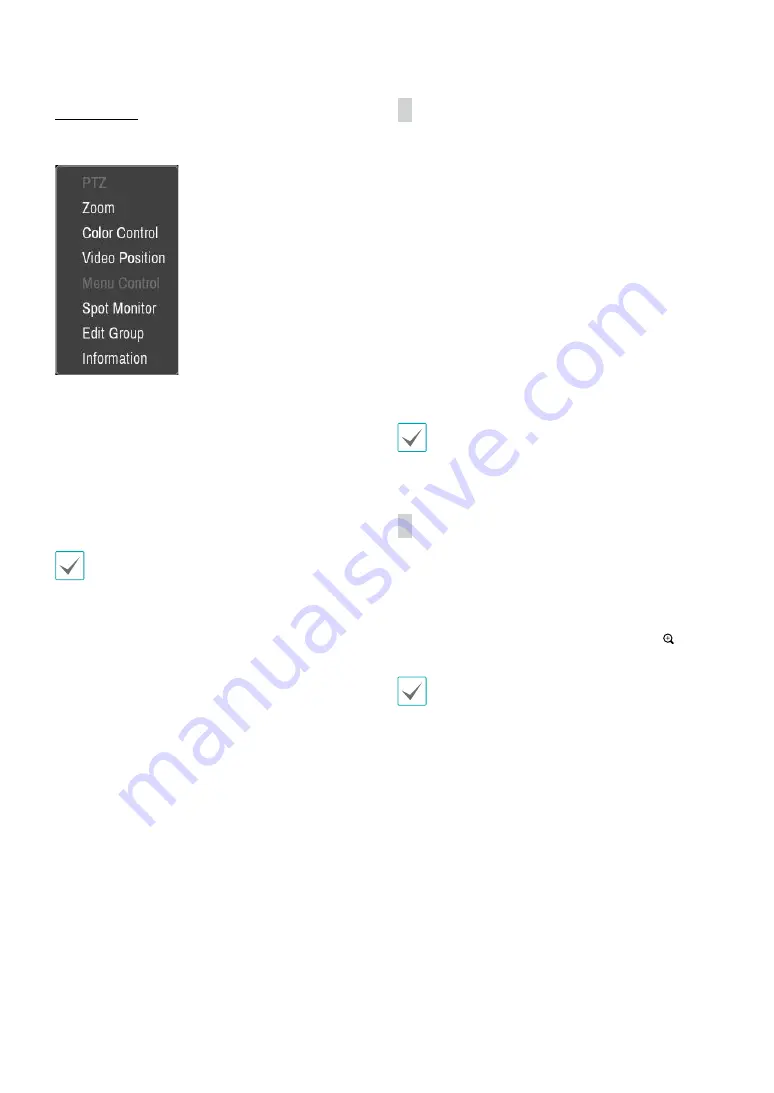
Right-click on the video display area to bring up the
camera menu.
•
PTZ:
Allows you to control the selected camera as long
as it has Pan, Tilt and Zoom capabilities.
•
Zoom:
Zooms the current image of the selected
camera on the screen.
•
Color Control
: Adjusts the camera’s color settings.
•
Video Position:
Adjusts the video position in left/right
directions.
•
Menu Control:
Adjusts the camera’s self-settings.
Menu Control
is supported only for the cameras that
use Pelco-C /H-C/ACP Protocol and support UTC (Up
The Coax) function.
•
Edit Group:
Enter to the Edit Group mode in the split
screen layout.
• Information:
Displays currently connected camera
information and recording status.
Edit Group
Edit Group lets you customize split screen pages in both
Live and Search modes.
1
While displaying a split screen page, select the
Edit
Group
option from the context menu. A yellow
border is drawn around the page. Use the mouse to
select a different page.
2
Use the mouse right button to select a camera.
Selected camera is then loaded on to the selected
page. Repeat to assign other channels to the page.
3
Select
Exit Group Edit
from the context menu to exit
the Edit Group mode.
Edit Group will terminate automatically after 15
seconds of inactivity.
Zoom
Select Camera
Menu > Zoom
and select a channel you
wish to zoom in on. A zoom frame will appear on the
selected channel. Use the arrow buttons to position the
frame. Press the
Play/Pause
button to cycle through
various zoom factors. When Zoom is activated,
icon is
on the status bar located on the bottom of the system.
•
In Full Screen mode, activating Zoom automatically
selects the current channel.
•
To restore the channel to normal size, press the Exit
icon from the Menu. The available enlargement ratio
is different from camera mode.


