background image

Part 2 - Configuration

62

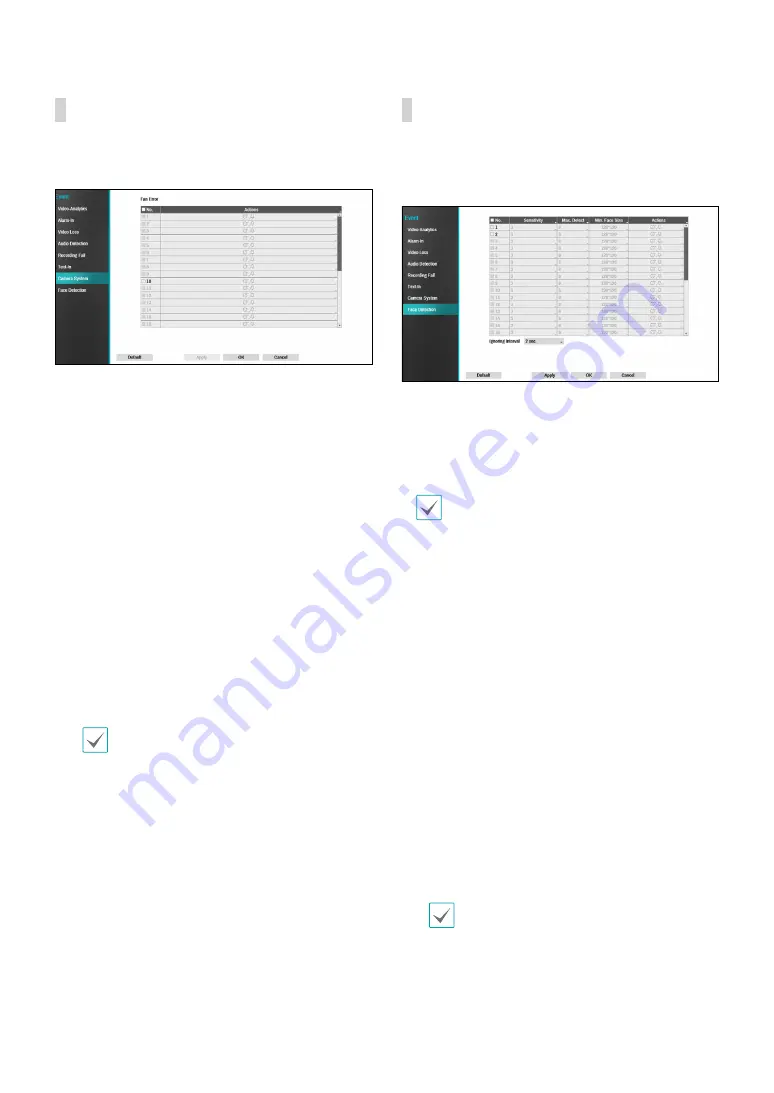
Camera System

The event occurs when the fan has stopped in the fan 
mounted camera.


No.

: Select which cameras to apply Fan Error to.


Actions

: Specify which actions to take when a Fan 

Error event occurs.


Record

: Specify which cameras to begin linked 

recording on when an event occurs. If the schedule 
is set to 

Event

 or 

Time & Event

 mode, the selected 

cameras will begin linked recording when an event 
occurs.


Alarm-Out

: Designate event-triggered alarm-out 

channels (each for the NVR and camera) and beeps.


Notify

: Configure to be notified of events by Mail, 

LAN1 through 5, SNS, Push, and/or Alert Window.


EventUpload: 

Uploads the video clips when an 

event occurs.


PTZ

: Moves the PTZ camera to a specific preset 

position when an event occurs.


Event Monitoring: 

Selects the cameras to monitor 

when an event occurs.


In order to use the Callback feature, the NVR 
must be registered on the remote program.


In case of the camera that not supports camera 
system event, the camera system feature will 
be disabled.

Face Detection

When face detection event occurs in the selected 
camera, the area that the face is detected displays on 
the screen.


No.

: Select which cameras to apply Face Detection to.


Sensitivity

: Set sensitivity settings between 1 (Low) 

and 5 (High).


Max. Detect Count

: Set the maximum detected 

number of face as 8 or 32.

When you set the Max. Detect Count as 32, the 
sensitivity feature will be disabled.


Min. Face Size

: Select 120 x 120, 150 x 150, 180 x180, 

210 x 210 or  240 x 240.


Actions

: Specify which actions to take when a Face 

Detection event occurs.


Record

: Specify which cameras to begin linked 

recording on when an event occurs. If the schedule 
is set to 

Event

 or 

Time & Event

 mode, the selected 

cameras will begin linked recording when an event 
occurs.


Alarm-Out

: Designate event-triggered alarm-out 

channels (each for the NVR and camera) and beeps.


Notify

: Configure to be notified of events by Mail, 

LAN1 through 5, SNS, Push, and/or Alert Window.


EventUpload: 

Uploads the video clips when an 

event occurs.


PTZ

: Moves the PTZ camera to a specific preset 

position when an event occurs.


Event Monitoring: 

Selects the cameras to monitor 

when an event occurs.


In order to use the Callback feature, the NVR 
must be registered on the remote program.


In case of the camera that not supports face 
detection event, the face detection feature will 
be disabled.

Содержание DR-6100P Series

Страница 1: ...Powered by Network Video Recorder Operation Manual DR 6100P Series DR 4100P Series DR 6200P Series DR 4200P Series...

Страница 2: ...iar with its use seek technical assistance from their retailer regarding product installation and use If you need to disassemble the product for functionality expansion or repair purposes you must con...

Страница 3: ...bjects have fallen into the equipment C If the equipment has been exposed to rain or water D If the equipment does not operate normally by following the operating instructions adjust only those contro...

Страница 4: ...INTERFERENCE AT THEIR OWN EXPENSE WARNING CHANGES OR MODIFICATIONS NOT EXPRESSLY APPROVED BY THE PARTY RESPONSIBLE FOR COMPLIANCE COULD VOID THE USER S AUTHORITY TO OPERATE THE EQUIPMENT THIS CLASS O...

Страница 5: ...espective owners The information in this manual is believed to be accurate as of the date of publication even though explanations of some functions may not be included We are not responsible for any p...

Страница 6: ...egistration Mode 20 Login 20 Live Menu 22 Zoom 24 PTZ Control 24 Dewarping Control 24 Event Monitoring 26 Covert Camera 26 Context Menu Access 26 Edit Group 27 Video Recording 27 Panic Recording 27 Au...

Страница 7: ...2 Stream 49 Audio 50 SD Card 50 Upgrade 51 Record Setup 51 General 51 Schedule 52 Pre Event 54 Smart Failover 54 Event Setup 55 Video Analytics 55 Alarm In 59 Video Loss 59 Audio Detection 60 Recordin...

Страница 8: ...nitor 75 Status Setup 75 Event 75 Storage 76 Network 77 Part 3 Search 79 Time Lapse Search 79 Context Menu 83 Motion Search 83 Text In Search 84 Clip Copy 85 Print 86 Event Log Search 86 Thumbnail Sea...

Страница 9: ...Setup Wizard only appears during initial booting When you login as an administrator account after initial booting you can use Wizard to go to Live menu and select Wizard 1 Select a system language Se...

Страница 10: ...Recording Profile High Longer Recording Time Priority Profile Standard Recording resolutions used under each recording method and record video quality setting are as follows HighVideo Quality Priority...

Страница 11: ...and then click Test to test the system s current network configuration This test must be performed before proceeding to the next step If the NVR is on a network connected to a network that has a DHCP...

Страница 12: ...Check the name s availability to complete the registration process The Finish button will then become activated You will be prompted with an error message if you do not enter a name for the NVR or ent...

Страница 13: ...gistration refer to Registration on page 40 Camera Scan Button You can scan and search and register cameras that were not detected automatically or third party cameras Pressing the Scan button display...

Страница 14: ...d via DHCP Dynamic Host Configuration Protocol If the camera is networked via DHCP connection to the camera may not be made properly depending on changes in the external network environment Advanced S...

Страница 15: ...e camera The range of 10 10 0 1 to 10 10 0 127 is not recommened because NVR system already has the IP addess 1 Select Scan to commence scanning Only cameras that are connected to the NVR via VIDEO IN...

Страница 16: ...cameras easily Export Exports the list of camera information on USB as a csv file Import Imports a camera information file csv file The user can edit a csv file directly A column indicates camera numb...

Страница 17: ...ation Initial registration other NVRs Registration X other NVRs Registration X 1 Screen Position Registration Status Identifies the camera s position in the video display area A blue background indica...

Страница 18: ...e if the camera has not been registered to the NVR Information is not indicated on the bottom of the screen for cameras already registered to the NVR and the Screen Position Registration Info icon is...

Страница 19: ...nges It is not possible to register a camera that has already been registered to a different NVR Diagnosis Process When the camera is registered to the NVR Self diagnosis runs automatically for the ne...

Страница 20: ...control or click on Login using the mouse 2 Select a user enter the password and then select OK There is no default password for the admin account Select admin and then OK without entering a password...

Страница 21: ...2 Enter Verification Code and select OK Select the question mark button at the bottom left corner of the screen to refer to the passoword settings instructions The password must be entered only with...

Страница 22: ...ccount ID is shown If in the logged out state the login icon is shown 2 Layout Used to change the screen layout to single screen corridor format 2x2 1 5 1 7 3x3 4x4 5x5 or 6x6 In order to use the corr...

Страница 23: ...are deactivated If there are no video signals If the page contains covert cameras If the user does not have permission to view feeds from the cameras 9 Select Camera Displays the selected camera in a...

Страница 24: ...Use the 1 2 3 4 5 6 and 1 2 3 4 5 6 buttons to zoom in out Use the 1 2 3 4 5 6 and 1 2 3 4 5 6 buttons to shift focus from nearby to far and vice versa Use the 1 2 3 4 5 6 button to load the preset wi...

Страница 25: ...pressing the Play Pause button and then SETUP button on the front panel This menu lists Speed Auto Pan and other advanced PTZ camera control options available for the camera Also selecting Point Move...

Страница 26: ...s are not shown Users that have a cover Covert Camera View are able to view both images from and status icons for all Covert 1 and Covert 2 cameras Context Menu Access While in Live mode press the rem...

Страница 27: ...rrectly as per information contained in Part 2 of this operation manual For more information on video recording settings refer to the Record Setup on page 51 Panic Recording Select Live or Search menu...

Страница 28: ...ameras also applies to video recording playback All Channel Playback 1 Press the Menu button while in Live mode 2 Select the Search Mode icon and then select Time Lapse Search Event Log Search or Thum...

Страница 29: ...cord Setup 4 Event Setup 5 Event Upload Setup 6 Device Setup 7 Network Setup 8 Notification Setup 9 Display Setup 0 Status Setup 2 Use the remote control s arrow buttons to select an option and then p...

Страница 30: ...using the virtual keyboard System ID Used to identify the NVR apart from other NVRs System ID is also used to control the NVR with the remote control The default System ID is 0 and can be changed to a...

Страница 31: ...For USB flash memory devices the NVR supports the FAT32 file format only Show System Log Displays a searchable list of 5 000 most recent system log entries For more information on types of system log...

Страница 32: ...Server s IP address or domain name or select and then choose a server from the list of registered time servers 3 Specify the server synchronization Interval 4 Select OK to apply and exit If you have c...

Страница 33: ...71 6 Configure Auto Login and Auto Logout settings 7 Select Apply or OK to exit Group names user names passwords and email can be entered using the virtual keyboard For more information on using the v...

Страница 34: ...Search modes Search Clip Copy The user who has permission for Clip Copy can perform Clip Copy If the user does not have permission Clip Copy is not allowed but only search is allowed Setup System Tim...

Страница 35: ...owing message will appear 2FA device registration is supported only via IDIS Mobile app The administrator account is required to configure this option The maximum number of device that can be registra...

Страница 36: ...R supports SATA2 HDDs Mirror The NVR suppports function that records the same data on the two disks at the same time You can set up mirroring by selecting Storage in the System menu and then selecting...

Страница 37: ...click OK When you click OK all data on the destination disk will be erased After resynchronization is complete mirroring will start When you try resynchronizing the disk that has never tried mirrorin...

Страница 38: ...the disk reaches the specified capacity 80 to 99 Disk Full Generates an event when all disks reach their maximum capacity Disk Bad Generates an event when the specified percentage of the disk becomes...

Страница 39: ...ate and time FailOver Whene a problem is detected on the target device click the Run the failover button to resolve the problem Target Device Selects which device to run the failover Channels Select t...

Страница 40: ...be visible for scanning and registration by the NVR For more information about supported network devices and models contact your retailer The supported scan modes may vary depending on protocol select...

Страница 41: ...Not registered indicates the camera is not registered to the NVR Login If the password is set or you want to register third party cameras registering a device requires an authorized user login 1 Selec...

Страница 42: ...eal Time Mode the remote streaming IPS can be low Advanced Setup Configure security and other advanced camera settings Video Adjust the camera image sensor settings such as white balance and exposure...

Страница 43: ...et number and then enter a name This saves the current preset under the specified preset number and name Go to Select a preset from the list and then click Go to to move the camera to the selected pre...

Страница 44: ...ur profile Select Apply after setting up a preset scan pattern or tour profile to see images from the concerned camera on the left side of the screen Selecting Apply or OK displays a popup screen that...

Страница 45: ...the lighting conditions and adjust the setting automatically Selecting Manual allows the user to adjust the setting manually Sharpness Adjust the sharpness level Adjust the contours to make the images...

Страница 46: ...or enable the Defog feature When it is enabled image with a fog is adjusted IR Strength Adjust the IR LED s brightness level Select a brightness level manually between 0 darkest and 100 brightest Sma...

Страница 47: ...arer the image e g Dark parking lot entrances and gas station entrances at night Local Exposure compensates for the bright light coming from incoming vehicle headlights and makes it possible to see th...

Страница 48: ...e area where the camera is located 1 30 to 1 8000 Select Apply after setting up a camera to see images from the concerned camera on the left side of the screen Selecting Apply or OK displays a popup s...

Страница 49: ...Remote greater than 2x2 stream depending on the remote program s live screen layout Record Video Profile Set up 4 recording quality profiles Video Profile Select Live 1 Live 2 Remote or Custom availa...

Страница 50: ...When the connection is recovered again the recorded video on SD memory card will be recorded on the NVR The port number can also be entered using the virtual keyboard For more information on Smart Fa...

Страница 51: ...st first If Recycle is disabled recording will simply stop when the recording disks reach their maximum capacity Record Audio The camera will record audio along with video Event Record Dwell If linked...

Страница 52: ...hr If you do not wish to disable the feature automatically select No Limit Video Profile Select a recording profile value for Panic Recording Schedule Simple Mode Advanced Mode Disabling Schedule On s...

Страница 53: ...the video profile selected for time under Setup When an event occurs the icon changes into icon and recording commences as per the video profile selected for events under Setup Channel Select which c...

Страница 54: ...sage will appear even in Time Event mode Smart Failover When the connection is recovered again Smart Failover Service enables the data recorded on SD memory card to record on NVR Recording Failover Se...

Страница 55: ...l blocks using the Camera buttons You can use the mouse to drag the zone and then select clear or reverse the selection From the zone selection screen press the button on the remote control or right c...

Страница 56: ...eeps Notify Configure to be notified of events by Mail LAN1 through 5 SNS Push and or Alert Window EventUpload Uploads the video clips when an event occurs PTZ Moves the PTZ camera to a specific prese...

Страница 57: ...ht click on the mouse to open up the Zone Setup menu Select Confirm the block selection in the selection window Clear Clear the block selection in the selection window Reverse Clear the blocks selecte...

Страница 58: ...s Adjust the time frame in 15 minute increments Times outside the specified range will be assumed as nighttime by the system Tampering No Select which cameras to apply Tampering to Sensitivity Set to...

Страница 59: ...pecify how long video loss has to last in order for it to be considered as an event When the video loss is not detected for the specified duration of time it will not be considered as an event Actions...

Страница 60: ...produce event log entries or issues remote notifications regarding audio detected during the specified time following the initial audio detection Set a value between 1 sec and 5 secs or choose Never...

Страница 61: ...strings designated under Transaction Start Transaction End Line Delimiter and Ignore String Case Sensitive does not apply to control strings Time Out Once Time Out has been enabled the system will as...

Страница 62: ...cted camera the area that the face is detected displays on the screen No Select which cameras to apply Face Detection to Sensitivity Set sensitivity settings between 1 Low and 5 High Max Detect Count...

Страница 63: ...oose Never EventUpload Refer to Menu Use on page 29 for basic information on using the Setup menus Schedule Click the icon at the bottom of the list to add an event to the schedule Day Select differen...

Страница 64: ...NetFS setup screen in the Network menu Uploade File Select between CBF and MP4 When you select CBF the NVR will upload an event detected video clip to the FTP site When you select MP4 the NVR will at...

Страница 65: ...out when an event occurs On Alarm out is always on Off Alarm out is always off Channels Configure alarm out port and beep settings Remote Control Port Select None RS232 or RS485 Click the Setup butto...

Страница 66: ...ect for use in Open SSL Toolkit http www openssl org IDIS Web If you wish to use IDIS Web select IDIS Web Use IDIS Web Service Select IDIS Web IDIS Web Port and choose a port number between 1024 and 6...

Страница 67: ...anic recording This is the same as pressing the PANIC button on the front panel or the remote control F2 Press the F2 key to reset all NVR outputs while the alarm has been activated including the buil...

Страница 68: ...er the IP address of the NVR 2 Adjust the frequency of the ping test 3 Select Run to do the test The test result is displayed 4 Select Close to exit If using a firewall select Change Port to change th...

Страница 69: ...ll be registered on the FEN server You will not be able to save FEN settings unless you click on the Check button next to the FEN Name field and check the entered name s availability You will be promp...

Страница 70: ...Use Select the usage for the NetFS feature N A Disables the NetFS feature ALL Enables the NetFS feature Upgrade Allows you to use the upgrade file that was uploaded to the NetFS site Setup Allows you...

Страница 71: ...er than ALL or Clip Copy the FTP notification function will be disabled Video display on certain media players may not be smooth depending on the network status RTSP service might not be supported dep...

Страница 72: ...mail account Select Recipient and then enter the mail address and server information The recipient s mail address must be in the correct email format and contain the symbol Select the icon to attach e...

Страница 73: ...Address entered under Sender must be in the correct email format and include the symbol If user authentication is required by the SMTP server select Use and then enter the User and Password informati...

Страница 74: ...atus Date and Time Displays the date and time Camera No Displays the camera number on the upper left corner of the camera screen Title Displays the camera name on the upper left corner of the camera s...

Страница 75: ...e resolution manually regardless of the resolution supported by the monitor Resolution Select 1920 x 1200 1920 x 1080 1680 x 1050 1600 x 1200 Event Monitoring On With Event Monitoring enabled the came...

Страница 76: ...when the disk becomes 100 full For more information refer to the Monitoring on page 37 Fan Error Event is indicated when the cooling fan cannot reach a certain RPM or fails for longer than 50 seconds...

Страница 77: ...designated by the user Generates a system event S M A R T N A A disk that does not support S M A R T Good A disk with normal S M A R T status Bad A disk with abnormal S M A R T status Possibility of d...

Страница 78: ...tes a camera or a network switch is connected indicates neither is connected Power Consumption If receiving power from the NVR the actual amount of power consumed by each camera is indicated under eac...

Страница 79: ...5 1 Select Setup while in Search mode to display a menu from which you can select Control Area 2 Press Setup once more to move the Control Area 3 In 2 seconds after moving the Control Area the Control...

Страница 80: ...vates the middle screen section Use the arrow buttons to select a camera 3 Right Activates the control buttons on the right Use the arrow buttons to select Bookmark Play Calendar Search and other cont...

Страница 81: ...On Off Setting On displays video on the camera screen in its original ratio 4 Alarm Pressing this button while the alarm has been activated resets all NVR alarm outputs including the built in buzzer...

Страница 82: ...ecording from that date paused state Selected date is highlighted in orange 4 Event Search Selecting Event Search provides Motion Search and Text In Search options Motion Search Perform Motion Search...

Страница 83: ...n selecting Refresh Recording Data Bar Colors Blue Time Lapse Recording Purple Event Recording Yellow Pre Event Recording Red Panic Recording Green Faulty recording due to a temporary disruption in de...

Страница 84: ...gh Min Blocks The Min Blocks option is available with Motion Search only Once all the options have been configured select Search Select search results entry to display the video recording on the left...

Страница 85: ...he information is added to the file name Selecting Start displays a calculation on the size of the data to be copied Check the calculation and then select Continue to proceed While Clip Copy is in pro...

Страница 86: ...ck the recording Use the drop down menu above to load recordings from other cameras Selecting the specific event displays the screen to be stationary By clicking the button on the camera right you can...

Страница 87: ...ding If no camera is selected only the events with no linked recording camera are searched Thumbnail Search Select Search Mode Thumbnail Search to bring up the thumbnail Search window Click on the lef...

Страница 88: ...00 6 00 Segment 1 Segment 2 When searching overlapped video recordings you can choose a specific point in time or a time frame If you use the Go to the Date Time option and select a point within the...

Страница 89: ...rnet Explorer Ver 7 0 or above 32 Bit IDIS Web only works with Microsoft Internet Explorer and will NOT work with other browsers IDIS Web does not work in Microsoft Windows 8 metro UI 1 Launch Interne...

Страница 90: ...low websites to open windows without address or status bars Enable To use IDIS Web on Microsoft Windows Vista or above launch Internet Explorer by right clicking on the icon and selecting the Run as a...

Страница 91: ...changed 5 Click to print the current video screen using a printer connected to the computer 6 Click to save the current video screen as an image file 7 Click TYPE 1 to configure rendering mode and OS...

Страница 92: ...via microphone Enables playback of audio from the remote locale on speakers Enables two way audio communication with the remote locale Disables audio transmission If the remote locale connected to sup...

Страница 93: ...s version 3 Displays time information of the video recording from the remote NVR 4 Select the desired mode 5 Click to print the current video screen using a printer connected to the computer 6 Click...

Страница 94: ...ottom displays recording data information for the selected date Select a point in time to display video from that moment If multiple recordings are available for the selected point in time you can sel...

Страница 95: ...stem If no name is entered for the camera the name used at the remote locale is shown on the screen Enable Audio If audio was recorded with the video enabling this option plays audio upon playback lim...

Страница 96: ...F FEN 69 71 I IDIS Web 89 96 L Live Mode 22 Login 20 M Motion Search 83 Mouse 30 O OSD 74 P Panic Recording 27 Pre Event 54 Print 86 PTZ Control 24 R Recording 27 Record Setup 51 S Search 79 Stream 49...

Страница 97: ...IDIS Co Ltd For more information please visit at www idisglobal com...

Отзывы: