78
Time-Lapse Search
While in Live mode, select the
Search Mode
icon
and select
Time-Laspe Search
,
Event Log Search
or
Thumbnail Search
.
When using
Use 2FA,
you can access the search
menu only after the mobile device on NVR must be
authenticated. For more information on 2FA function,
refer to the
.
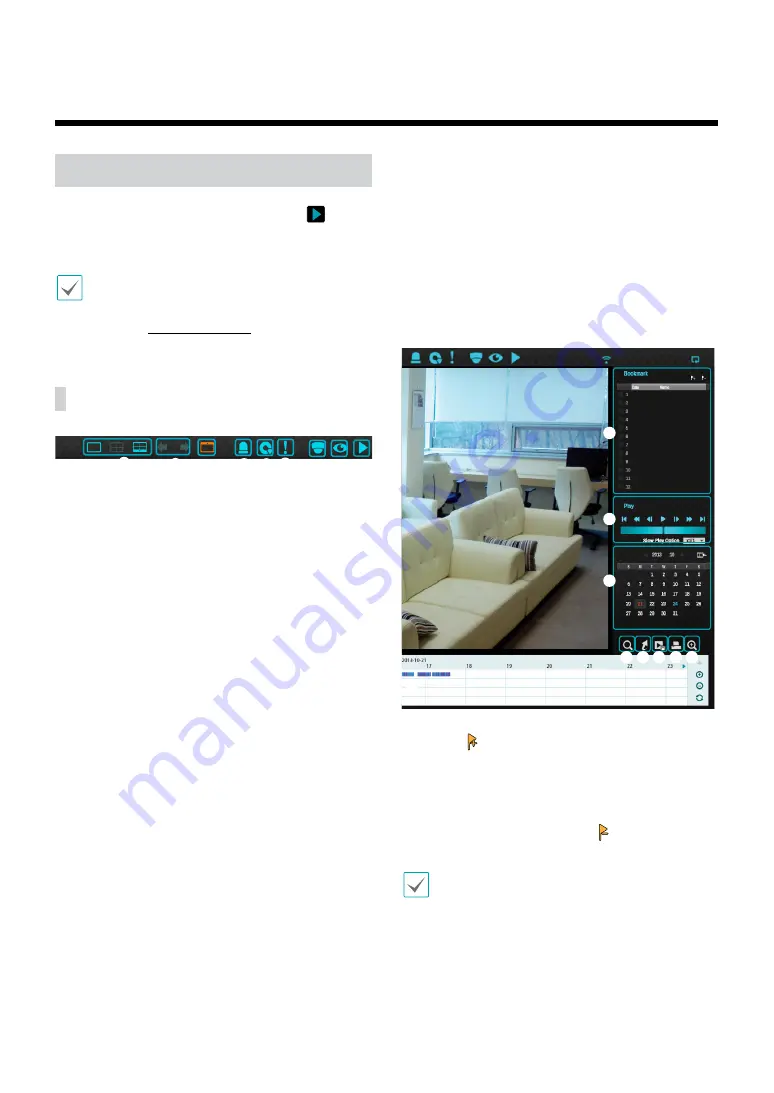
Search Menu
1
2
3
4
5 6
7 8 9
1
Layout
Used to change the screen layout to single screen,
corridor format, 2x2. In order to use the Corridor
Format feature, Corridor Format (Display Setup - Main
monitor - Use Corridor Format) must first be enabled.
2
Previous/Next Group
Loads the previous/next screen group.
3
Display
●
OSD On/Off
: Enables/disables the OSD feature.
●
Original Ratio On/Off
: Setting On displays video
on the camera screen in its original ratio.
4
Alarm
Pressing this button while the alarm has been
activated resets all NVR alarm outputs, including the
built-in buzzer.
5
Database
●
Record
: Search recording data contained in the
main recording device.
●
Other
: Search data recorded while disks used in
other systems were connected.
6
Panic Record
Use the Panic Record feature.
7
Camera
Select a camera channel and display it as a single
screen.
8
Live Mode
Activates Live mode.
9
Search Mode
Search by changing Time-Lapse Search, Event Log
Search and Thumbnail search.
CAM3
1
2
3
4 5 6 7 8
9
1
Bookmark
Select the
icon to add a bookmark to the current
playback position.
Select a bookmark from the Bookmark setup window on
the right side of the Time-Lapse Search mode screen to
move to the registered playback position.
Select Bookmark list and then the
icon to delete the
corresponding bookmark.
The maximum number of bookmarks that can be
saved is 12.
Part 3 - Search


