Chapter 2
Test Setup Procedures
STANDARD CABLE ID
If the Simple Cable ID option is not activated in the Preferences screen under Autotest
Preference, you have further options available to set the required cable.
Setting a Cable ID
1.
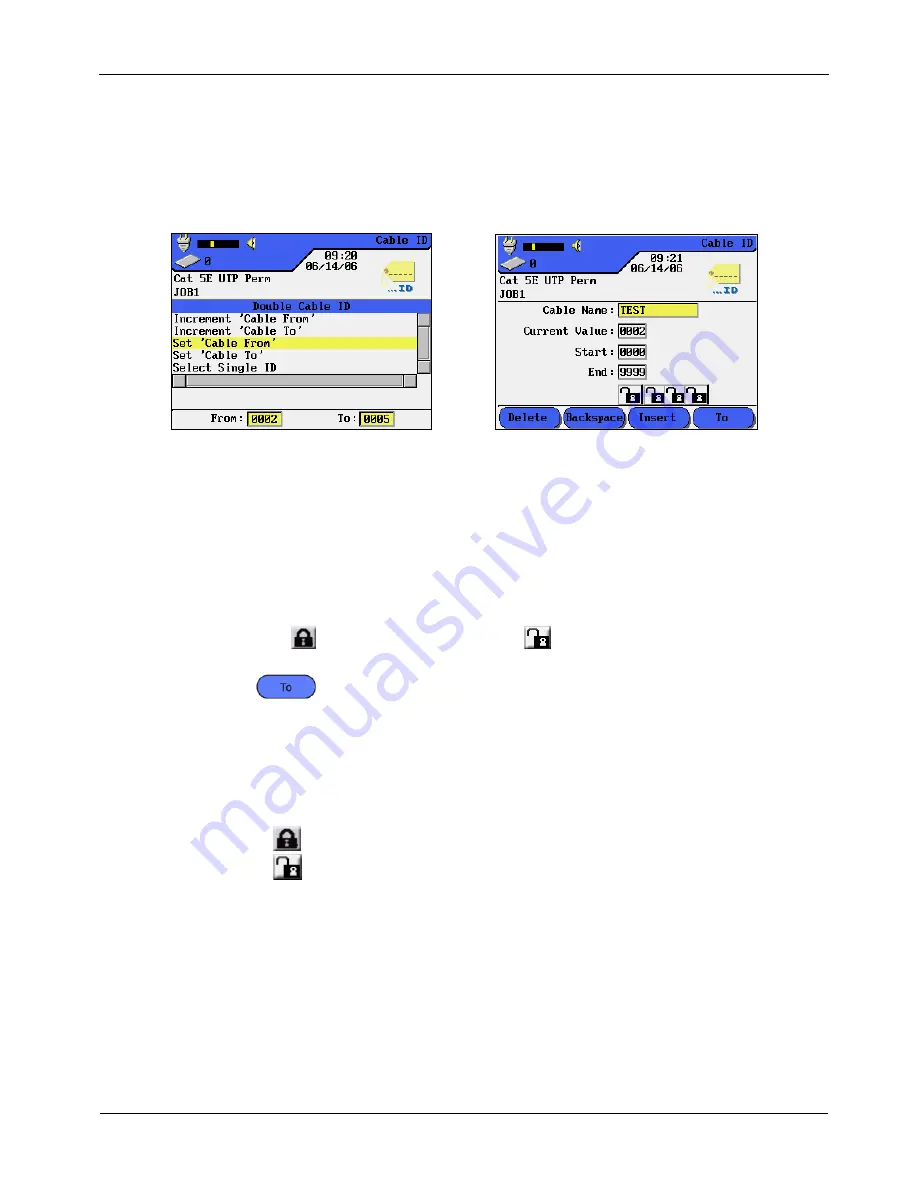
In the Cable ID screen, highlight Set ‘Cable From’.
Figure 2-17: Cable ID Screens
2.
Press ENTER to open the screen.
Note: The screen that appears will reflect the most recently assigned Cable ID (either
Single or Double). Double ID is used in this example.
3.
Enter the following parameters as required:
a.
‘Cable From’ name, twelve (12) characters maximum.
b.
Current, Start, and End point of the counter, four digits each. After reaching the
End point the counter will be reset.
c.
Select the
icon to activate a lock and
to activate the Auto Increment
feature for a character.
¾
Select
to go to the ‘Cable To’ screen. Repeat steps a, b and c.
4.
After entering the desired ‘Cable From’ and ‘Cable To’ names and parameters,
press ENTER to save and return to the Main Cable ID screen.
Test Counter
In addition to the cable name, you can assign up to four characters to identify
individual tests.
¾
The icon
below a digit designates a non-incrementing field.
¾
The icon
indicates an automatically incrementing field.
The default numbering scheme is set to starts counting from 0000 and ends at 9999.
Custom numbering schemes may be used. Table 2-2 and Table 2-3 contain some
examples for counting Single and Double IDs.
2-11
www.vemco.pl
Содержание FIBERTEK
Страница 1: ...w w w v e m c o p l ...
Страница 132: ...Chapter 7 LANTEK REPORTER Software 7 21 w w w v e m c o p l ...


