Before you start
www.idappcom.com
Thank you for purchasing a H
IPS
Y from Idappcom!
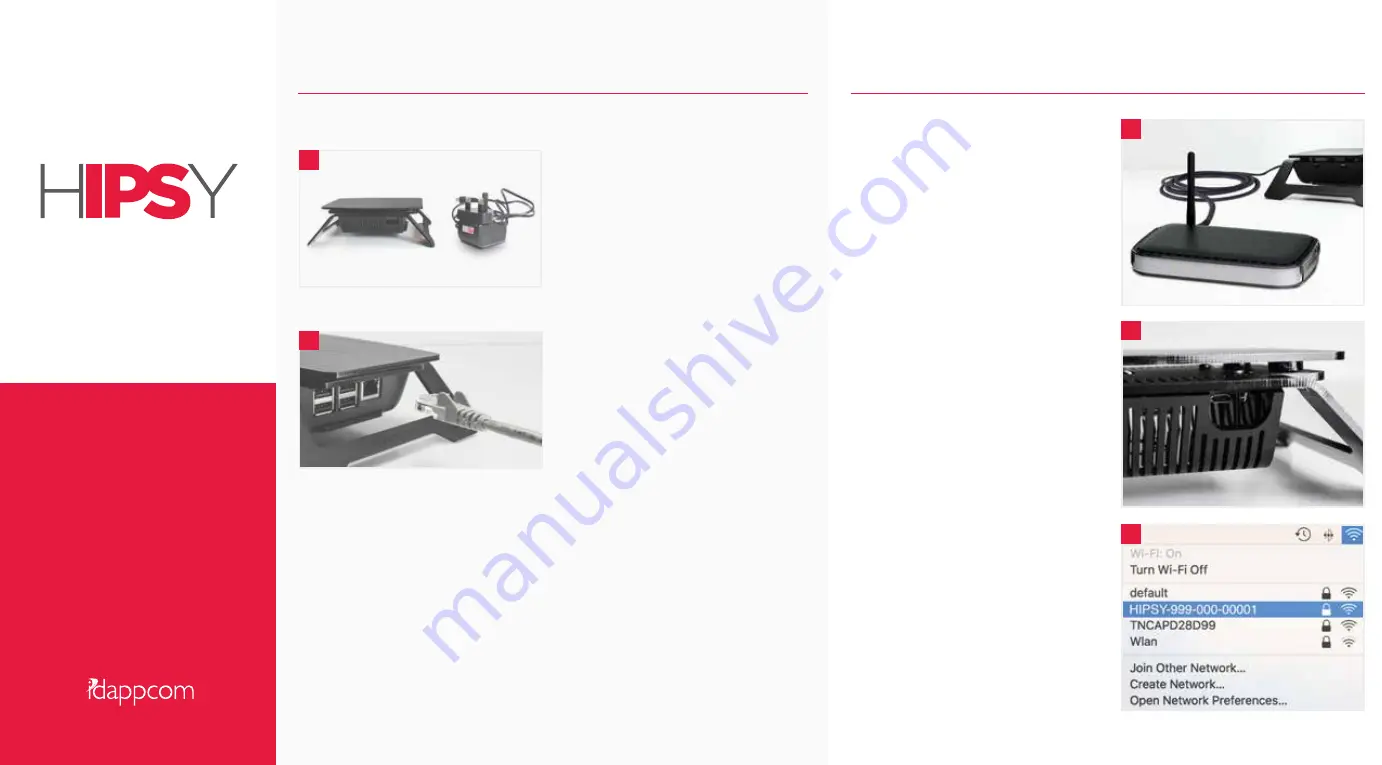
Within your box you will find the HIPSY and a power supply.
The power supply has a micro USB
connector to connect to the HIPSY.
(See 'Connecting your HIPSY', overleaf)
About Your HIPSY
Your HIPSY device is designed to provide an extra layer of security for all your Wi-Fi enabled
devices that connect to the internet. The HIPSY protects connected devices utilising a shared
internet router from Cyber Intrusion and Attack. Idappcom Recommends using your HIPSY in
addition to up to date Anti-Virus Software and Firewall.
How it works
Your HIPSY will automatically protect your Wi-Fi enabled devices once connected to your HIPSY.
It will block attempts to compromise your online security. Where you would normally connect
your Wi-Fi enabled devices to your broadband router’s built-in hotspot, you will instead connect
to the HIPSY’s Wi-Fi access point. The HIPSY now gives you the same industry-standard online
Cyber Intrusion Protection as large business systems do.
Getting Started
This guide provides all you need to know to get you set up in just a few minutes. If you experience
any difficulty our technical team are standing by to answer your questions. Further information is
available on our website
http://www.go-ipsy.com
Y
P
H
S
25626 - 06/0716 - IDAPcomm
Use a standard Ethernet cable to connect your HIPSY to your router.
Please allow sufficient cable length to
position the HIPSY in the optimum location
for the best Wi-Fi signal strength around
your home or office.
Multiple HIPSY devices can be deployed to
provide different protection levels and to
cover larger areas where wireless signals may
be weak.
Connecting your HIPSY
1.
The HIPSY first needs to be connected to
your router using a spare Ethernet socket.
These are usually located at the back of the
router
(see figure 1)
. You will need an Ethernet
cable long enough to allow the HIPSY to be
positioned in the optimum location within the
home to ensure a strong Wi-Fi signal to as
many wireless devices as you wish to protect.
NB
.
You can deploy multiple HIPSYs throughout
the home to increase signal strength if needed.
This has the added benefit of allowing the
creation of different user zones including
adding parental controls to protect young
family members.
2.
Once the HIPSY is connected to the router, it is
ready to be powered up using the power
supply provided
(see figure 2)
. After plugging in
please wait until it completes the process of
initialising itself and starts broadcasting a Wi-Fi
signal. This should only take a few moments.
3.
When the HIPSY has finished initialising, your
computer should now be able to connect to its
Wi-Fi access point. Select the HIPSY’s SSID
(Service Set Identifier - the HIPSY's broadcast
access point name) from the list of available
access point names, and enter the password
(see figure 3)
.
NB.
The HIPSY’s default access point name is
the same as its 'Hostname' (usually in the form:
HIPSY-000-000-00000) and the default wireless
password is the same as its ‘Serial Number’,
which are both printed on the underside of the
device.
Recommendation:
You may have other wireless access
points in your list of available networks. For all but the
HIPSY, un-tick ‘connect automatically’ where that is an
option.
The HIPSY will now be acting as your main Wi-Fi
access point for all the Internet enabled devices that
you wish to protect.
2
1
1
2
3
Quick Start Guide


