nGauge AFM User Manual
6
2.3 nGauge AFM Components
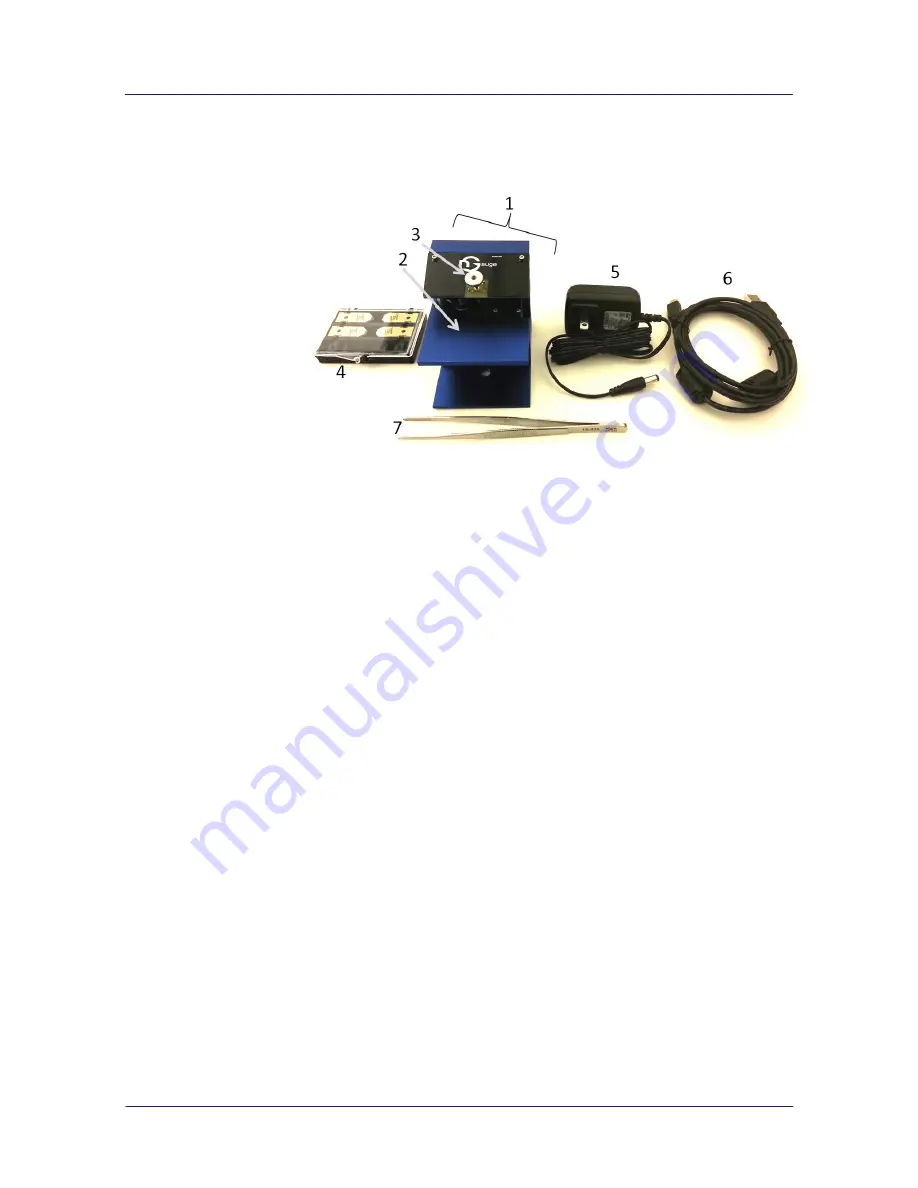
The nGauge AFM system includes all of the following components. A computer (not included)
with a USB port is required.
1.
Stage
2.
Sample Platform
3.
Thumb Nut
4.
AFM Chips
5.
Power Supply
6.
USB Cable
7.
Tweezers
2.4 nGauge AFM Capabilities and Limitations
The nGauge AFM operates in tapping mode, in which the cantilever oscillates at its resonant
frequency and makes intermittent contact, or “taps” the sample surface. It can scan areas of up to
20x20x10um in X, Y, and Z respectively with <1nm RMS Z noise.
Any solid sample can be imaged, including both conductive and non-conductive, but the AFM
cannot operate in liquid and cannot image liquid samples. Some samples, particularly polymers, may be
difficult to image due to surface charging.
3.0 Setup
3.1 Where to set it up
The nGauge AFM is small, simple, and portable, and can be set up just about anywhere.
However, for best results, it is recommended that you adhere to the following guidelines:
Flat surface
: The system should be set up on a flat, level surface, like a desk or tabletop, with
enough space to ensure that the stage does not get bumped or moved while imaging.
Vibrations
: The unique design of the nGauge AFM minimizes the effects of common sources of
vibrations, such as those caused by people walking by, doors opening and closing, and building
vibrations. However, it is best to set the system up on a solid, stable surface away from as many
sources of vibration as possible.
Air Drafts
: The system is not immune to air drafts and should be set up away from air vents,
drafty windows, etc. If air drafts are unavoidable and present a significant problem, a box or
enclosure around the system may be required.


