


5
MAINTENANCE
5-4
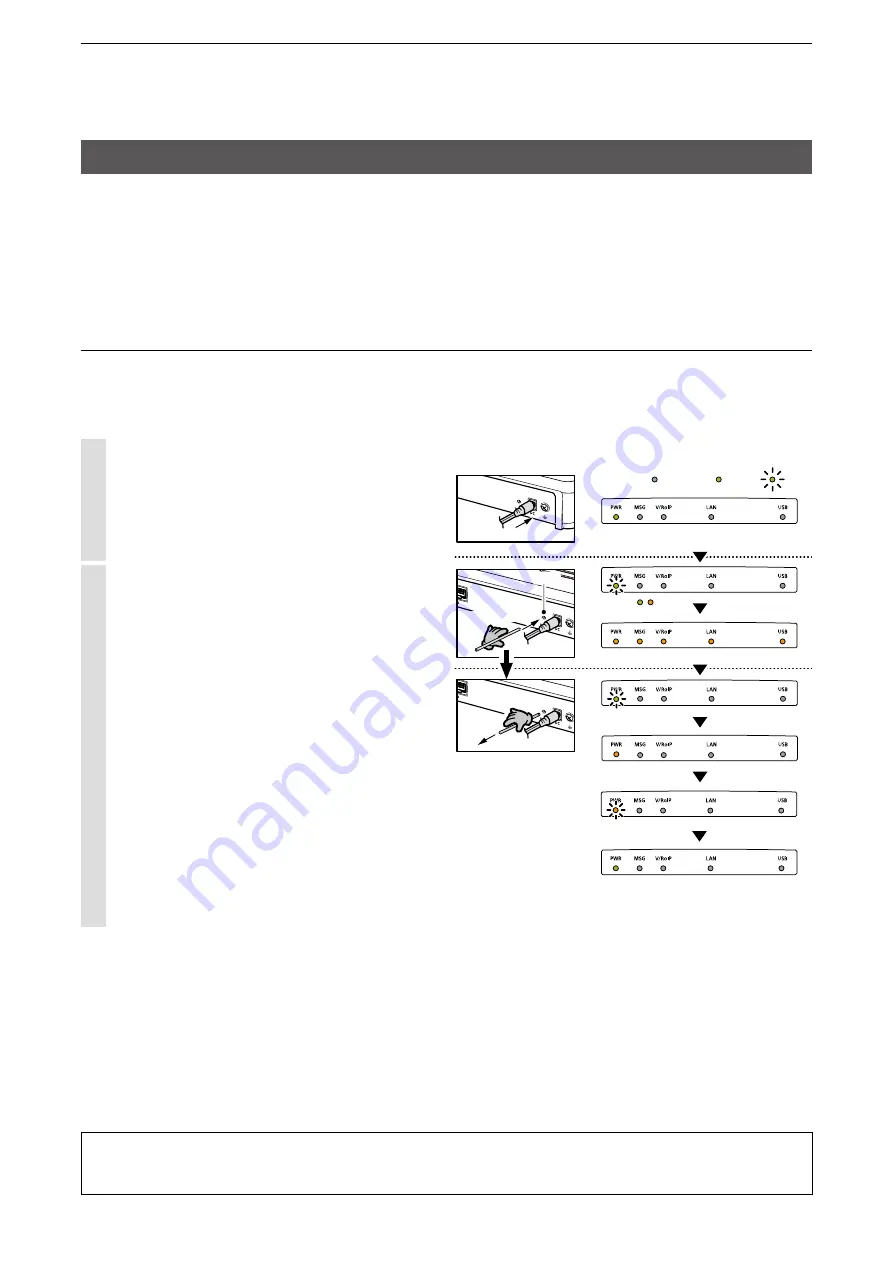
:Black out
<Status>
[LED indication]
[Operation]
:Light
:Blink
Turn ON the power
Use
a pin
Power
adapter
[INIT]
Push in and hold
Release
Rear
panel
Lights
(Green)
Blinks
(Orange)
Blinks
(Green)
Blinks
(Green/Orange)
Lights
(Green)
All LEDs light (Orange)
Lights
(Orange)
/
3. How to initialize the settings to the factory default
There two ways to initialize the IP1000C.
L
Set the IP1000C’s IP address again after the IP1000C is initialized.
A: Using the <INIT> button.
If you cannot access the IP1000C setting screen, initialize the IP1000C by pushing the <INIT> button.
B: Initialize on the IP1000C’s setting screen.
If you can access the IP1000C setting screen, initialize the IP1000C on the setting screen. (p. 5-5)
A: Using the <INIT> button
Initializing clears all the settings.
L
If the network part of the PC IP address is different from that of the IP1000C, you cannot access the IP1000C setting
screen. In such case, change the PC IP address according to the IP1000C address.
See the supplied “Precautions” leaflet for details.
1
Disconnect all cables from the IP1000C, and
then connect the power adapter.
• Verify that the [PWR] indicator lights green.
2
Push in and hold [INIT] with a pin on the rear
panel until all indicators on the front panel light
orange, and then release.
L
When the initialization has been completed, the
[PWR] indicator lights green.
About the initializing condition
You can restore all the IP1000C’s settings. The IP1000C’s IP address is set to “192.168.0.1,” when
initialized. Set the PC’s IP address to “192.168.0.xxx.” (You can set xxx to any number from 2 to 254.)