PC Connection
16
About Partitioning the Hard Disk Drive
Partitioning the Hard Disk Drive under Windows Vista/XP/2000
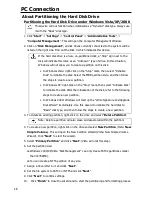
This device will not function when initialized as a “Dynamic” disk type. Always use
it with the “Basic” disk type.
1.
Click “
Start
”
“
Settings
”
“
Control Panel
”
“
Administrative Tools
”
“
Computer Management
”. This will open the Computer Management Window.
2.
Click on “
Disk Management
”, all disk drives currently connected to the system will be
listed on the right side. Find out the Disk # which indicates this device.
If the hard disk drive is a new, un-partitioned disk, a “Stop” sign next to the
disk will indicate this drive as an “Unknown” type of drive. In this situation,
Windows will not allow you to create a partition on this disk.
•
In Windows Vista: right-click on the “Stop” mark, then select “Initialize
Disk” to initialize the disk. Select the MBR partition style, and then follow
the steps to create a new partition.
•
In Windows XP: right-click on the “Stop” mark, then select “Initialize Disk”
to initialize the disk. After the initialization of the disk, refer to the following
steps to create a new partition.
•
In Windows 2000: Windows will start up the “Write Signature and Upgrade
Disk Wizard” immediately. Use this wizard to initialize the hard disk to
“Basic” disk type, and then follow the steps to create a new partition.
3.
To delete an existing partition, right-click on the drive and select “
Delete Partition
”.
Note: Delete a partition will also erase all data stored within the partition!
4.
To create a new partition, right-click on the drive and select
New Partition
(Vista:
New
Simple Volume
). This will open the New Partition Wizard (Vista: New Simple Volume
Wizard). Click “
Next
” to start the wizard.
5.
Select “
Primary
Partition
” and click “
Next
”.(Vista will omit this step).
6.
Set the partition size:
Windows 2000/XP/Vista “Disk Management” can only create FAT32 partitions smaller
than 32768MB).
You can create a NTFS partition of any size.
7.
Assign a drive letter to it and click “
Next
”.
8.
Set the file system to FAT32 or NTFS and click “
Next
”.
9.
Click “
Next
” to confirm settings.
10.
Click “
Finish
” to close the wizard and to start the partitioning and formatting process.
Содержание SI-707139
Страница 1: ......
Страница 2: ......
Страница 4: ......
Страница 8: ...The Remote Control 4 22 VOL Volume down ...

