TIMER & DIMMER FUNCTION DESCRIPTION
1. Switch setting: Press the on/off button to switch the light on or off. If the
power supply is disconnected, the timer and dimmer function must be
reset and the brightness will be 100%.
2. Brightness setting: To dim the light, press the dimmer button. The bri-
ghtness of the lamp will go from 100% to 1%, and the other way around
from 1% to 100%. Release the button when the required brightness level
is reached.
3. Timmer setting: To use the use cycle timer, select the required time 6H,
8H, 10H, 12H and a green light will appear on the control panel to indica-
te the selected time. The screen will light up / switch off automatically at
the same time on the following day. For example: the light comes on at
8.00am and the timer is set to 12hrs, it will switch off at 8.00pm, and will
repeat this operating cycle every day. The timer must be disconnected
by hand.
INSTALLATION
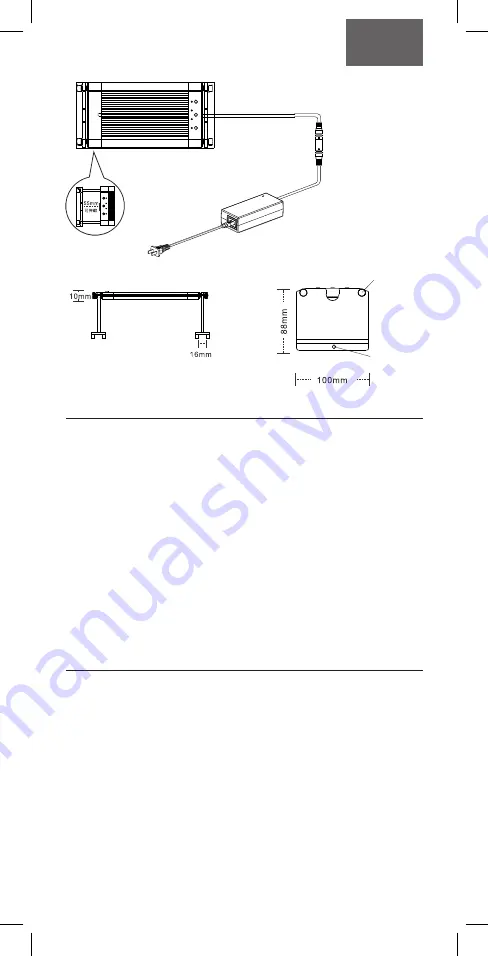
Please first check that the products are complete:
Lamp unit x 1, adapter x 1, power cord x 1, acrylic support x 2, crossbar x 4,
nut x 4, plastic bolt x 2, manual/warranty card x 1.
First connect the power cord, the power adapter, and the power cord for
the lamp unit. Plug the power cord into a socket and test whether the lamp
works normally and lights up correctly. If it does not light up normally, inform
the store where it was purchased.
Crossbar adjustment: adjust the appropriate width, placing the lamp and its
supports on the tank, and then adjusting the acrylic support to the required
width.
Location: after adjusting the supports to the required width and inserting its
base onto the edge of the aquarium glass, fit the plastic bolts into the hole in
the supports to fix the shade.
ENGLISH
Bar and nut
Control panel
Lamp unit
Power cord
Power
adapter
Power
connector
*Make sure the connection is firm
Acrylic support
Assembly
hole
Fixture
hole
Extendible
(+5cm)


