background image

Labels

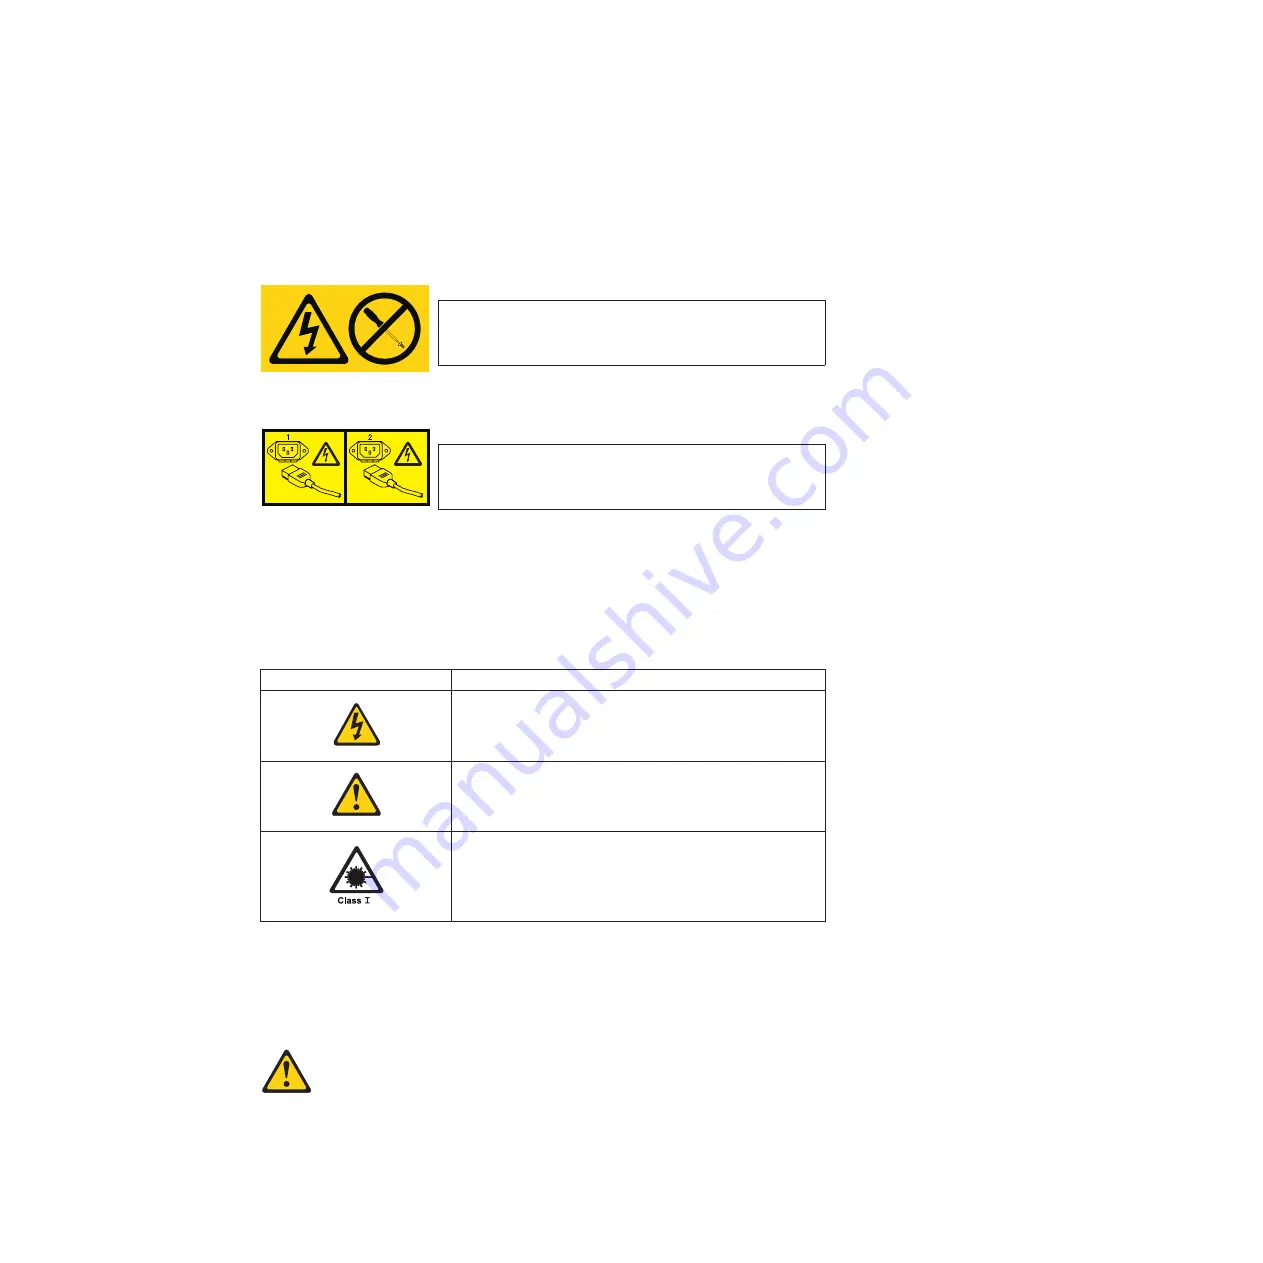
As an added precaution, safety labels are often installed directly on products or
product components to warn of potential hazards.

The actual product safety labels may differ from these sample safety labels:

(L001)

DANGER

Hazardous voltage, current, or energy levels are present
inside any component that has this label attached. Do not
open any cover or barrier that contains this label.

(L003)

DANGER

Multiple power cords. The product might be equipped
with multiple power cords. To remove all hazardous
voltages, disconnect all power cords.

Caution notices

A caution notice calls attention to a situation that is potentially hazardous to
people because of some existing condition. A caution notice can be accompanied
by different symbols, as in the examples below:

If the symbol is...

It means....

A hazardous electrical condition with less severity than
electrical danger.

A generally hazardous condition not represented by other
safety symbols.

A hazardous condition due to the use of a laser in the
product. Laser symbols are always accompanied by the
classification of the laser as defined by the U. S.
Department of Health and Human Services (for example,
Class I, Class II, and so forth).

Attention notices

An attention notice indicates the possibility of damage to a program, device, or
system, or to data. An exclamation point symbol may accompany an attention
notice, but is not required. A sample attention notice follows:

Attention:

Do not bend a fibre cable to a radius less than 5 cm (2 in.);

you can damage the cable. Tie wraps are not recommended for optical
cables because they can be easily overtightened, causing damage to the
cable.

Safety notices

v

Содержание N7800

Страница 1: ...IBM System Storage N7000 Series Hardware and Service Guide Covering the N7600 N7800 N7700 and N7900 systems GC26 7953 13...

Страница 2: ......

Страница 3: ...IBM System Storage N7000 Series Hardware and Service Guide Covering the N7600 N7800 N7700 and N7900 systems GC26 7953 13...

Страница 4: ...NES CORPORATION PROVIDES THIS PUBLICATION AS IS WITHOUT WARRANTY OF ANY KIND EITHER EXPRESS OR IMPLIED INCLUDING BUT NOT LIMITED TO THE IMPLIED WARRANTIES OF MERCHANTABILITY OR FITNESS FOR A PARTICULA...

Страница 5: ...or advice v Attention notices on page v These notices indicate potential damage to programs devices or data v Caution notices on page v These statements indicate situations that can be potentially ha...

Страница 6: ...nsure outlet supplies proper voltage and phase rotation according to the system rating plate v Connect any equipment that will be attached to this product to properly wired outlets v When possible use...

Страница 7: ...different symbols as in the examples below If the symbol is It means A hazardous electrical condition with less severity than electrical danger A generally hazardous condition not represented by other...

Страница 8: ...smitting on system links with laser modules that operate at greater than Class 1 power levels For this reason never look into the end of an optical fiber cable or open receptacle C027 Attention In the...

Страница 9: ...s shelves or work spaces Do not place objects on top of rack mounted devices v Each rack cabinet might have more than one power cord Be sure to disconnect all power cords in the rack cabinet when dire...

Страница 10: ...correct power connection to a rack refer to the rating labels located on the equipment in the rack to determine the total power requirement of the supply circuit v For sliding drawers Do not pull out...

Страница 11: ...nd cables are secure Ensure that the four leveling pads are raised to their highest position Ensure that there is no stabilizer bracket installed on the rack cabinet during movement Do not use a ramp...

Страница 12: ...x IBM System Storage N7000 Series Hardware and Service Guide...

Страница 13: ...atting conventions xxiii Keyboard conventions xxiv How to send your comments xxiv Chapter 1 Preparing for the installation 1 Required manuals tools and equipment 1 Handling static sensitive devices 1...

Страница 14: ...x 32 Replacing a CompactFlash card in an active active configuration running Data ONTAP 7 x 35 Replacing the CompactFlash card in an N7000 series system running Data ONTAP 8 0 40 Replacing a CompactF...

Страница 15: ...an NVRAM adapter in a system operating in 7 Mode 94 Replacing an NVRAM adapter in an N7000 series system Data ONTAP 8 2 104 Replacing a NVRAM adapter in 7 Mode environments 104 Replacing an NVRAM ada...

Страница 16: ...ment 148 Japan Electronics and Information Technology Industries Association Statement 148 Korean Communications Commission Class A Statement 149 Russia Electromagnetic Interference Class A Statement...

Страница 17: ...fan module 57 16 Removing the RLM carrier 60 17 Removing the power supply 64 18 Removing the cable management tray 68 19 Removing the motherboard tray 68 20 Removing the RTC battery 69 21 Removing th...

Страница 18: ...xvi IBM System Storage N7000 Series Hardware and Service Guide...

Страница 19: ...lectrical requirements with five Performance Acceleration Modules or Flash Cache modules 4 8 Installation process procedures 7 9 Manuals for configuring and using the RLM 19 10 N7000 series system fro...

Страница 20: ...xviii IBM System Storage N7000 Series Hardware and Service Guide...

Страница 21: ...ning Data ONTAP 7 x and Data ONTAP 8 x 7 Mode In the Data ONTAP 8 x 7 Mode product name the term 7 Mode signifies that the 8 x release has the same features and functionality found in the prior Data O...

Страница 22: ...found at the following web page www ibm com storage nas v The IBM System Storage N series support website requires users to register in order to obtain access to N series support content on the web T...

Страница 23: ...ipped with your hardware product in printed documents or as PDF files on a documentation CD For the latest N series hardware product documentation PDFs go to the IBM N series support website Hardware...

Страница 24: ...s refers to a pair of storage systems sometimes called nodes configured to serve data for each other if one of the two systems stops functioning Also sometimes referred to as active active pairs clust...

Страница 25: ...nsion units in a stack of storage expansion units and the number of storage expansion unit stacks in a configuration are dependent on the type of storage system Command conventions You can enter comma...

Страница 26: ...y Enter Used to refer to the key that generates a carriage return although the key is named Return on some keyboards type Used to mean pressing one or more keys on the keyboard enter Used to mean pres...

Страница 27: ...eet for your storage system to gather the information that the software setup process requires The configuration worksheet is provided in the Data ONTAP Software Setup Guide for your version of Data O...

Страница 28: ...on This section identifies the shipment contents and the rules and regulations you need to observe for the proper installation of your N7000 series system It also provides an overview of the entire sy...

Страница 29: ...l versions 15 2 cm 6 in Front maintenance All versions 63 5 cm 25 in Rear cooling All versions 30 5 cm 12 in Rear maintenance All versions 102 cm 40 in Table 3 N7000 series system environmental requir...

Страница 30: ...nput power measured W 1009 293 585 969 289 578 Thermal dissipation BTU hr 3440 998 1996 3305 985 1969 Input power frequency Hz 50 to 60 Table 6 N7800 and N7900 electrical requirements Input voltage 10...

Страница 31: ...2 power cords 8 SFPs SFPs might be installed in the N7000 series system as shipped There will also be envelopes with the software EULA and license keys A rail kit for mounting the N7700 in a standard...

Страница 32: ...n a standard 19 inch rack may also be present Rules for installing the N7000 series system in a rack You need to observe the following rules and restrictions when installing an N7000 series system in...

Страница 33: ...l as other Data ONTAP documentation is available on the IBM N series support website which is accessed and navigated as described in Websites on page xx If you are configuring a storage system as part...

Страница 34: ...rage expansion units on page 10 or the Installation and Setup Instructions that came with your system Gateway Connect the N7000 gateway system to the back end storage Yes n a Customer The Data ONTAP G...

Страница 35: ...o not put excess weight on the cable at the connection point Be sure that the cable is well supported CAUTION Data processing environments can contain equipment transmitting on system links with laser...

Страница 36: ...Connecting your N7000 series system to storage The N7000 series system has eight onboard Fibre Channel ports labeled 0a thru 0h as shown in Figure 1 Additional HBAs can be plugged into the PCI slots t...

Страница 37: ...cribes how to cable your filer storage system using a dual port optical Fibre Channel expansion adapter for storage expansion unit disk shelf storage Attention If you are connecting to a stack or stac...

Страница 38: ...nit cable to Port b of the Fibre Channel expansion adapter and then connect the other end of the cable to the In port of ESH2 ESH4 or AT FCX B on storage expansion unit 1 b Connect the Out port of ESH...

Страница 39: ...rt 3 Repeat Step 2 connecting output to input for the remaining storage expansion units in the loop Out In Out In B A Out In Out In B A Out In Out In B A Out In Out In B A 1 2 3 4 5 6 7 8 9 1 2 3 4 5...

Страница 40: ...html Refer to the documentation for your external storage for additional information Connecting your N7000 series system to a third party device You can connect third party devices to your N7000 seri...

Страница 41: ...and enables you to perform system administration For information about ASCII terminal console wiring DB 9 to RJ 45 console adapter pin connections and connecting your system to an ASCII terminal conso...

Страница 42: ...16 IBM System Storage N7000 Series Hardware and Service Guide...

Страница 43: ...st be identical on both storage system nodes If you have a high availability or active active configuration IBM recommends that you print and complete two copies of the configuration worksheet one for...

Страница 44: ...high availability configuration to an edge switch and use this switch as a bridge to the fabric For information about specific switch models supported and fabric configuration guidelines see the IBM S...

Страница 45: ...uide for your version of Data ONTAP Configuring and using the RLM The following table provides a list of documents for configuring and using the RLM These documents are available on the IBM N series s...

Страница 46: ...20 IBM System Storage N7000 Series Hardware and Service Guide...

Страница 47: ...ystem and optional adapter cards see the IBM System Storage N series Platform Monitoring Guide For diagnostic information about your system see the IBM System Storage N series Diagnostics Guide Monito...

Страница 48: ...ult is displayed in the LCD Note This LED remains lit during boot while the operating system loads Power Green The system is receiving power Off The system is not receiving power Monitoring the rear p...

Страница 49: ...wo modes Initiator and Target For information about monitoring the LEDs for your optional Fibre Channel HBAs refer to the IBM System Storage N series Platform Monitoring Guide Ethernet port LEDs Your...

Страница 50: ...M6 Attention This might occur if your system did not shut down properly as in the case of a power failure or panic The data is replayed when the system boots up again PH1 Green On The physical connect...

Страница 51: ...ate whether the power supply is functioning normally or whether there are problems with the hardware You can also identify any hardware failure associated with the power supplies from the error messag...

Страница 52: ...On Flashing There is AC power present but the power supply is not enabled Off Off There is no power to this power supply Monitoring the fans To monitor the fans check the console error messages and l...

Страница 53: ...Table 15 Fan LED descriptions continued LED description Description Off There is no power to the system or the fan is operational Chapter 4 Monitoring your system 27...

Страница 54: ...28 IBM System Storage N7000 Series Hardware and Service Guide...

Страница 55: ...system on page 56 v Installing or replacing the RLM in an N7000 series system on page 58 v Replacing a power supply on an N7000 series system on page 64 v Replacing the Real Time Clock RTC battery in...

Страница 56: ...system 5 Fans RLM CompactFlash card n70hw002 LED LCD CompactFlash Module Figure 11 N7000 series system components Front 1 2 3 4 5 6 7 8 9 Console Port RLM Port n70hw003 Expansion Adapter Slots 2 Power...

Страница 57: ...the IBM N series support website which is accessed and navigated as described in Websites on page xx v IBM System Storage N series Data ONTAP Upgrade Guide as applicable v IBM System Storage N series...

Страница 58: ...CompactFlash card on page 33 v Placing a boot image on the CompactFlash card on page 33 v Updating the CompactFlash card on page 34 v Completing the replacement process on page 35 Removing the Compac...

Страница 59: ...to Placing a boot image on the CompactFlash card If your replacement CompactFlash card has a software image already installed go to Updating the CompactFlash card on page 34 Placing a boot image on th...

Страница 60: ...ed netapp_ rlse x86 64 where rlse is the Data ONTAP release 5 Rename the netapp_ rlse x86 64 image to Primary KRN 6 Install the CompactFlash card with the kernel image into the system 7 Go to Updating...

Страница 61: ...es a primary and secondary set of system files on it also called the boot image that the system uses when it boots To replace the CompactFlash card you must complete a specific sequence of procedures...

Страница 62: ...nd unplug them from the power source 6 While grounded remove the bezel and set it aside 7 Remove the CompactFlash card from the target node by removing the bezel flipping the ejector lever up on the L...

Страница 63: ...to display the Special Boot Menu 11 Determine what version of Data ONTAP the system is running by entering the following command on the target node console version 12 Start clustering by entering the...

Страница 64: ...ge is called netapp_ rlse x86 64 It is located on your PC in the boot folder in the files you extracted from rlse_setup exe 6 Rename the netapp_ rlse x86 64 image to Primary KRN 7 While grounded insta...

Страница 65: ...annel port configuration on the CompactFlash card v If the variable values are different or need modification complete the following substeps a Set the values of the individual variables by entering t...

Страница 66: ...ng Data ONTAP 8 x in 7 Mode Before you begin Before extracting the compressed system files during the CompactFlash card installation process you must make sure that the utility you use is set to suppr...

Страница 67: ...de go to the next step v If the target node took over the partner node give back the partner node using the cf giveback command from the target node initiate the takeover from the partner node using t...

Страница 68: ...iles to the CompactFlash card you must have the following v The blank replacement CompactFlash card you received from your provider v A PC or laptop with a CompactFlash reader writer that is running W...

Страница 69: ...ntents of the file named diags tgz to the root directory on the CompactFlash card This creates the directory structure for the diagnostics utilities and firmware 9 Verify the directory structure on th...

Страница 70: ...command on the NFS client mount node_name vol vol0 mnt node_name 5 Verify the contents of the newly mounted volume by entering the following command on the NFS client ls al mnt node_name etc varfs tgz...

Страница 71: ...oller Procedure 1 If you are not already grounded properly ground yourself 2 Remove the bezel if necessary and locate the CompactFlash card slot in the LCD module 3 Align the CompactFlash card with th...

Страница 72: ...ir and you did not copy the varfs tgz to the boot device Complete the following substeps when the following menu is displayed 1 Select the Update flash from backup config from the displayed menu 2 Ent...

Страница 73: ...necessary and locate the CompactFlash card slot in the LCD module 5 Align the CompactFlash card with the CompactFlash card socket or connector and then firmly push the CompactFlash card into the socke...

Страница 74: ...ssary for your interface For details use the help ifconfig command at the LOADER prompt 13 At the boot environment prompt enter the following command netboot http path_to_web accessible_directory netb...

Страница 75: ...he system files and restore configuration information to your HA pair nondisruptively by using netboot and the partner node Before you begin v You must have the blank replacement CompactFlash card tha...

Страница 76: ...make sure that it is seated squarely and completely in the socket or connector If necessary remove the CompactFlash card and reseat it into the socket 7 Replace the bezel 8 Reinstall the cable manage...

Страница 77: ...or details use the help ifconfig command at the LOADER prompt 12 At the boot environment prompt enter the following command netboot http path_to_web accessible_directory netboot kernel 13 Select the I...

Страница 78: ...ng y when you see the following screen The restore configuration has been copied from the HA partner to this node would you like to use this restored copy now y n y CF device dev ad0 found Checking de...

Страница 79: ...he web accessible directory Your directory listing should contain the following file and directory image tgz netboot 3 If you are not already grounded properly ground yourself 4 Remove the bezel if ne...

Страница 80: ...for your interface For details use the help ifconfig command at the LOADER prompt 12 At the LOADER prompt enter the following command netboot http path_to_the_web accessible_directory netboot kernel...

Страница 81: ...software Do you want to reboot now y n y The controller module reboots but stops at the boot environment prompt 3 Boot Data ONTAP by entering the following command at the boot environment prompt boot...

Страница 82: ...g a fan module in an N7000 series system To replace a fan module you must perform the following tasks in order About this task The fan module is hot swappable and can be replaced without interrupting...

Страница 83: ...free from the chassis and injure you 1 Thumbscrew 2 Release tab 6 Set the fan module aside Installing a fan module To replace the fan module you must perform the following steps in order Procedure 1...

Страница 84: ...h all versions of Data ONTAP supported by your system v This procedure refers to HA pairs which in releases prior to Data ONTAP 8 0 were called active active configurations v All other components in t...

Страница 85: ...DC source and then remove the DC wires if necessary Shutting down the node in a stand alone system For a node that is not configured with a high availability HA partner you must perform a clean shutdo...

Страница 86: ...the chassis 2 Loosen the thumbscrew on the left side of the RLM carrier and then swing the retaining arm to the right 1 Thumbscrew 2 Retaining bar 3 Slide the RLM out of the carrier and set it aside...

Страница 87: ...trix on the IBM N series support website Go to the next step 6 Plug one end of an RJ 45 cable into the RLM port and then plug the other end into a 10 100 Ethernet network port The network for the RLM...

Страница 88: ...IBM N series support website which is accessed and navigated as described in Websites on page xx Refer to the list of current RLM firmware versions in the System RLM SP and Disk Shelf Firmware Matrix...

Страница 89: ...nning diagnostics on the RLM You should run diagnostics on the RLM to confirm its operation Procedure 1 Reboot the system and interrupt the boot process 2 Enter the following at the prompt boot_diags...

Страница 90: ...To remove a power supply you must follow the steps to identify the one you want to remove disconnect the power cord and remove the power supply from the chassis About this task Attention You must rep...

Страница 91: ...re not already grounded properly ground yourself 3 Align the edges of the power supply with the opening in the system chassis and gently push the power supply into the chassis until the cam handle beg...

Страница 92: ...ither node For Issue the command 7 Mode cf status Cluster Mode storage failover show 2 Take one of the following actions depending on the result of the storage failover show or cf status command If Th...

Страница 93: ...s flashing red after you enter the halt local command reboot your system and try halting it again 2 If you are not already grounded properly ground yourself 3 Turn off the power supplies and unplug bo...

Страница 94: ...p to replace components on the motherboard tray However your system must be on a stable surface where the chassis and motherboard tray are supported so that your system cannot tip when you pull the mo...

Страница 95: ...tery You must use this procedure to install a Real Time Clock RTC battery Procedure 1 If you are not already grounded properly ground yourself 2 Remove the replacement battery from the antistatic ship...

Страница 96: ...diagnostics Procedure 1 From the diagnostics menu select and complete the appropriate tests See the IBM System Storage N series Diagnostics Guide for information about specific diagnostics tests you...

Страница 97: ...the target node date_and_time is the date and time setting for the node in the format MM DD YYYY HH MM SS Note See the Data ONTAP Cluster Mode System Administration Guide or Cluster Mode Administrati...

Страница 98: ...tus of the target node the node you want to perform maintenance on by entering the following command at the system console of either node For Issue the command 7 Mode cf status Cluster Mode storage fa...

Страница 99: ...that blinks if there is unwritten data in the NVRAM If this LED is flashing red after you enter the halt local command reboot your system and try halting it again 2 If you are not already grounded pr...

Страница 100: ...p to replace components on the motherboard tray However your system must be on a stable surface where the chassis and motherboard tray are supported so that your system cannot tip when you pull the mo...

Страница 101: ...already grounded properly ground yourself 2 Locate the DIMMs 3 Note the orientation of the DIMM in the socket so that you can insert the replacement DIMM in the proper orientation 4 Push apart the lat...

Страница 102: ...d into the slot The edge connector on the DIMM must make complete contact with the slot 5 Push carefully but firmly on the top edge of the DIMM until the latches snap into place over the notches at th...

Страница 103: ...g command at the prompt to boot the system boot_ontap Completing the replacement process Return the failed part to IBM Contact IBM Service and Support at 1 800 IBM SERV 1 800 426 7378 for more informa...

Страница 104: ...this procedure The partner node took over the target node The target node is in a state where you can shut it down go to the next step in this procedure The target node took over the partner node 1 C...

Страница 105: ...2 If you are not already grounded properly ground yourself 3 Turn off the power supplies and unplug both power cords from the power source If your system uses Then AC power Unplug the power cords from...

Страница 106: ...p to replace components on the motherboard tray However your system must be on a stable surface where the chassis and motherboard tray are supported so that your system cannot tip when you pull the mo...

Страница 107: ...et 2 Loosen the thumbscrew on the secondary PCI retaining bracket located at the back of the motherboard tray and then lift the retaining bracket up and off the chassis frame 3 Remove any retaining sc...

Страница 108: ...the system The cam handle begins to engage when the motherboard tray is properly seated all the way inside the system 2 Firmly push the cam handle to finish seating the motherboard tray in the system...

Страница 109: ...Data ONTAP 8 0 were called active active configurations v All disk shelves must be working properly and you cannot change any disks or disk shelves as part of this procedure v You must be replacing a...

Страница 110: ...ommand 7 Mode cf takeover Cluster Mode storage failover takeover bynode node 4 If you are not already grounded properly ground yourself 5 Turn off the power supplies and disconnect the power on the ta...

Страница 111: ...owing command from the partner node to save the onboard Fibre Channel port configuration information for the target node the system on which you are replacing the motherboard tray partner fcadmin conf...

Страница 112: ...s and set it aside Make sure that you support the bottom of the tray with your free hand when removing it from the chassis 7 Loosen the six thumbscrews that secure the motherboard tray to the chassis...

Страница 113: ...Remove the slide rails from the sides of the motherboard tray 11 Set the six screws and rails in a safe place you need them for the replacement motherboard tray Removing a PCI card You must use this...

Страница 114: ...e a note of which slot the adapter was in You need this information when reinstalling the PCI adapters in the new motherboard tray 5 Repeat the above steps as needed Moving the DIMMs to the new mother...

Страница 115: ...ign it over the slot The notch among the pins on the DIMM should line up with the tab in the socket 6 Insert the DIMM straight into the slot The DIMM fits tightly in the slot but should go in easily I...

Страница 116: ...motherboard tray After you replace a component within the motherboard tray you must reinstall the motherboard tray in the system chassis Procedure 1 Attach the slide rails that you removed from the ol...

Страница 117: ...the following command at the boot prompt to check the time on the target node show date Current date time is 04 29 2009 16 58 15 4 If necessary use the set date command to set the time on the target...

Страница 118: ...tner sysid partner system id 4 Enter the following command at the boot loader prompt boot_diags 5 Select mb from the menu and then select the comprehensive motherboard test from the test menu Examine...

Страница 119: ...3 Enter one of the following commands depending on what you need to do v To program target ports fcadmin config t target adapter_name v To program initiator ports fcadmin config t initiator adapter_n...

Страница 120: ...tem operating in 7 Mode You must use a specific procedure to replace the adapter in a system operating in 7 Mode Because the disk ownership ID is based on the NVRAM adapter serial number as the last p...

Страница 121: ...ve the power cords DC power Remove the power at the DC source Remove the DC wires if necessary Shutting down the node in a stand alone system For a node that is not configured with a high availability...

Страница 122: ...cables in the cable clips of the cable management tray so that when you reinstall the cable management tray the cables are already aligned If your system uses Use this method to disconnect the cables...

Страница 123: ...ndle Press latch Opening the system To access components inside the motherboard tray you must open the system Procedure 1 If you are not already grounded properly ground yourself 2 Unplug the system c...

Страница 124: ...ystem must be on a stable surface where the chassis and motherboard tray are supported so that your system cannot tip when you pull the motherboard tray away from the chassis 1 1 Motherboard tray 5 Lo...

Страница 125: ...and gently rocking it out of the socket It should be placed on an antistatic surface 3 2 1 1 NVRAM adapter 2 Secondary bracket 3 Primary bracket Installing the NVRAM adapter To install the new NVRAM a...

Страница 126: ...again and press Ctrl C when prompted 7 Enter y when prompted to acknowledge the system ID mismatch due to the new NVRAM adapter Acknowledge the system ID mismatch Restoring var from CF WARNING System...

Страница 127: ...ring the following command disk show v Note Make note of the new system ID which is displayed in the Local System ID field The following example contains the following information v system 2 is the ta...

Страница 128: ...Step 2 v The old system ID is 118073209 v The new system ID is 118065481 Stand alone Reassign disk ownership by entering the following command at the Maintenance mode prompt of the target node disk r...

Страница 129: ...ou must perform a final takeover and giveback from the target node About this task These steps must be taken regardless of the version of Data ONTAP you are using It is important that you apply the co...

Страница 130: ...AP 8 2 only v This procedure uses the following terminology The impaired node is the node on which you are performing maintenance The healthy node is the HA partner of the impaired node v This procedu...

Страница 131: ...s in Then A stand alone configuration and is running 1 Enter the following command at the console halt t 0 2 Go to step 6 A stand alone configuration and is not running Go to step 6 An HA pair Go to t...

Страница 132: ...iber interconnect cables the media adapters Procedure 1 If you are not already grounded properly ground yourself 2 Remove the cables and any media converters SFPs from the NVRAM adapter Leave the cabl...

Страница 133: ...ndle Press latch Opening the system To access components inside the motherboard tray you must open the system Procedure 1 If you are not already grounded properly ground yourself 2 Unplug the system c...

Страница 134: ...ystem must be on a stable surface where the chassis and motherboard tray are supported so that your system cannot tip when you pull the motherboard tray away from the chassis 1 1 Motherboard tray 5 Lo...

Страница 135: ...and gently rocking it out of the socket It should be placed on an antistatic surface 3 2 1 1 NVRAM adapter 2 Secondary bracket 3 Primary bracket Installing the NVRAM adapter To install the new NVRAM a...

Страница 136: ...and then turn on the power Reassigning disks If the storage system is in an HA pair the system ID of the new NVRAM adapter is automatically assigned to the disks In a stand alone system you must manu...

Страница 137: ...nt node In this example it is 1873774574 4 From the healthy node ensure that any coredumps on the replacement node are saved a Enter the following command partner savecore b If the command output indi...

Страница 138: ...rt of the disk owner column The following example shows the old system ID of 118073209 disk show a Local System ID 118065481 DISK OWNER POOL SERIAL NUMBER HOME 0b 29 system 1 118073209 Pool0 J8XJE9LC...

Страница 139: ...hannel FC ports are not preconfigured you must restore any FC port configurations in your HA pair before you bring the node back into service otherwise you might experience a disruption in service Sys...

Страница 140: ...t_ontap 8 After the node boots up enter the following command to verify that the Fiber Channel configuration settings have been restored run local fcadmin config 3 If your configuration includes a gat...

Страница 141: ...with the other nodes in the cluster Time Node Severity Event 8 13 2012 14 03 51 ssan 6240 12 INFORMATIONAL scsiblade in quorum The scsi blade on this node established quorum with the other nodes in th...

Страница 142: ...g actions depending on the result of the storage failover show command v If the impaired node is not running or has been taken over by the healthy node go to step 4 v If the impaired node took over th...

Страница 143: ...edure 1 If you are not already grounded properly ground yourself 2 Remove the cables and any media converters SFPs from the NVRAM adapter Leave the cables in the cable clips of the cable management tr...

Страница 144: ...ress latch Opening the system To access components inside the motherboard tray you must open the system Procedure 1 If you are not already grounded properly ground yourself 2 Unplug the system cables...

Страница 145: ...our system must be on a stable surface where the chassis and motherboard tray are supported so that your system cannot tip when you pull the motherboard tray away from the chassis 1 1 Motherboard tray...

Страница 146: ...ntly rocking it out of the socket It should be placed on an antistatic surface 3 2 1 1 NVRAM adapter 2 Secondary bracket 3 Primary bracket Installing the NVRAM adapter To install the new NVRAM adapter...

Страница 147: ...s If the storage system is in an HA pair the system ID of the new NVRAM adapter is automatically assigned to the disks In a stand alone system you must manually reassign the ID to the disks About this...

Страница 148: ...A mailboxes node2 node1 false System ID changed on partner Old 151759755 New 151759706 In takeover 6 From the healthy node ensure that any coredumps on the replacement node are saved a From the health...

Страница 149: ...plete e Enter the storage failover show command to confirm that the HA pair is healthy and takeover is possible The output from the storage failover show command should not include the System ID chang...

Страница 150: ...old system ID In the case of the preceding example the command is disk reassign s 118073209 You can respond Y when prompted to continue 4 Verify that the disks or gateway LUNs were assigned correctly...

Страница 151: ...C configurations can skip this procedure Before you begin You must have the values of the FC port settings that you saved earlier Procedure 1 From the healthy node verify the values of the FC configur...

Страница 152: ...mmand halt After you issue the command wait until the system stops at the LOADER prompt 7 Enter the following command at the LOADER prompt printenv The following line should be present in the displaye...

Страница 153: ...HA pair the module can be replaced without interrupting service About this task v You can use this procedure with all versions of Data ONTAP supported by your system v This procedure refers to HA pai...

Страница 154: ...ower Remove the power at the DC source and then remove the DC wires if necessary Shutting down the node in a stand alone system For a node that is not configured with a high availability HA partner yo...

Страница 155: ...ers of the module and remove the LED LCD CompactFlash module 1 Thumbscrews 2 Note The CompactFlash card in this module is a separate field replaceable unit FRU If you are replacing it also see appropr...

Страница 156: ...s contact technical support Completing the replacement process Return the failed part to IBM Contact IBM Service and Support at 1 800 IBM SERV 1 800 426 7378 for more information on the return procedu...

Страница 157: ...pport information see the IBM N series support website which is accessed and navigated as described in Websites on page xx Shutting down the node You shut down a node using different procedures depend...

Страница 158: ...d with a high availability HA partner you must perform a clean shutdown ensuring that all data has been written to disk and disconnect the power supplies Procedure 1 Enter the following command from t...

Страница 159: ...re 1 Remove the cable management tray by gently pushing the sides of the tray at the arrows and lifting the tray up 1 Cable management tray 2 Loosen the thumbscrews on both ends of the Fibre Channel t...

Страница 160: ...Fibre Channel tray The bars should swing easily into place If they do not reseat the tray b Tighten the thumbscrews 4 Install the correct SFP modules into the ports on the Fibre Channel tray 5 Reinst...

Страница 161: ...restores the configuration of the ports at boot However when replacing the Fibre Channel tray on a gateway system the WWPN and WWNN names on the WWPNs of the initiator ports do change If your configur...

Страница 162: ...136 IBM System Storage N7000 Series Hardware and Service Guide...

Страница 163: ...size for 2 voltage drop for a particular distance in feet taken from the Radio Engineer s Handbook Table 16 110V single phase recommended conductor sizes 110V single phase 20A circuit 30A circuit 40A...

Страница 164: ...138 IBM System Storage N7000 Series Hardware and Service Guide...

Страница 165: ...Norway Peru Poland Portugal Romania Russia Slovakia Slovenia Spain Suriname Sweden Turkey v 2 5 m 9 feet unshielded rated 250 V 10 A v Attached plug EL 211 CEE 7 VII designed for 200 240 V ac input FC...

Страница 166: ...lded rated 250 V 10 A v Attached plug EL 208 BS 164 1 BS 546 designed for 200 240 V ac input FC 9011 Israel Provides power cords for Israel v 2 5 m 9 feet unshielded rated 250 V 10 A v Attached plug E...

Страница 167: ...v Attached plug EL 610 CNS 10917 CNS 690 designed for 250 V ac input Appendix B FRU CRU and power cord list for N series products 141...

Страница 168: ...142 IBM System Storage N7000 Series Hardware and Service Guide...

Страница 169: ...consistent with local law INTERNATIONAL BUSINESS MACHINES CORPORATION PROVIDES THIS PUBLICATION AS IS WITHOUT WARRANTY OF ANY KIND EITHER EXPRESS OR IMPLIED INCLUDING BUT NOT LIMITED TO THE IMPLIED WA...

Страница 170: ...er Network Appliance SnapCopy Snapshot and The Evolution of Storage are trademarks of Network Appliance Inc in the United States and or other countries and registered trademarks in some other countrie...

Страница 171: ...se These products are offered and warranted solely by third parties IBM makes no representations or warranties with respect to non IBM products Support if any for the non IBM products is provided by t...

Страница 172: ...nada Australia and New Zealand Class A Statement Attention This is a Class A product In a domestic environment this product might cause radio interference in which case the user might be required to t...

Страница 173: ...eich Funk St rungen verursachen in diesem Fall kann vom Betreiber verlangt werden angemessene Mabnahmen zu ergreifen und daf r aufzukommen Deutschland Einhaltung des Gesetzes ber die elektromagnetisch...

Страница 174: ...Taiwan Tel 0800 016 888 Japan Voluntary Control Council for Interference Class A Statement This explains the Japan Voluntary Control Council for Interference VCCI statement Japan Electronics and Infor...

Страница 175: ...power cords used in the United States and Canada are listed by Underwriter s Laboratories UL and certified by the Canadian Standards Association CSA For units intended to be operated at 115 volts Use...

Страница 176: ...e attachment plug The cord set should have the appropriate safety approvals for the country in which the equipment will be installed IBM power cords for a specific country or region are usually availa...

Страница 177: ...TAP 8 0 52 installing and transferring system files nondisruptively in 7 Mode 46 49 replacing in systems running Data ONTAP 8 x 40 CompactFlash module installing 129 removing 129 configuration workshe...

Страница 178: ...high availability configuration tasks 17 high availability configurations 18 how to send your comments xxiv I initiator mode 18 installation preparation for 1 procedures for 7 rack vii rules 6 tools 1...

Страница 179: ...diagnostics 82 installing 82 90 removing 81 87 physical characteristics 3 power separate circuit breakers for 10 power cords 149 feature codes 139 power line sizes 137 power supplies 10 interpreting L...

Страница 180: ...ts verifying 32 system opening 67 73 79 T target node shutting down 35 terminators optical ports vi terminology xxii the controller module with normal boot 110 121 third party devices rules for connec...

Страница 181: ......

Страница 182: ...Printed in USA GC26 7953 13...

Отзывы: