background image

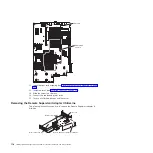
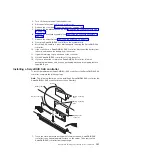
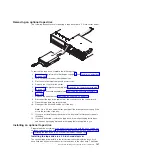
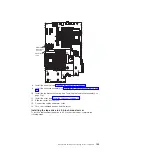
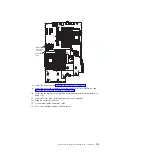
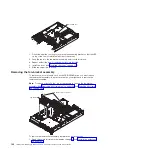
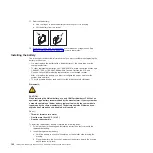
SATA tape
drive signal
connector

SATA tape
cable

8.


Install


the


air


baffle


(see


“Installing


the


air


baffle”


on


page


112).


9.


Install


the


riser-card


assembly


(see“Installing


the


riser-card


assembly”


on


page


155).


10.


Install


the


fan-bracket


assembly


(see


Installing


the


fan-bracket


assembly


on


page


114).


11.


Install


the


cover


(see


“Installing


the


cover”


on


page


110).


12.


Slide


the


server


into


the


rack.


13.


Connect


the


cables


and


power


cords.


14.


Turn


on


all


attached


devices


and


the


server.

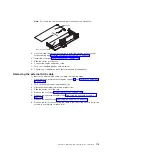
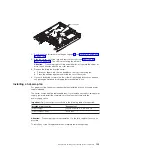
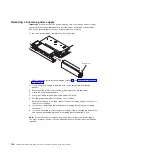
Installing


the


tape


drive


in


a


2.5-inch


model


server


To


install


a


replacement


tape


drive


in


a


2.5-inch


model


server,


complete


the


following


steps.


Chapter


5.


Removing


and


replacing


server


components


129

Содержание 7985

Страница 1: ...IBM System x3655 Type 7985 and 7943 Problem Determination and Service Guide...

Страница 2: ......

Страница 3: ...IBM System x3655 Type 7985 and 7943 Problem Determination and Service Guide...

Страница 4: ...Notices on page 187 The most recent version of this document is available at http www ibm com support Sixth Edition July 2008 Copyright International Business Machines Corporation 2006 US Government U...

Страница 5: ...al connectors 13 Power backplane card internal connectors 13 System board external connectors 14 System board jumpers 15 System board LEDs 17 Riser card assembly LEDs 17 Chapter 3 Diagnostics 19 Diagn...

Страница 6: ...ecting the cables 107 Removing and replacing Tier 1 CRUs 109 Removing the cover 109 Installing the cover 110 Removing the air baffle 111 Installing the air baffle 112 Removing an adapter 113 Installin...

Страница 7: ...rver 167 Using the ServerGuide Setup and Installation CD 167 Using the Configuration Setup Utility program 168 Using the ServeRAID configuration programs 168 Using the baseboard management controller...

Страница 8: ...vi IBM System x3655 Type 7985 and 7943 Problem Determination and Service Guide...

Страница 9: ...tuotteen lue turvaohjeet kohdasta Safety Information Avant d installer ce produit lisez les consignes de s curit Vor der Installation dieses Produkts die Sicherheitshinweise lesen Prima di installare...

Страница 10: ...exterior cover is not damaged loose or broken and observe any sharp edges 3 Check the power cord v Make sure that the third wire ground connector is in good condition Use a meter to measure third wire...

Страница 11: ...n the off position v Never assume that power has been disconnected from a circuit Check it to make sure that it has been disconnected v If you have to work on equipment that has exposed electrical cir...

Страница 12: ...tion document For example if a caution statement begins with a number 1 translations for that caution statement appear in the Safety Information document under statement 1 Be sure to read all caution...

Страница 13: ...quipment when there is evidence of fire water or structural damage v Disconnect the attached power cords telecommunications systems networks and modems before you open the device covers unless instruc...

Страница 14: ...y replace it only with the same module type made by the same manufacturer The battery contains lithium and can explode if not properly used handled or disposed of Do not v Throw or immerse into water...

Страница 15: ...e device v Use of controls or adjustments or performance of procedures other than those specified herein might result in hazardous radiation exposure DANGER Some laser products contain an embedded Cla...

Страница 16: ...and the power switch on the power supply do not turn off the electrical current supplied to the device The device also might have more than one power cord To remove all electrical current from the dev...

Страница 17: ...is label attached There are no serviceable parts inside these components If you suspect a problem with one of these parts contact a service technician Statement 26 CAUTION Do not place any object on t...

Страница 18: ...xvi IBM System x3655 Type 7985 and 7943 Problem Determination and Service Guide...

Страница 19: ...ostic programs you must determine whether the failing server is part of a shared hard disk drive cluster two or more servers that share external storage devices If it is part of a cluster you can run...

Страница 20: ...ge 17 i Check for the following results v Successful completion of POST which is indicated by a single beep see POST on page 19 for more information v Successful completion of startup which is indicat...

Страница 21: ...the Warranty and Support Information document The server has two model styles which are based on the size and number of hard disk drive bays v The 3 5 inch models have six 3 5 inch hot swap hard disk...

Страница 22: ...ith the server The documentation might be updated occasionally to include information about those features or technical updates might be available to provide additional information that is not include...

Страница 23: ...e description of a potentially hazardous procedure step or situation v Danger These statements indicate situations that can be potentially lethal or extremely hazardous to you A danger statement is pl...

Страница 24: ...ffload Engine TOE support v One serial port v One serial attached SCSI SAS controller v Six Universal Serial Bus USB ports 2 0 Two on the front of the server Four on the rear of the server v Two video...

Страница 25: ...g illustration shows the controls light emitting diodes LEDs and connectors on the front of the 2 5 inch model server Operator information panel USB 5 connector USB 6 connector Video connector Rack re...

Страница 26: ...ff it does not mean that there is no electrical power in the server The LED might be burned out To remove all electrical power from the server you must disconnect the power cord from the electrical ou...

Страница 27: ...connector Connect a serial attached SCSI SAS device to this connector System management Ethernet connector Use this connector to connect the server to a network for systems management information cont...

Страница 28: ...error LED When this LED is lit it indicates that a system error has occurred An LED on the light path diagnostics panel is also lit to help isolate the error Serial connector Connect a 9 pin serial de...

Страница 29: ...nnector DIMM 9 connector DIMM 8 connector DIMM 7 connector DIMM 6 connector DIMM 5 connector DIMM 4 connector DIMM 3 connector DIMM 2 connector DIMM 1 connector Fan connector 3 Fan connector 1 Fan con...

Страница 30: ...lowing illustration shows the connectors for user installable devices on the riser card Riser card assembly Remote Slimline Adapter II connector HTX adapter connector 12 IBM System x3655 Type 7985 and...

Страница 31: ...ternal USB Tape drive power Front USB Front video CD DVD power CD DVD signal Operator panel SATA tape drive signal Power backplane card internal connectors The following illustration shows the interna...

Страница 32: ...al input output connectors on the system board Ethernet 2 USB 3 connectors Ethernet 1 USB 4 connectors USB 1 USB 2 connectors Systems management Ethernet connector Video connector Serial connector 14...

Страница 33: ...ystem board Any jumpers on the system board that are not shown in the illustration are reserved See Recovering the BIOS code on page 67 for information about the BIOS recovery jumper Power on password...

Страница 34: ...Changing the position of this jumper to pins 2 and 3 bypasses the power on password check the next time the server is turned on and starts the Configuration Setup Utility so that you can change or de...

Страница 35: ...slot 2 error LED PCI slot 4 error LED DIMM 9 error LED DIMM 16 error LED DIMM 1 error LED DIMM 2 error LED DIMM 3 error LED DIMM 4 error LED DIMM 5 error LED DIMM 6 error LED DIMM 7 error LED DIMM 8...

Страница 36: ...18 IBM System x3655 Type 7985 and 7943 Problem Determination and Service Guide...

Страница 37: ...major components of the server The diagnostic programs are in read only memory on the server See Diagnostic programs messages and error codes on page 55 for more information POST When you turn on the...

Страница 38: ...ts are field replaceable units FRU v If an action step is preceded by Trained service technician only that step must be performed only by a trained service technician Beep code Description Action 1 1...

Страница 39: ...time in the order shown restarting the server each time a DIMMs b Trained Service Technician only System board 1 3 2 First 64K RAM parity test failed 1 Reseat the DIMMs 2 Replace the following compone...

Страница 40: ...3 1 Screen initialization failed Trained service technician only Replace the system board 2 3 2 Screen memory failed Trained service technician only Replace the system board 2 3 3 Screen retrace faile...

Страница 41: ...Trained service technician only Replace the system board 3 2 4 Failure comparing CMOS memory size against actual 1 Reseat the following components a DIMMs b Battery 2 Replace the following components...

Страница 42: ...ode might sound during POST followed by a blank display screen If this occurs and the Boot Fail Count feature in the Start Options of the Configuration Setup Utility program is set to Enabled its defa...

Страница 43: ...ith the primary bank of DIMMs return one bank of DIMMs to the server at a time restarting the server each time until the beep code error returns c Replace one pair of DIMMs at a time in the failing ba...

Страница 44: ...cessor 2 and its VRM and restart the server v If no beep code occurs microprocessor 2 might have failed replace the microprocessor v If the beep code remains remove microprocessor 1 and install microp...

Страница 45: ...service technician only that step must be performed only by a trained service technician No beep symptom Description Action No beep and the system operates correctly Possible problem with the operator...

Страница 46: ...am the menu choices are described in the User s Guide When you are troubleshooting an error be sure to clear the BMC system event log so that you can find current errors more easily Entries that are w...

Страница 47: ...complete the following steps 1 If the server is running turn off the server and all attached devices 2 Turn on all attached devices then turn on the server 3 When the prompt F2 for Diagnostics is dis...

Страница 48: ...e server each time a Battery b Trained service technician only System board 162 Device configuration error 1 Run the Configuration Setup Utility program select Load Default Settings and save the setti...

Страница 49: ...ly Replace the system board 201 Memory test error 1 Update BIOS code and rerun diagnostics 2 Reseat the DIMMs 3 Replace the following components one at a time in the order shown restarting the server...

Страница 50: ...t the IRQ and I O port assignments needed by the serial port are available 2 If all interrupts are being used by adapters remove an adapter or force other adapters to share an interrupt 1200 Processor...

Страница 51: ...tion ROM of adapters in the PCI slots c Select Devices and I O Ports to disable any of the integrated devices 4 If the problem remains replace the following components one at a time in the order shown...

Страница 52: ...rive IDE cable c CD or DVD drive 3 Replace the following components one at a time in the order shown restarting the server each time a CD or DVD drive power cable b CD or DVD drive IDE cable c CD or D...

Страница 53: ...the failing adapter if installed 5 Replace the following components one at a time in the order shown restarting the server each time a Failing adapter b Trained service technician only System board 0...

Страница 54: ...Trained service technician only that step must be performed only by a trained service technician Error code Description Action 19990305 An operating system was not found 1 Make sure that a bootable o...

Страница 55: ...s FRU v If an action step is preceded by Trained service technician only that step must be performed only by a trained service technician Symptom Action The CD or DVD drive is not recognized 1 Make su...

Страница 56: ...that step must be performed only by a trained service technician Symptom Action Not all drives are recognized by the hard disk drive diagnostic test the Fixed Disk test Remove the drive that is indic...

Страница 57: ...1 If the reset occurs during POST and the POST watchdog timer is enabled click Advanced Setup Baseboard Management Controller BMC Settings BMC Post Watchdog in the Configuration Setup Utility program...

Страница 58: ...USB connector 5 Replace the following components one at a time in the order shown restarting the server each time a Keyboard b Only if the problem occurred with a front USB connector Internal USB cab...

Страница 59: ...I replace the DIMM v If a DIMM was disabled by the user or by POST run the Configuration Setup Utility program and enable the DIMM 3 Run memory diagnostics see Running the diagnostic programs on page...

Страница 60: ...Light path diagnostics LEDs on page 52 2 Make sure that the server supports all the microprocessors and that the microprocessors match in speed and cache size 3 Trained service technician only Make s...

Страница 61: ...er shown restarting the server each time a Remote Supervisor Adapter II SlimLine if one is installed b Trained service technician only System board The screen is blank 1 If the server is attached to a...

Страница 62: ...e location of the monitor Magnetic fields around other devices such as transformers appliances fluorescent lights and other monitors can cause screen jitter or wavy unreadable rolling or distorted scr...

Страница 63: ...the installation instructions that came with the device and the device is installed correctly v You have not loosened any other installed devices or cables v You updated the configuration information...

Страница 64: ...er If the button does not work replace the operator information panel assembly e Press the reset button to restart the server If the button does not work replace the operator information panel assembl...

Страница 65: ...ained service technician only that step must be performed only by a trained service technician Symptom Action The number of serial ports that are identified by the operating system is less than the nu...

Страница 66: ...erGuide program See the ServerGuide Setup and Installation CD label for a list of supported operating system versions The operating system cannot be installed the option is not available Make sure tha...

Страница 67: ...onitor problems on page 43 Light path diagnostics Light path diagnostics is a system of LEDs on various external and internal components of the server When an error occurs LEDs are lit throughout the...

Страница 68: ...iagnostics RAID BRD Note any LEDs that are lit and then push the light path diagnostics panel back into the server Look at the system service label on the top of the server which gives an overview of...

Страница 69: ...g illustration shows the LEDs on the riser card Remote Supervisor Adapter II SlimLine error LED Expansion slot 1 error LED Remind button You can use the remind button on the light path diagnostics pan...

Страница 70: ...e that the failing microprocessor which is indicated by a lit LED on the system board is installed correctly See Installing a microprocessor on page 158 for information about installing a microprocess...

Страница 71: ...e it v Make sure that the room temperature is not too high See Features and specifications on page 6 for temperature information v Make sure that the air vents are not blocked RAID A RAID controller e...

Страница 72: ...he server or a problem with the ac power source 1 Check the ac power to the server 2 Make sure that the power cord is connected to a functioning power source 3 Remove one power supply at a time Lit Of...

Страница 73: ...ress F1 from within a help screen to obtain online documentation from which you can select different categories To exit from the help information press Esc To determine what action you should take as...

Страница 74: ...the hardware might be missing or is not being recognized The result is followed by an error code or other additional information about the error Viewing the test log To view the test log when the tes...

Страница 75: ...sor Adapter II SlimLine and ServeRAID code are installed In the error codes x can be any numeral or letter However if the three digit number in the central position of the code is 000 195 or 197 do no...

Страница 76: ...the cause of the error and take the indicated action 2 Restart the server and run the diagnostic test again 3 Run the Quick Memory Test All Banks diagnostic then if an error is detected take the indi...

Страница 77: ...he ServeRAID SAS controller firmware 2 Reseat the ServeRAID SAS controller 3 Replace the ServeRAID SAS controller 035 289 001 Adapter Cache Test Error 1 Update the ServeRAID SAS controller firmware 2...

Страница 78: ...ment Failed Unable to communicate with Remote Supervisor Adapter II SlimLine 1 Update the firmware BIOS service processor diagnostics to the latest levels 2 Run the diagnostic test again 3 Correct oth...

Страница 79: ...ained service technician only Replace the system board 166 201 001 BMC indicates I2C errors on bus 1 1 Trained service technician only Reseat the microprocessor 2 Replace the following components one...

Страница 80: ...assembly and the system board 2 Trained service technician only Replace the system board 166 260 000 System Management Failed Remote Supervisor Adapter II SlimLine restart error 1 Disconnect all powe...

Страница 81: ...nect the power cords and cables and retry the test 2 Update the BMC firmware to the latest level 3 Reseat the following components a Hard disk drive signal cable b Hard disk drive backplane 4 Replace...

Страница 82: ...em board 166 414 001 System Management Failed I2 C bus failure 1 Disconnect all power cords and external cables from the server wait 30 seconds reconnect the power cords and cables and retry the test...

Страница 83: ...Replace the following components one at a time in the order shown restarting the server each time a Operator information panel assembly b Trained service technician only System board 180 361 003 Faile...

Страница 84: ...rvice technician only Replace the system board assembly 202 xxx 0nn Failed system cache test Note nn APIC ID for failing microprocessor v 0 1 microprocessor 1 v 2 3 microprocessor 2 1 Make sure that t...

Страница 85: ...technician only Replace the system board 405 xxx 00n Failed Ethernet test on adapter in PCI slot n 1 Reseat the Ethernet adapter in slot n 2 Replace the Ethernet adapter in slot n 3 Trained service t...

Страница 86: ...en prompted as to whether you want to save the current code to a diskette press N 10 When prompted to choose a language select a language from 0 to 7 and press Enter 11 Remove the BIOS recovery disket...

Страница 87: ...four power channel error LEDs A B C or D on the system board are lit see the entries about power channel error LEDs in Power problems on page 46 See System board LEDs on page 17 2 If the actions in Po...

Страница 88: ...replace the power backplane Restart the server c If the server fails to start trained service technician only replace the system board 5V critical over voltage fault 1 Remove the following devices wh...

Страница 89: ...ault Information only 2 5V critical under voltage fault Information only 1 8V critical over voltage fault Information only 1 8V critical under voltage fault Information only The system real time clock...

Страница 90: ...connector on the fan is not damaged 2 Make sure that the fan connector on the system board is not damaged 3 Make sure that the fan is fully installed press down on the fan 4 Reseat fan n 5 Replace fa...

Страница 91: ...the server and to a working electrical outlet 2 Replace power supply n 3 Replace the power backplane Power supply n fan fault n the power supply number 1 Make sure that there are no obstructions such...

Страница 92: ...echnician only if the error continues replace the system board 4 Remove all PCI adapters from the server Trained service technician only if the error continues replace the system board Software NMI In...

Страница 93: ...Reseat microprocessor 1 2 Trained service technician only Replace microprocessor 1 3 Trained service technician only Replace the system board VRD 1 critical under voltage fault 1 Trained service tech...

Страница 94: ...Replace the DIMMs 3 Replace the microprocessor 4 Trained service technician only Replace the system board System firmware progress Assertion 000B Firmware ROM corrupted 00 0F 1 Use the Boot recovery B...

Страница 95: ...only Replace the system board Planar VBAT 1C 02 1 Replace the battery 2 Trained service technician only Replace the system board Not redundant 1E 08 1 Install another power supply if possible and mak...

Страница 96: ...Power unit failure 27 08 1 Trained service technician only Reseat the microprocessor 2 Trained service technician only Replace the microprocessor VRD 5V Assertion 00 Presence detected 28 08 Informatio...

Страница 97: ...08 1 Inspect the SAS power cable 2 Replace the SAS backplane assembly 3 Trained service technician only Replace the system board 12V faults 2C 09 Trained service technician only Replace the system bo...

Страница 98: ...2 Replace power supply 1 3 Trained service technician only Replace the system board Power supply 2 fault 39 08 1 Reseat power supply 2 2 Replace power supply 2 3 Trained service technician only Replac...

Страница 99: ...all the fan Fan 1 detected Assertion 01 Presence detected 50 04 Information only Fan 2 detected Assertion 00 Not detected 51 04 Replace or install the fan Fan 2 detected Assertion 01 Presence detected...

Страница 100: ...oard Power supply 2 status Assertion 00 Presence detected 71 08 Information only Power supply 2 status Assertion 01 Power supply failure or 03 Power supply ac loss 71 08 1 Check the primary voltages t...

Страница 101: ...nformation only CPU 1 status Assertion 08 Processor disabled 90 07 1 Check the DIMM error LEDs on the system board 2 Trained service technician only Reseat the microprocessor 3 Trained service technic...

Страница 102: ...PERR on PCI x slot AB AC 21 1 Reseat the failing adapter 2 Replace the failing adapter 3 Trained service technician only Replace the system board HT1000 initiated sync flood SERR on PCI x slot AB AC...

Страница 103: ...C2 01 Information only CPU 4 hot C3 01 Information only BIOS logged BMC system error log messages BIOS can log two types of system event log messages POST events which occur during system start up an...

Страница 104: ...escription OEM POST without time stamp 0xE0 Byte 4 POST Error Event Type 0x00 POST PCI POST Event Error 0x01 POST PCI Processor Event 0x02 POST Memory Error 0x04 POST Bus Event 0x05 POST Chipset Event...

Страница 105: ...ution buses Usually a short circuit will cause the power subsystem to shut down because of an overcurrent condition To diagnose a power problem use the following general procedure 1 Turn off the serve...

Страница 106: ...urely attached at all connections If the cable is attached but the problem remains try a different cable If the Ethernet controller is set to operate at 100 Mbps you must use Category 5 cabling If you...

Страница 107: ...upplies are working correctly complete the following steps 1 Turn off the server 2 Make sure that the server is cabled correctly 3 Remove or disconnect the following devices one at a time until you fi...

Страница 108: ...ion currently in use BIOS level v Operating system software Type and version level Note To eliminate confusion identical systems are considered identical only if they 1 Are the exact machine type and...

Страница 109: ...ng system type and version level You can solve some problems by comparing the configuration and software setups between working and nonworking servers When you compare servers to each other for diagno...

Страница 110: ...92 IBM System x3655 Type 7985 and 7943 Problem Determination and Service Guide...

Страница 111: ...mation Replaceable server components Replaceable components are of three types v Tier 1 customer replaceable unit CRU Replacement of Tier 1 CRUs is your responsibility If IBM installs a Tier 1 CRU at...

Страница 112: ...View 1...

Страница 113: ...0 7 SAS filler panel type 7985 models 1Ax 1Bx 2Ax 4Ax 5Ax 6Ax E1G E2G E4G type 7943 models 32x 34x 52x AC1 CTO MC1 39M4375 8 Center bracket 3 5 inch drive cage type 7985 models 1Ax 1Bx 2Ax 4Ax 5Ax 6Ax...

Страница 114: ...1G E2G E4G E5G type 7943 models AC1 CTO MC1 41Y2758 4 Memory 1GB PC2 5300 type 7985 EBU ECU EDU type 7943 models 32x 34x 52x AC1 CTO MC1 41Y2761 4 Memory 2 GB PC2 5300 optional 41Y2764 4 Memory 4 GB P...

Страница 115: ...roprocessor 2 3 GHz quad core w heatsink type 7943 models 52x AC1 CTO MC1 44R6074 10 Microprocessor 1 7 GHz quad core w heatsink type 7943 models 22x 1EY 46M2283 11 Heat sink all models 40K7438 12 Low...

Страница 116: ...36 GB 10K optional 39R7364 Hard disk drive 63 GB 15K optional 39R7346 Hard disk drive 73 GB 10K optional 39R7340 Hard disk drive 73 GB 10K optional 39R7366 Hard disk drive 73 GB 15K optional 39R7348 H...

Страница 117: ...dapter optional 39Y6100 PCI E fiber channel 4 GB dual port adapter optional 39R6528 PCI E fiber channel 4 GB single port adapter optional 39R6526 PCI E fiber channel 4 GB single port adapter optional...

Страница 118: ...veRAID 8k battery optional 25R8088 SFS 7000P PCI E HCA adapter optional 41Y4606 Slide kit toolless all models 40K6591 Slide kit shipping brackets all models 40K6592 Slide kit screw in 41Y8731 System l...

Страница 119: ...rprise Edition 32 bit 1 2 microprocessors French 44W4058 Windows Server Enterprise Edition 32 bit 1 8 microprocessors French 44W4066 Windows Server Enterprise Edition 32 bit 1 2 microprocessors German...

Страница 120: ...at 115 volts Use a UL listed and CSA certified cord set consisting of a minimum 18 AWG Type SVT or SJT three conductor cord a maximum of 15 feet in length and a parallel blade grounding type attachmen...

Страница 121: ...istan Samoa South Africa Sri Lanka Swaziland Uganda 39M5151 Abu Dhabi Bahrain Botswana Brunei Darussalam Channel Islands China Hong Kong S A R Cyprus Dominica Gambia Ghana Grenada Iraq Ireland Jordan...

Страница 122: ...power cord part number Used in these countries and regions 39M5068 Argentina Paraguay Uruguay 39M5226 India 39M5233 Brazil 104 IBM System x3655 Type 7985 and 7943 Problem Determination and Service Gu...

Страница 123: ...maximum levels of performance To download firmware updates for your server go to http www ibm com servers eserver support xseries index html select System x3655 from the Hardware list click Go and cli...

Страница 124: ...er see http www ibm com servers eserver serverproven compat us System reliability guidelines To help ensure proper cooling and system reliability make sure that v Each of the drive bays has a drive or...

Страница 125: ...available Always use an electrostatic discharge wrist strap or other grounding system when working inside the server with the power on v Handle the device carefully holding it by its edges or its fram...

Страница 126: ...server in a rack are in the Rack Installation Instructions that come with the server Front View USB 5 connector USB 6 connector Video connector Rear View Power cord connector Systems management Ethern...

Страница 127: ...age vii and Installation guidelines on page 105 2 If you are planning to install or remove a microprocessor memory module PCI adapter or tape drive turn off the server and all attached devices and dis...

Страница 128: ...ch in the open up position 3 Insert the bottom tabs of the top cover into the matching slots in the server chassis 4 Press down on the cover release latch to lock the cover in place 5 Slide the server...

Страница 129: ...nents Release tab Release tab Riser card assembly Air baffle To remove the air baffle complete the following steps 1 Read the safety information that begins on page vii and Installation guidelines on...

Страница 130: ...n the front of the air baffle with the rear of the fan bracket assembly and the side of the heat sink on microprocessor number one 2 Slide the air baffle down into the server until the bottom edge res...

Страница 131: ...on page vii and Installation guidelines on page 105 2 Turn off the server and all attached devices 3 Disconnect all external cables and power cords 4 Slide the server out of the rack 5 Remove the cove...

Страница 132: ...y Expansion slot 1 Expansion slot cover Expansion slot cover The following illustration shows the location of the adapter expansion slots PCI slot 1 PCI slot 2 PCI slot 3 PCI slot 4 To install the rep...

Страница 133: ...emoving the external SAS cable To remove the external SAS cable complete the following steps 1 Read the safety information that begins on page vii and Installation guidelines on page 105 2 Turn off th...

Страница 134: ...ete the following steps 1 Read the safety information that begins on page vii and Installation guidelines on page 105 2 Turn off the server and all attached devices 3 Disconnect all external cables an...

Страница 135: ...see Installing the air baffle on page 112 then route the cable through the slot in the side of the air baffle External SAS cable slot External SAS cable Release tab Riser card assembly Air baffle The...

Страница 136: ...the rack 14 Connect the cables and power cords 15 Turn on all attached devices and the server Removing the Remote Supervisor Adapter II SlimLine The following illustration shows how to remove the Rem...

Страница 137: ...dapter II SlimLine follow all packaging instructions and use any packaging materials for shipping that are supplied to you Installing the Remote Supervisor Adapter II SlimLine The optional Remote Supe...

Страница 138: ...or Adapter II SlimLine for information about installing the firmware and configuring the options Note When you start the server for the first time after you install a Remote Supervisor Adapter II Slim...

Страница 139: ...end of the connector 12 Lift the ServeRAID SAS controller out of the connector 13 If you are instructed to return the ServeRAID SAS controller follow all packaging instructions and use any packaging m...

Страница 140: ...tabs into the battery mounting clips on the wall of the power supply bay next to the connector c Connect the ServeRAID 8k SAS controller battery cable to the ServeRAID SAS controller 5 Reposition the...

Страница 141: ...drive Locate the documentation that comes with the hard disk drive and follow those instructions in addition to the instructions in this chapter For information about the type of hard disk drive that...

Страница 142: ...e drive b Align the drive assembly with the guide rails in the bay c Gently push the drive assembly into the bay until the drive stops d Push the tray handle to the closed locked position 2 Check the...

Страница 143: ...cover see Removing the cover on page 109 6 Press down on the release tab on the top of the drive bay to release the drive then while pressing the tab push the drive toward the front of the server Alig...

Страница 144: ...ntion clip 2 Attach the drive retention clip to the side of the drive 3 From the front of the server slide the drive into the CD RW DVD drive bay until the drive clicks into place 4 Install the cover...

Страница 145: ...ly pull the drive and cables out of the bay Note On a 3 5 inch model server gently pull the drive cables out through the slot in the left side of the bay 11 If you are not installing another drive in...

Страница 146: ...the cable to the back of the tape drive 5 Push the tape drive assembly into the bays gently pulling the cables farther into the server as you do so until the tape drive assembly stops 6 Push the tray...

Страница 147: ...bly see Installing the fan bracket assembly on page 114 11 Install the cover see Installing the cover on page 110 12 Slide the server into the rack 13 Connect the cables and power cords 14 Turn on all...

Страница 148: ...gently pulling the cable farther into the server as you do so until the tape drive assembly stops 6 Push the tray handle to the closed locked position 7 Connect the cable to the following system boar...

Страница 149: ...TA drive see Installing the riser card assembly on page 155 10 Install the fan bracket assembly see Installing the fan bracket assembly on page 114 11 Install the cover see Installing the server cover...

Страница 150: ...If you are instructed to return the DIMM follow all packaging instructions and use any packaging materials for shipping that are supplied to you Installing a memory module For information about the t...

Страница 151: ...rs in the server at a minimum you must install two DIMMs in Slots 1 and 2 and two DIMMs in slot 9 and 10 v The server supports online spare memory This feature disables a failed pair of DIMMS from the...

Страница 152: ...there is a gap between the DIMM and the retaining clips the DIMM has not been correctly inserted open the retaining clips remove the DIMM and then reinsert it 5 Repeat steps 1 through 4 until all the...

Страница 153: ...instructions and use any packaging materials for shipping that are supplied to you Installing a hot swap fan For proper cooling the server requires five fans installed for each hot swap power supply i...

Страница 154: ...replace some components such as the CD RW DVD drive you must remove the fan bracket assembly to route some cables you might have to remove the fan bracket assembly Note To remove or install a fan it...

Страница 155: ...ng the fan bracket assembly To install the replacement fan bracket assembly complete the following steps Fan bracket Fan bracket release latches 1 Align the guides on the left and right sides of the a...

Страница 156: ...you are removing 4 Grasp the power supply handle 5 Press the orange release latch down and hold it down 6 Pull the power supply part of the way out of the bay 7 Release the release latch then support...

Страница 157: ...any part that has the following label attached Hazardous voltage current and energy levels are present inside any component that has this label attached There are no serviceable parts inside these co...

Страница 158: ...power supply are lit indicating that the power supply is operating correctly Removing the battery Note After you replace the battery you must reconfigure the server and reset the system date and time...

Страница 159: ...Battery Chapter 5 Removing and replacing server components 141...

Страница 160: ...v To avoid possible danger read and follow the following safety statement Statement 2 CAUTION When replacing the lithium battery use only IBM Part Number 33F8354 or an equivalent type battery recommen...

Страница 161: ...cal outlet before the power control button becomes active 10 Turn on all attached devices and the server 11 Start the Configuration Setup Utility program and reset the configuration v Set the system d...

Страница 162: ...ge 109 5 Remove the fan bracket assembly see Removing the fan bracket assembly on page 136 6 Disconnect the operator information panel ribbon cable from the system board 7 Reach inside the server and...

Страница 163: ...front of the server thread the operator information panel ribbon cable through the panel housing in the server then connect the ribbon cable to the operator panel connector J76 on the system board se...

Страница 164: ...Installation guidelines on page 105 2 Turn off the server and all attached devices 3 Disconnect all external cables and power cords 4 Slide the server from the rack and place it on a flat static prote...

Страница 165: ...hard disk drive enclosure 3 Push the top of the hard disk drive backplane toward the front of the server until it clicks into place Make sure the release latches hold the backplane securely in place 4...

Страница 166: ...k drives out of the server slightly to disengage them from the backplane 6 Remove the cover see Removing the cover on page 109 7 Remove the fan bracket assembly see Removing the fan bracket assembly o...

Страница 167: ...r until it clicks into place Make sure the release latches hold the backplane securely in place 3 Connect the power and signal cables to the backplane 4 Replace the fan bracket assembly see Installing...

Страница 168: ...bracket assembly on page 136 7 Disconnect the operator information panel cable from the system board 8 Release the CD RW DVD drive and pull it out of the bay slightly see Removing a CD RW DVD drive o...

Страница 169: ...the operator information panel cable to the connector on the system board J76 see System board internal connectors on page 11 for the location of the connector 5 Slide the CD RW DVD drive into the bay...

Страница 170: ...wer supply bays see Removing a hot swap power supply on page 138 6 Remove the cover see Removing the cover on page 109 7 Remove the fan bracket assembly see Removing the fan bracket assembly on page 1...

Страница 171: ...til the edge connectors are fully connected 3 Connect the power cable from the hard disk drive backplane to the power backplane 4 Install the fan bracket assembly see Installing the fan bracket assemb...

Страница 172: ...following steps to remove the riser card assembly 1 Read the safety information that begins on page vii and Installation guidelines on page 105 2 Turn off the server and all attached devices 3 Disconn...

Страница 173: ...the retention latches the guides on the rear of the server and the riser card connector on the system board then press down on the assembly Make sure that the riser card assembly is fully seated in t...

Страница 174: ...Turn off the server and all attached devices 3 Disconnect all external cables and power cords 4 Slide the server from the rack and place it on a flat non conductive surface 5 Remove the cover see Rem...

Страница 175: ...he rack 7 Install the hard disk drives see Installing a hard disk drive on page 123 8 Connect the cables and the power cord 9 Turn on all attached devices and the server Removing a microprocessor Atte...

Страница 176: ...he microprocessor release latch to the fully open position 10 Open the microprocessor bracket frame and carefully remove the microprocessor Microprocessor Alignment marks Notches 11 If you are instruc...

Страница 177: ...ing the microprocessor to any unpainted metal surface on the server Then remove the microprocessor from the package 2 Rotate the microprocessor release lever on the socket from its closed and locked p...

Страница 178: ...mly on the front of the heat sink until it is seated securely f Rotate the heat sink release lever to the closed position and hook it underneath the lock tab 6 Install the air baffle see Installing th...

Страница 179: ...heat sink retention module from the system board 8 If you are instructed to return the heat sink retention module follow all packaging instructions and use any packaging materials for shipping that a...

Страница 180: ...age 112 5 Install the riser card assembly see Installing the riser card assembly on page 155 6 Install the cover see Installing the cover on page 110 7 Slide the server into the rack 8 Connect the cab...

Страница 181: ...existing firmware that the customer provides on a diskette or CD image Make sure that you have the latest firmware or a copy of the pre existing firmware before you proceed 5 Remove the following comp...

Страница 182: ...essor and its original heatsink can require the installation of a new heat sink instead 10 Remove each microprocessor heat sink and microprocessor then place them on a static protective surface for re...

Страница 183: ...kplane on page 153 3 Install the power supplies see Installing a hot swap power supply on page 139 4 Connect the cables to the system board that you disconnected in step 7 of Removing the system board...

Страница 184: ...er update the server with the latest SAS firmware or restore the pre existing firmware from a diskette or CD image v Update the UUID see Updating the UUID on page 183 166 IBM System x3655 Type 7985 an...

Страница 185: ...ode You can select to update the VPD code during the BIOS code update procedure Configuring the server The ServerGuide Setup and Installation CD provides software setup tools and installation tools th...

Страница 186: ...teristics of the server and the order of startup devices startup drive sequence v Set and change settings for advanced hardware features v View and clear the error log v Change interrupt request IRQ s...

Страница 187: ...rting the ServeRAID Configuration Utility program To start the IBM ServeRAID Configuration Utility program complete the following steps 1 Turn on the server 2 When the prompt Press CTRL A for IBM Serv...

Страница 188: ...nfigured controller and ready drives the Configuration wizard starts In the Configuration wizard you can select express configuration or custom configuration Express configuration automatically config...

Страница 189: ...to help you diagnose the problem and also records the error in the BMC system event log The baseboard management controller also provides the following remote server management capabilities through th...

Страница 190: ...Console Stop Bits 1 v Remote Console Text Emulation ANSI v Remote Console Keyboard Emulation ANSI v Remote Console Active After Boot Enabled v Remote Console Flow Control Hardware d Press Esc twice to...

Страница 191: ...the etc securetty file to enable a user to log in as the root user through the SOL console ttyS0 LILO configuration If you are using LILO complete the following steps 1 Modify the etc lilo conf file...

Страница 192: ...sage boot message linear image boot vmlinuz 2 4 9 e 12smp label linux initrd boot initrd 2 4 9 e 12smp img read only root dev hda6 image boot vmlinuz 2 4 9 e 12 label linux up initrd boot initrd 2 4 9...

Страница 193: ...starts a LILO boot prompt is displayed instead of the graphical user interface Press Tab at this prompt to install all of the boot options that are listed To load the operating system in interactive m...

Страница 194: ...rub after making changes to this file NOTICE You have a boot partition This means that all kernel and initrd paths are relative to boot eg root hd0 0 kernel vmlinuz version ro root dev hda6 initrd ini...

Страница 195: ...l vmlinuz 2 4 9 e 12 ro root dev hda6 initrd initrd 2 4 9 e 12 img You must restart the Linux operating system after completing these procedures for the changes to take effect and to enable SOL SUSE S...

Страница 196: ...e color white blue black light gray default 0 timeout 8 title linux kernel hd0 1 boot vmlinuz root dev hda2 acpi oldboot vga 791 1 initrd hd0 1 boot initrd title floppy root chainloader 1 title failsa...

Страница 197: ...then press Enter to display the current boot options for your server b In the Boot Entries section locate the boot entry ID for the section with an OS friendly name of Windows Server 2003 Standard Wr...

Страница 198: ...003 operating system after completing this procedure for the changes to take effect and to enable SOL Installing the OSA SMBridge management utility program Important To obtain maximum benefit from th...

Страница 199: ...ed in as a root user to perform these procedures 1 Go to http www ibm com servers eserver support xseries index html Download the utility program and create the OSA BMC Management Utility CD 2 Insert...

Страница 200: ...board management controller firmware update utility program Use the baseboard management controller firmware update utility program to download and apply a baseboard management controller firmware upd...

Страница 201: ...ont of the server power Turn the server on and off remotely reboot Force the server to restart sel get Display the BMC system event log sol Configure the SOL function sysinfo Display system informatio...

Страница 202: ...184 IBM System x3655 Type 7985 and 7943 Problem Determination and Service Guide...

Страница 203: ...a request for information You can solve many problems without outside assistance by following the troubleshooting procedures that IBM provides in the online help or in the documentation that is provid...

Страница 204: ...r more information about Support Line and other IBM services see http www ibm com services or see http www ibm com planetwide for support telephone numbers In the U S and Canada call 1 800 IBM SERV 1...

Страница 205: ...T LIMITED TO THE IMPLIED WARRANTIES OF NON INFRINGEMENT MERCHANTABILITY OR FITNESS FOR A PARTICULAR PURPOSE Some states do not allow disclaimer of express or implied warranties in certain transactions...

Страница 206: ...d other countries Other company product or service names may be trademarks or service marks of others Important notes Processor speeds indicate the internal clock speed of the microprocessor other fac...

Страница 207: ...found on IBM s Internet site at http www ibm com ibm environment products prp shtml Esta unidad debe reciclarse o desecharse de acuerdo con lo establecido en la normativa nacional o local aplicable IB...

Страница 208: ...effects of EEE on the environment and human health due to the potential presence of hazardous substances in EEE For proper collection and treatment contact your local IBM representative Battery return...

Страница 209: ...ery may also include a chemical symbol for the metal concerned in the battery Pb for lead Hg for mercury and Cd for cadmium Users of batteries and accumulators must not dispose of batteries and accumu...

Страница 210: ...reil num rique de la classe A est conforme la norme NMB 003 du Canada Australia and New Zealand Class A statement Attention This is a Class A product In a domestic environment this product may cause r...

Страница 211: ...Taiwanese Class A warning statement Chinese Class A warning statement Japanese Voluntary Control Council for Interference VCCI statement Appendix B Notices 193...

Страница 212: ...194 IBM System x3655 Type 7985 and 7943 Problem Determination and Service Guide...

Страница 213: ...tronic emission notice 191 command line interface commands identify 182 power 182 sel 182 sysinfo 182 for remote management 182 configuration Configuration Setup Utility 168 minimum 89 ServerGuide Set...

Страница 214: ...pdating 167 Fixed Disk Test 55 FRUs replacing operator information panel assembly 144 SAS backplane 146 system board 163 H hard disk drive diagnostic tests types of 55 installing 123 problems 38 hardw...

Страница 215: ...controller 88 hard disk drive 38 intermittent 39 keyboard 40 memory 41 microprocessor 42 monitor 43 problems continued optional devices 45 POST BIOS 30 power 46 87 serial port 47 software 48 undetermi...

Страница 216: ...system error LED 8 10 log 68 system locator LED 8 10 T temperature 6 test log viewing 56 tests hard disk drive diagnostic 55 thermal material heat sink 160 tools diagnostic 19 trademarks 187 U undeter...

Страница 217: ......

Страница 218: ...Part Number 42D2167 Printed in USA 1P P N 42D2167...

Отзывы: