Chapter 12. Removing and replacing the expansion unit cover
or door
You might need to remove, replace, or install covers or doors on an expansion unit as a part of accessing
components or performing a service action.
Removing the front cover on the 7314-G30 or 5796
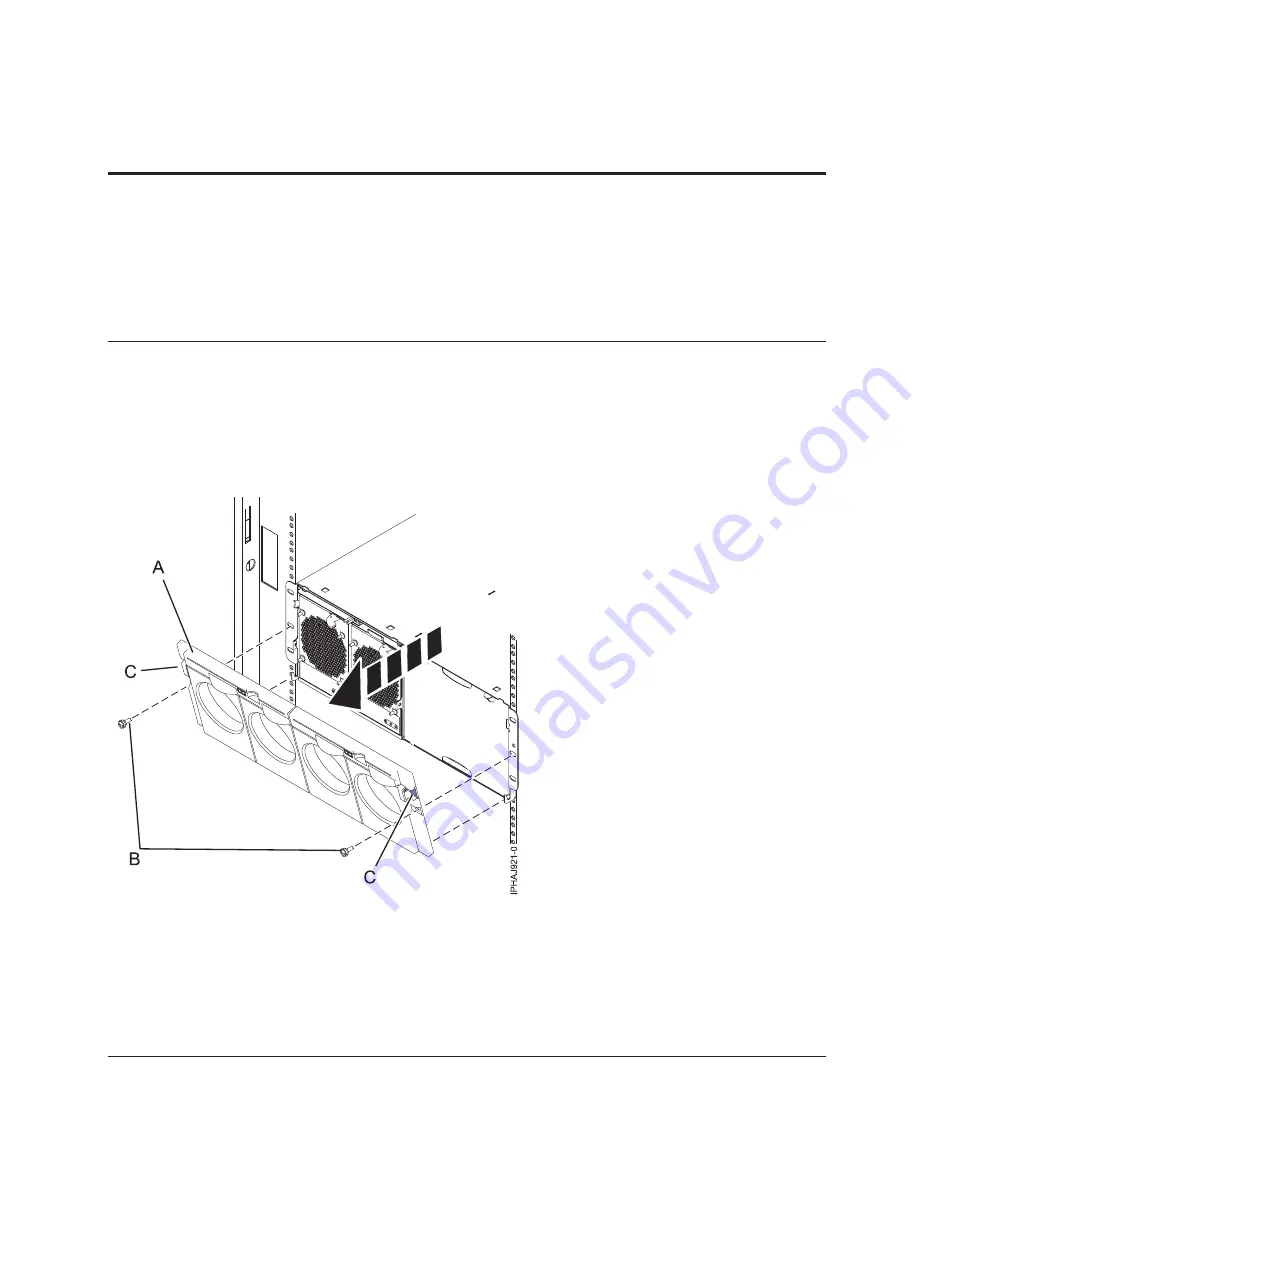
You might need to remove the front cover to perform service to the system.
To remove the front cover follow these steps.
1.
Remove the two thumbscrews
(B)
located on the left and right of the cover.
2.
Press in on the two latches
(C)
located left and right of the cover to release the cover.
3.
Lift the cover
(A)
out and away from the chassis.
Tip:
If an airflow block is present on an unpopulated side of the chassis do not remove it unless you
are populating that side of the chassis.
Installing the front cover on the 7314-G30 or 5796
Use this procedure to install the front cover after installing the system or performing a service action.
Figure 131. Remove the front cover for model 7314-G30 or 5796
© Copyright IBM Corp. 2007, 2009
139
Содержание 0551
Страница 1: ...Power Systems Rack rack features and installing systems or expansion units into a rack ...
Страница 2: ......
Страница 3: ...Power Systems Rack rack features and installing systems or expansion units into a rack ...
Страница 8: ...vi Installing into a rack ...
Страница 12: ...2 Installing into a rack ...
Страница 34: ...24 Installing into a rack ...
Страница 118: ...108 Installing into a rack ...
Страница 126: ...116 Installing into a rack ...
Страница 130: ...120 Installing into a rack ...
Страница 136: ...4 Remove the latch bracket from the system unit Figure 124 Removing the retaining screws 126 Installing into a rack ...
Страница 148: ...138 Installing into a rack ...
Страница 164: ...154 Installing into a rack ...
Страница 174: ...3 Close the front rack door 164 Installing into a rack ...
Страница 181: ......
Страница 182: ... Printed in USA ...


