Chapter 3. Quick Start
19
detail in the following paragraph. Additional information for blind users is available on
¸
the Rockbox website at
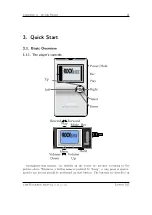
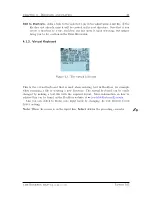
The player is curved so that the end with the screen on it is thicker than the other
end. Hold the player wih the thick end towards the top and the screen facing towards
you. Half way up the front of the unit on the right hand side is a four way joystick which
is the
Up
,
Down
,
Left
, and
Right
buttons. When pressed it serves as
Select
.
On the right hand side of the player from top to bottom, first there is a two way
switch. the
Power
button is activated by pushing this switch up, and pushing this
switch down until it clicks slightly will activate the
Hold
button. When the switch is in
this position, none of the other keys will have an effect.
Below the switch is a lozenge shaped button which is the
Rec
button, and below that
the final button on this side of the unit, the
Play
button. Just below this is a small
hole which is difficult to locate by touch which is the internal microphone. At the very
bottom of this side of the unit is the reset hole, which can be used to perform a hard
reset by inserting a paper clip.
On the bottom of the unit is the connector for the Iaudio subpack or dock. On the
top of the unit is a charge indicator light, which may feel a bit like a button, but is not.
From the top of the player on the left hand side is the headphone socket, then the
remote connector. Below this is a cover which protects the USB and charging connec-
tor.
3.1.2. Turning the player on and off
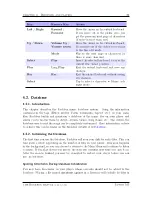
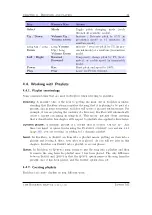
To turn on and off your Rockbox enabled player use the following keys:
Key
Remote Key
Action
Power
Play
Start Rockbox
Long
Power
Long
Play
Shutdown Rockbox
On shutdown, Rockbox automatically saves its settings.
If you have problems with your settings, such as accidentally having set the colours to
black on black, they can be reset at boot time. See the Reset Settings in section
(page
) for details.
In the unlikely event of a software failure, hardware poweroff or reset can be performed
by holding down
Power
until the player shuts off or reboots.
3.1.3. Putting music on your player
With the player connected to the computer as an MSC/UMS device (like a USB Drive),
music files can be put on the player via any standard file transfer method that you would
use to copy files between drives (e.g. Drag-and-Drop). Files may be placed wherever
you like on the player, but it is strongly suggested
NOT
to put them in the
/.rockbox
folder and instead put them in any other folder, e.g.
/
,
/music
or
/audio
. The default
The Rockbox manual
(version 3.14)
Iaudio M5

