Hypersen Technologies Co., Ltd.
HPS-FT-USER V1.8
25
/
38
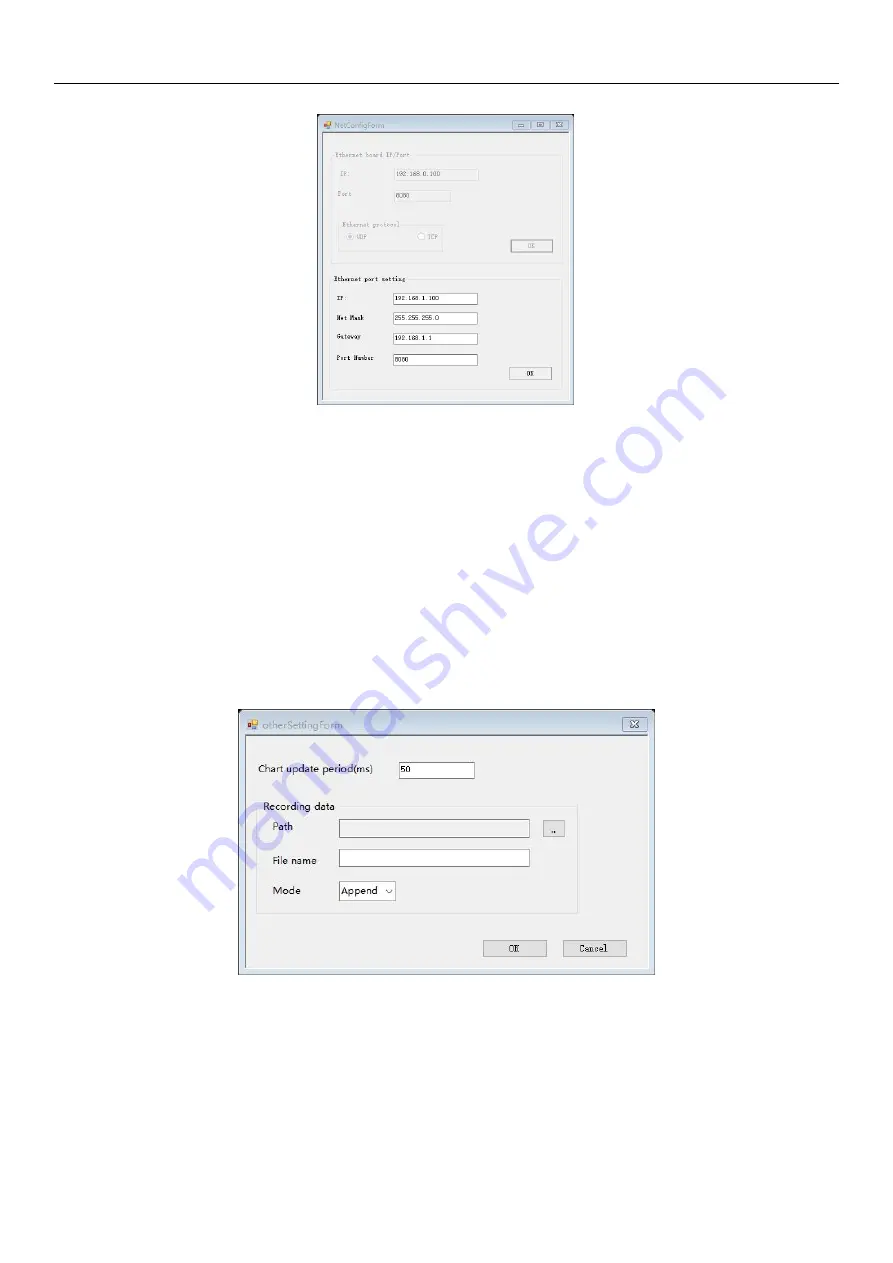
3. Open the
Port Setting
window.
4. After setting the ports of the sensor, click
OK
, and wait until it is prompted that the setting is
successful and reconnection is recommended.
5.
Click the
Save user setting
button on the
Advanced setting
menu, and then the relevant
parameters will remain valid after shutdown.
6. Turn off the sensor and then restart it. Set the computer and the sensor to the same
network segment. Connect it to the host again with the new port settings.
5.1.4 Save data
Steps: 1. Connect the host software to the sensor according to 5.1.1.
2. Click the
Stop
button to stop the acquisition performed by the sensor.
3. Click the
Advanced setting
menu to open the
Other Setting
window.
4. You can set the refresh period of the “Plot” by setting the
Chart update period (ms).
5. Set the file save path and filename in
Recording data
.
6. Set the data save mode to “Append” or “Overwrite”. Click
OK
to make the settings take effect.
7. Close the window and click
Start
to start acquiring data.
8. In the lower right corner of the "Plot", check
Recording data
, and the data will be saved.
9. Uncheck it again to stop saving the data. The data is acquired at a frame rate, which is not
suitable for long data recording.


