background image

51

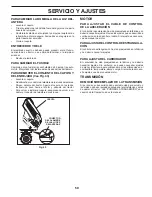
Fig. 21

FILTRO DEL AIRE

Su motor puede sufrir averías y funcionar de manera incorrecta 

con un filtro del aire sucio. Déle servicio al filtro de aire más a 

menudo si se usa en condiciones polvorosas. Vea la manual de 

la motor.

LIMPIEZA DE LA REJILLA DE AIRE 

La rejilla de aire debe mantenerse sin mugre y paja para evitar 

el daño al motor debido al sobrecalentamiento. Límpiela con un 

cepillo de alambre o con aire comprimido para remover la mugre 

y las fibras de goma secas, pegadas.

SISTEMA DE ENFRIAMIENTO DE AIRE 

Para asegurar un enfriamiento adecuado, asegúrese que la rejilla 

del césped, las aletas de enfriamiento, y otras superficies ex ter nas 

del motor se mantengan limpias en todo momento.
Cada 100 horas de operación (más a menudo bajo condiciones 

extremadamente polvorosas o sucias), remueva la caja del 

ven ti la dor y otras tapas de enfriamiento. Limpie las aletas de 

en fria mien to y las superficies externas, según sea necesario. 

Ase gú re se que se vuelvan a instalar las tapas de enfriamiento.

AVISO

: Si se opera la máquina con una rejilla del césped blo-

queada, sucia, o con las aletas de enfriamiento taponadas, y/o 

las tapas de enfriamiento removidas se producirá daño en el 

motor debido al calentamiento excesivo.

SILENCIADOR

Inspeccione y cambie el silenciador corroído y el amortiguador 

de chispas (si viene equipado) pues pueden crear un peligro de 

incendio y/o daños.

FILTRO DE COMBUSTIBLE EN LINEA

(Vea Fig. 21)

El filtro de combustible debe cambiarse una vez cada temporada. 

Si el filtro de combustible se tapona, obstruyendo el flujo del 

combustible hacia el carburador, es necesario cambiarlo.
• 

Con el motor frío, remueva el filtro y tapone las secciones 

de la línea de combustible.

• 

Ponga el filtro de combustible nuevo en su posición en la 

línea de combustible con la flecha señalando hacia el car-

bu ra dor.

• 

Asegúrese de que no hayan fugas en la línea del combus-

tible y que las grapas estén colocadas en forma adecuada.

• 

Inmediatamente limpie toda la gasolina derramada.

BUJÍA(S)

Cambie las bujías al comienzo de cada temporada de siega o 

después de cada 100 horas de operación, lo que suceda pri me ro. 

El tipo de bujía y el ajuste de la abertura aparecen en “ES PE CI-

FI CA CIO NES DEL PRODUCTO” sección de este manual.

00667

Filtro de 

combustible

Abrazadera

Abrazadera

Fig. 22

• 

Mantenga las superficies pulidas y las ruedas sin de rra mes 

de gasolina, aceite, etc.

• 

Proteja las superficies pintadas con cera tipo automotriz.

No recomendamos que se utilice una manguera de jardín o 

agua a presión para limpiar el tractor a no ser que el motor 

y la transmisión estén cubiertos para protegerlos del agua. 

El agua en el motor y la transmisión acortan la vida útil del trac-

tor. Utilizar aire comprimido o un soplador de hojas para remover 

hierba, hojas y basura del tractor y cortacéspedes. 

LIMPIEZA

• 

Limpie todo material extraño del motor, la batería, el asiento, 

el pulido, etc. 

• 

Limpie los desechos de la placa guía.  Los desechos pueden 

limitar el movimiento del eje del pedal del freno/embrague, 

lo que hará que patine la correa y que se pierda la tracción.

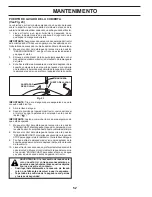
SISTEMA DE DIRECCIÓN,

SALPICADERO, GUARDA-

BARROS Y SEGADORA NO 

MOSTRADOS

PEDAL DEL 

EMBRAGUE/FRENO

PLACA 

DE 

DIRECCIÓN

LIMPIAR PARTE 

SUPERIOR

PRECAUCIÓN: 

PUNTOS DE 

ENGANCHE

PRECAUCIÓN:  Evite todos los puntos de 

enganche y las piezas móviles. (Vea Fig. 22)

MANTENIMENTO

• 

Vuelva a llenar el motor con aceite a través del tubo de la 

varilla indicadora de nivel para relleno del aceite. Vacíelo 

lentamente. No lo llene demasiado. Para la capacidad aproxi-

ma da vea las “Especificaciones del Producto” sección de 

este manual.

• 

Use un medidor en la tapa/varilla indicadora del nivel para 

relleno del aceite para revisar el nivel.  Mantenga el aceite 

en la línea de lleno (FULL) en la varilla indicadora de nivel. 

Apriete la tapa en el tubo en forma segura cuando termine. 

FILTRO DE ACEITE DEL MOTOR 

Cambie el filtro de aceite del motor cada temporada o vez por 

medio que cambie el aceite, si el tractor se usa más de 100 horas 

en un año.

NOTA: 

Si es necesario, retire las cubiertas de panel inferiores 

utilizando los pasos de la sección "Extracción de la cubierta del 

tablero inferior" de este manual.

Содержание GT52XLS

Страница 1: ...dtheproductwarranty Estamáquinapuedeutilizargasolinaconuncontenido dehastael10 deetanol E10 Elusodeunagasolina que supere el 10 de etanol E10 anulará la garantía del producto the product warranty Please read the operator s manual carefully and make sure you understand the instructions before using the machine Por favor lea cuidadosamente y comprenda estas intrucciones antes de usar esta maquina ...

Страница 2: ...lope Keep all movement on the slopes slow and gradual Do not make sudden changes in speed or direction which could cause the machine to roll over Use extra care while operating machine with grass catch ers or other attachments they can affect the stability of the machine Do no use on steep slopes Do not try to stabilize the machine by putting your foot on the ground Do not mow near drop offs ditch...

Страница 3: ...Use extra care when approaching blind corners shrubs trees or other objects that may block your view of a child IV TOWING Tow only with a machine that has a hitch designed for towing Do not attach towed equipment except at the hitch point Follow the manufacturer s recommendation for weight limits for towed equipment and towing on slopes Never allow children or others in or on towed equipment On sl...

Страница 4: ...read and retain this manual The instructions will enable you to assemble and maintain your tractor properly Always observe the SAFETY RULES CUSTOMER RESPONSIBILITIES Read and observe the safety rules Follow a regular schedule in maintaining caring for and using your tractor Follow the instructions under Maintenance and Stor age sections of this manual Wear proper Personal Protective Equipment PPE ...

Страница 5: ...he Operation section of this manual Roll tractor forward off skid Continue with the instructions that follow TOOLS REQUIRED FOR ASSEMBLY A socket wrench set will make assembly easier Standard wrench sizes are listed 1 1 2 wrench Tire pressure gauge 2 7 16 wrenches Utility knife Pliers Whenrightorlefthandismentionedinthismanual itmeans when you are in the operating position seated behind the steeri...

Страница 6: ...ortably and tightened securely All tires are properly inflated For shipping purposes the tires were overinflated at the factory Be sure mower deck is properly leveled side to side front to rear for best cutting results Tires must be properly inflated for leveling Check mower and drive belts Be sure they are routed properly around pulleys and inside all belt keepers Check wiring See that all connec...

Страница 7: ...entify safety inform ation about hazards which can result in death serious injury and or property damage DANGER indicates a hazard which if not avoided will result in death or serious injury WARNING indicates a hazard which if not avoided could result in death or serious injury CAUTION indicates a hazard which if not avoided might result in minor or moderate injury CAUTION when used without the al...

Страница 8: ...unted to your tractor F IGNITION SWITCH Used for starting and stopping the engine G REVERSE OPERATION SYSTEM ROS ON POSITION Allows operation of mower or other powered attachment while in reverse H LIGHT SWITCH Turns the headlights on and off J CRUISE CONTROL LEVER Used to set forward movement of tractor at desired speed without holding the forward drive pedal K FORWARD DRIVE PEDAL Used for forwar...

Страница 9: ...rs the best mower performance TO USE CHOKE CONTROL N See Fig 6 Use choke control whenever you are starting a cold engine Do not use to start a warm engine To engage choke control N pull knob out Slowly push knob in to disengage GROUND DRIVE To stop ground drive depress brake pedal into full BRAKE position IMPORTANT FORWARD AND REVERSE DRIVE PEDALS RETURN TO NEUTRAL POSITION WHEN NOT DEPRESSED STOP...

Страница 10: ... such as trimming at slow speeds may cause the cruise control to disengage Do not use the cruise control on slopes rough terrian or while trimmimg or turning With forward drive pedal depressed to desired speed pull cruise control lever J up and hold while lifting your foot off the pedal then release the lever To disengage the cruise control depress the brake pedal or tap on forward drive pedal Put...

Страница 11: ...essary TO OPERATE ON HILLS CAUTION Do not drive up or down hills with slopes greater than 15 and do not drive across any slope Choose the slowest speed before starting up or down hills Avoid stopping or changing speed on hills If stopping is absolutely necessary push brake pedal quickly to brake position and engage parking brake To restart movement slowly release parking brake and brake pedal Slow...

Страница 12: ...tem of an engine while in storage To avoid engineproblems thefuelsystemshouldbeemptied before storage of 30 days or longer Drain the gas tank start the engine and let it run until the fuel lines and carburetor are empty Use fresh fuel next season See Storage Instructions for additional information Neveruseengineorcarburetorcleaner products in the fuel tank or permanent damage may occur SERVICE REM...

Страница 13: ...ractor for the first time This procedure will remove any trapped air inside the transmission which may have devel oped during shipping of your tractor IMPORTANT SHOULD YOUR TRANSMISSION REQUIRE REMOVAL FOR SERVICE OR REPLACEMENT IT SHOULD BE PURGED AFTER REINSTALLATION BEFORE OPERATING THE TRACTOR 1 Place tractor safely on a level surface that is clear and open with engine off and parking brake se...

Страница 14: ... first cut relatively high the second to the desired height Do not mow grass when it is wet Wet grass will plug mower and leave undesirable clumps Allow grass to dry before mowing Always operate engine at full throttle when mow ing to assure better mowing performance and proper discharge of material Regulate ground speed by selecting a low enough gear to give the mower cutting performance as well ...

Страница 15: ...MENDATIONS The warranty on this tractor does not cover items that have beensubjectedtooperatorabuseornegligence Toreceive full value from the warranty operator must maintain tractor as instructed in this manual Some adjustments will need to be made periodically to properly maintain your tractor At least once a season check to see if you should make any of the adjustments described in the Service a...

Страница 16: ... with the ignition switch in the ROS ON position and the attachment clutch engaged any attempt by the operator to shift into reverse should NOT shut off the engine BLADE CARE Forbestresultsmowerbladesmustbekeptsharp Replace bent or damaged blades CAUTION Useonlyareplacementbladeap proved by the manufacturer of your tractor Using a blade not approved by the manu facturer of your tractor is hazardou...

Страница 17: ...the factory and fluid mainte nance is not required for the life of the transaxle Should the transaxle ever leak or require servicing contact your nearest authorized service center department 02794 DRAIN TUBE OIL DRAIN VALVE TO CLOSE TO OPEN Fig 19 Fig 20 TABS SLOTS FASTENER LOWER DASH COVER TO CHANGE ENGINE OIL See Fig 18 20 Determine temperature range expected before oil change All oil must meet ...

Страница 18: ...he useful life of your tractor Use compressed air or a leaf blower to remove grass leaves and trash from tractor and mower CLEANING Clean engine battery seat finish etc of all foreign matter Clean debris from steering plate Debris can restrict clutch brake pedal shaft movement causing belt slip and loss of drive CAUTION Avoid all pinch points and movable parts See Fig 22 CLUTCH BRAKE PEDAL STEERIN...

Страница 19: ...er on 6 While sitting in the operator s position on the tractor re start the engine and place the throttle lever in the Fast position IMPORTANT Recheck the area making certain the area is clear 7 Move the tractor s attachment clutch control to the ENGAGED position Remainintheoperator sposition with the cutting deck engaged until the deck is cleaned 8 Move the tractor s attachment clutch control to...

Страница 20: ...wer suspension arm A from chassis and rear lift link C from rear mower bracket D remove retainer springs and washers Go to other side of mower and disconnect the suspen sion arm and rear lift link CAUTION After rear lift links are discon nected the attachment lift lever will be springloaded Haveatightgriponliftlever when changing position of the lever Slide mower out from under right side of tract...

Страница 21: ...TOREPLACEMOWER BLADE DRIVE BELT in this section of the manual D C Fromrightsideofmower firstinsert90 endofanti sway bar S into hole in transaxle bracket T located near left rear tire in front of transaxle NOTE Flashlight may be helpful NOTE Depending on model bracket T may be differ ent than shown but hole for anti sway bar will be in same position location ANTI SWAY BAR S LOCATION TRANSAXLE BRACK...

Страница 22: ... and visually checking the appearance Readjust if necessary until you are satisfied with the results Fig 32 Fig 33 PRECISION SIDE TO SIDE ADJUSTMENT See Fig 33 With all tires properly inflated park tractor on level ground or driveway CAUTION Blades are sharp Protect your hands with gloves and or wrap blade with heavy cloth Raise mower to its highest position At both sides of mower position blade a...

Страница 23: ...any dirt or grass clippings which may have accumulated around mandrels and entire upper deck surface With a 3 8 breaker bar and using the square open ing in the idler arm shift the arm counter clockwise to relieve the tension on the belt Carefully roll the belt over the top of the cutter housing pulleys Remove the belt from around the electric clutch on the engine shaft MOWER DRIVE BELT INSTALLATI...

Страница 24: ...left footrest BELT REMOVAL 1 Remove mower See TO REMOVE MOWER section in this manual NOTE Observe entire motion drive belt and position of all belt guides and keepers 2 Disconnect clutch wire harness A 3 Remove anti rotation link B on right side of tractor 4 Remove belt from stationary idler C and clutching idler D 5 Pull belt slack toward rear of tractor Carefully remove belt upwards from transmi...

Страница 25: ...om fuel tank and battery TO REMOVE CABLES REVERSE ORDER BLACK cable first from chassis and then from the fully charged battery RED cable last from both batteries WEAK OR DEAD BATTERY FULLY CHARGED BATTERY Fig 41 SERVICE AND ADJUSTMENTS REPLACING BATTERY See Fig 42 WARNING Do not short battery termi nals by allowing a wrench or any other object to contact both terminals at the same time Before conn...

Страница 26: ...e above procedure ENGINE TO ADJUST THROTTLE CONTROL CABLE The throttle control has been preset at the factory and adjustment should not be necessary If adjustment is nec essary see engine manual TO ADJUST CHOKE CONTROL Thechokecontrolhasbeenpresetatthefactoryandadjust ment should not be necessary If adjustment is necessary see engine manual TO ADJUST CARBURETOR Your carburetor is not adjustable If...

Страница 27: ...AL FUEL SYSTEMPARTSSUCHASCARBURETOR FUELFILTER FUEL HOSE OR TANK DURING STORAGE ALSO EXPERIENCE INDICATES THAT ALCOHOL BLENDED FUELS CALLED GASOHOL OR USING ETHANOL OR METHANOL CANATTRACTMOISTUREWHICHLEADS TO SEPARATION AND FORMATION OF ACIDS DURING STORAGE ACIDIC GAS CAN DAMAGE THE FUEL SYSTEM OF AN ENGINE WHILE IN STORAGE Empty the fuel tank by starting the engine and let it run until the fuel l...

Страница 28: ...ing 7 Faulty ignition switch 7 Check replace ignition switch 8 Faulty solenoid or starter 8 Check replace solenoid or starter 9 Faulty operator presence switch es 9 Contact an authorized service center department Engine clicks but will not start 1 Weak or dead battery 1 Recharge or replace battery 2 Corroded battery terminals 2 Clean battery terminals 3 Loose or damaged wiring 3 Check all wiring 4...

Страница 29: ...led 9 Reinstall blades sharp edge down 10 Improper blades used 10 Replace with blades listed in parts manual 11 Cloggedmowerdeckventholesfrombuildup of grass leaves trash around mandrels 11 Clean around mandrels to open vent holes Headlight s not working if so equipped 1 Switch is OFF 1 Turn switch ON 2 Bulb s or lamp s burned out 2 Replace bulb s or lamp s 3 Faulty light switch 3 Check replace li...

Страница 30: ... never across the face Do not mow slopes greater than 15 degrees Make turns gradually to prevent tipping or loss of control Exercise extreme caution when changing direction on slopes 1 Fold this page along dotted line indicated above 2 Hold page before you so that its left edge is vertically parallel to a tree trunk or other upright structure 3 Sight across the fold in the direction of hill slope ...

Страница 31: ...Warranty In most cases these items are NOT manufactured by Husqvarna in which case they may be covered separately by their respective manufacturer s warranties if one is provided and included with the product at the time of purchase The following transmission transaxle manufacturers Dana Hydro Gear Tuff Torq provide a warranty for the transmission transaxle to the ultimate purchaser or to Husqvarn...

Страница 32: ...onal problem or failure occurs 9 Reinforced Stamped Armor Protected 10 Year Limited Fabricated Limited Lifetime Deck Warranties These Limited Warranties are for the deck shell only mechanical components parts such as belts pulleys spindle housings bearings blades rods height adjusters caster anti scalp wheels are NOT covered The Limited Lifetime Warranty does not cover damage other than that resul...

Страница 33: ...arranty 10 Years No Warranty No Warranty Fabricated Deck shell Limited Lifetime Warranty No Warranty No Warranty Battery 1 Year Pro rated No Warranty No Warranty Other Non Expendable Components 3 Years 1 Year No Warranty LE475 Edger Tillers Snow Throwers Engine Other Non Expendable Components 2 Years 90 days 90 days Tiller Tines No Warranty No Warranty Walk Behind Mowers High Wheel Trimmer Engine ...

Страница 34: ... left Consumer Commercial Rental Armor Protected Stamped Deck Shell Example Below Fabricated Deck Shell Example Below Stamped Deck Shell below NOT reinforced Limited Lifetime Warranty on Tiller tines and Fabricated Deck shell is for the life of the product or 7 seven years after the last date of the complete unit s final production whichever comes first Deck Shell replacement will be limited to a ...

Страница 35: ...u otros es combros que pueden tocar el tubo de escape partes del motor calientes y quemarse No permitir que el puente del cortacésped cargue hojas u otros residuos que pu eden causar acumulaciones Limpiar toda salpicadura de aceite o carburante antes de hacer operaciones sobre la máquina o guardarla Dejarla enfriar antes de guardarla II FUNCIONAMIENTO EN PENDIENTES Las pendientes son el mayor fact...

Страница 36: ...l depósito de carburante o la abertura del contenedor durante toda la operación de abastecimiento No utilizar un dispositivo con boquilla cerrada abierta OPERACIONES DE SERVICIO GENERALES Nunca hacer funcionar la máquina en un área cerrada Mantener todas las tuercas y pernos apretados para asegu rarse de que trabaja en condiciones seguras Nunca modificar los dispositivos de seguridad Controlar su ...

Страница 37: ...os como mínimo calzado de seguridad gafasprotectorasyprotecciónauditiva Noutilicepantalones cortos y o calzado abierto cuando corte la hierba Informe siempre a alguien de que se dispone a cortar la hierba en el exterior ADVERTENCIA Este tractor viene equipado con un motor de combustión interna y no se debe usar sobre o cerca de un terreno no desarrollado cubierto de bosques de arbustos o de césped...

Страница 38: ...r el asiento en la posición AVISO Ahora puede rodar su tractor fuera de la corredera Siga lassiguientesinstruccionespararemovereltractordelacorredera ADVERTENCIA Antes de empezar leer entender y seguir todas las instrucciones presentes en la sección Operaciones de este manual Asegurarse que el tractor esté en un área bien ventilada Asegurarse que la zona delante del tractor esté libre de otras per...

Страница 39: ... han sido infladas en forma adecuada Para fines de envío las llantas se inflaron demasiado en la fábrica Asegúrese que el conjunto segador esté nivelado en forma adecuada de lado a lado y desde adelante hacia atrás para obtenerlosmejoresresultadosenelcorte Lasllantastienen que estar infladas en forma adecuada para la nivelación Revise las correas de impulsión y de la segadora Asegúrese que recorra...

Страница 40: ... No seguir las siguientes instrucciones puede provocar heridas o muerte Los símbolos de aviso de seguridadse utilizan para identificar informaciones de seguridad relativas a peligros que puedenprovocar la muerte heridas graves y o daños a la máquina PELIGRO indica un peligro que si no se evita provoca muerte o lesiones graves ADVERTENCIA indica un peligro que si no se evita puede provocar muerte o...

Страница 41: ... de marcha atrás K PEDAL DE MARCHA ADELANTE Se utiliza para el movimiento del tractor hacia adelante L PEDAL DE MARCHA ATRÁS Se utiliza para el movimiento del tractor hacia atrás M CONTROL DE RUEDA LIBRE Desengancha la trans misión para empujar o arrastrar lentamente el tractor con el motor apagado N CONTROL DE ESTRANGULACIÓN Se usa cuando se hace arrancar un motor frío P DISPOSITIVODEAVISODESERVI...

Страница 42: ...forma segura MOVERSE HACIA ADELANTE Y HACIA ATRÁS Vea Fig 7 La dirección y la velocidad de movimientos están controlados por los pedales de marcha adelante y atrás Poner en marcha el tractor y quitar el freno de mano Apretar lentamente el pedal marcha adelante K y atrás L para iniciar el movimiento Más se aprieta el pedal y mayor es la velocidad PARA USAR EL CONTROL DE LA ACELERACIÓN D Vea Fig 6 S...

Страница 43: ...sto instalando la rueda calibradora en el mismo agujero de ajuste PARA AJUSTAR LA ALTURA DE CORTE DE LA SEGADORA Vea Fig 8 La posición de la palanca elevadora A determina a qué altura se cortará el césped Coloque la palanca elevadora en la ranura de la altura de seada La gama de la altura de corte es de aproximadamente 1 a 4 pulga das Las alturas se miden desde el suelo a la punta de la cuchilla c...

Страница 44: ...ue puesto apagará el motor a menos que la llave de ignición se ponga en la posición de ON del ROS ATENCIÓN Ir marcha atrás con el embrague puesto para cortar no es recomendable Poniendo el ROS en posición ON para permitir el funcionamiento atrás con el embrague puesto se tiene que hacer sólo cuando el operador lo considera necesario para reposicionar la máquina con el dispositivo embragado No sieg...

Страница 45: ...on plomo aumentará los depósitos de óxido de plomo y carbono y se reducirá la duración de la válvula No mezcle el aceite con la gasolina Para asegurar que la gasolina utilizada sea fresca compre estanques los cuales puedan ser utilizados durante los primeros 30 días PRECAUCIÓN Limpie el aceite o el com bustible derramado No almacene derrame ousegasolinacercadeunallamaexpuesta IMPORTANTE CUANDO SE ...

Страница 46: ... de operación suelte el pedal del freno y ponga el freno de estacionamiento Mueva el embrague del accesorio a la posición desen ganchado Mueva la palanca de control de la aceleración a la posición de estrangulación AVISO Antes de arrancar lea las instrucciones siguientes para el arranque en clima frío y templado Inserte la llave en la ignición y gire la llave en el sentido que giran las manillas d...

Страница 47: ...os vueltas siegue en la dirección opuesta haciendo virajes a la izquierda hasta que termine Vea Fig 15 Si el césped está demasiado alto se debe segar dos veces para reducir la carga y los posibles peligros de incendio debido a los recortes secos Haga el primer corte relativamente alto el segundo a la altura deseada No siegue el césped cuando está mojado El césped mojado taponará la segadora y deja...

Страница 48: ...fiéz la commande de présence d opérateur et le sistema d ROS Revisar si hay sujetadores sueltos Afilar cambiar las cuchillas de la segadora Tabla de lubricación Revisar el nivel Revisar el nivel del aceite del motor Cambiar el aceite del motor con filtro Limpiar el filtro de aire Limpiar la rejilla de aire Cambiar el filtro de aceite si equipado Limpiar las aletas de enfriamiento Cambiar la bujía ...

Страница 49: ...orio conectado cualquier tentativa del operador de viajar marcha atrás NO apagará el motor 02828 POSICIÓN ROS ON MOTOR EN POSICIÓN ON OPERACIÓN NORMAL CUIDADO DE LA CUCHILLA Para obtener resultados óptimos las cuchillas de la cortadora debenestarafiladas Reemplacelascuchillasqueesténgastadas dobladas o dañadas PRECAUCIÓN Usar solamente la hojas de repuesto aprobada por el fabricante de su cortacés...

Страница 50: ... en un envase adecuado EXTRACCIÓN DE LA CUBIERTA DEL TABLERO INFERIOR Levantar la capota Retirar el sujetador de la cubierta del tablero inferior PRECAUCIÓN Retirarlacubiertadeltableroinferiorconcuidado para que no se rompan las lengüetas de la cubierta Deslizar la cubierta del tablero inferior hacia arriba para liberar las lengüetas de la cubierta de las ranuras cónicas del tablero inferior y ret...

Страница 51: ... la gasolina derramada BUJÍA S Cambie las bujías al comienzo de cada temporada de siega o después de cada 100 horas de operación lo que suceda primero El tipo de bujía y el ajuste de la abertura aparecen en ESPECI FICACIONES DEL PRODUCTO sección de este manual 00667 Filtro de combustible Abrazadera Abrazadera Fig 22 Mantenga las superficies pulidas y las ruedas sin derrames de gasolina aceite etc ...

Страница 52: ...á equipada con un puerto de lavado sobre la superficie que forma parte del sistema de lavado de la cubierta Sedeberíautilizarcadavezquesehayausadoeltractor 1 Lleve el tractor a un lugar horizontal y despejado de su césped lo bastante cerca de una boca de riego como para que llegue la manguera del jardín IMPORTANTE Asegúresedequelabocadedescargadeltractor está orientada LEJOS de su casa garaje coch...

Страница 53: ...a hágala descender lentamente y tránquela en la posición más baja NOTA Cerciórese de que los brazos de suspensión de los lados de la segadora A estén dirigidos hacia adelante antes de deslizarla por PARA DESMONTAR LA CORTADORA DE CÉSPED Vea Fig 24 Suelte el embrague poniéndolo en la posición DISEN GAGED DESACTIVADO Baje la palanca elevadora de montaje a la posición de más abajo Retire la cinta de ...

Страница 54: ...asándola por encima de la polea del motor M Fig 28 Fig 29 COLOQUE EL ESLABÓN FRONTAL E Trabaje desde el lado izquierdo de la cortadora de césped Inserte el extremo de la varilla roscada del ensamblaje del eslabón a través del orificio frontal de la abrazadera de suspensión de la cortadora de césped F Instale el manguito O e instale sin apretar la tuerca P y la contratuerca Q Inserte los extremos a...

Страница 55: ...o Si la punta anterior de la hoja de la cuchilla no está 1 8 a 1 2 más abajo que la punta posterior diríjase a la parte de adelante del tractor Con una llave inglesa de 11 16 o de calibre regulable afloje la tuerca A dándole varias vueltas para despejar la tuerca de ajuste B Con una llave inglesa de 3 4 o de calibre regulable haga girar la tuerca de ajuste de la pieza de unión anterior B en sentid...

Страница 56: ...iedad y recortes de césped que se hayan podido acumular alrededor de los mandriles y en toda la superficie de la plataforma superior Con una barra de palanca de 3 8 y utilizando la abertura cuadrada del brazo guía gire el contador del brazo hacia la derecha para liberar la tensión de la cinta Enrolle con cuidado la cinta sobre la parte superior de las poleas de la carcasa de la cortadora INSTALACI...

Страница 57: ...ontaje de la correa DESMONTAJE DE LA CORREA 1 Desmonte la SEGADORA Ver PARA DESMONTAR LA SEGADORA en este capítulo del manual NOTE Observe toda la correa de impulsión de movimiento y la posición de todas las guías y guardacorreas 2 Desconecte el arnés del cable del embrague A 3 Quite la pieza de unión anti rotación B que está del lado derecho del tractor 4 Retire la correa del piñón estacionario C...

Страница 58: ... A TIERRA DEL CHASIS alejado del estanque de combustible y de la batería PARA REMOVER LOS CABLES INVIERTA EL ORDEN El cable NEGRO primero del chasis y luego de la batería completamente cargada El cable ROJO al último de ambas baterías REEMPLAZAR LA BATERIA Vea Fig 42 ADVERTENCIA No haga cortocircuito con los terminales de la batería al permitir que una llave de tuerca o cualquier otro objeto entre...

Страница 59: ...nstalar el capota asegúrese de volver a co nectar el conector del alambre de las luces CAPOTA CONECTOR DEL ALAMBRE DE LAS LUCES DELANTERAS MOTOR PARA AJUSTAR EL CABLE DE CONTROL DE LA ACELERACIÓN El control de la aceleración ha sido preajustado en la fábrica y no debería necesitar ajustes Revise los ajustes que se describen a continuación antes de soltar el cable Si el ajuste es necesario vea de m...

Страница 60: ...arburador el filtro del combustible la manguera del combustiblesmezcladosconalcohol conocidocomogasohol o que tienen etanol o metanol pueden atraer humedad lo que conduce a la separación y a la formación de acudos durante elalmacenamiento Lagasolinaacidicapuededañarelsistemade combustible de un motor durante el periodo de almacenamiento Vaciar el depósito del carburante poniendo en marcha el motor...

Страница 61: ...to o dañado 6 Revise todo el alambrado 7 Interruptor de la ignición fallado 7 Revise cambie el interruptor de la ignición 8 Solenoide o arrancador fallados 8 Revise cambie el solenoide o arrancador 9 Interruptor es que exige n la presencia del operador fallado 9 Póngase en contacto con un centro de servicio cuali ficado El motor suena pero no arranca 1 Batería baja o descargada 1 Vuelva a cargar o...

Страница 62: ...hojas y basura debajo de la segadora 7 Limpie la parte inferior de la cajade la segadora 8 La correa de impulsión de la segadora está des gastada o desajustada 8 Cambie ajuste la correa de impulsión de la segadora 9 Las cuchillas están mal coninstaladas 9 Vuelva a instalar las cuchillas elborde afilado hacia abajo 10 Cuchillas inadecuadas en uso 10 Cambie por las cuchillas enumeradas en este manua...

Страница 63: ...luidos los sistemas de transmisión no están cubiertos por esta garantía limitada En la mayoría de los casos estos elementos NO han sido fabricados por Husqvarna en cuyo caso pueden estar cubiertos por separado por la garantía de sus respectivos fabricantes si tal garantía se proporciona e incluye con el producto en el momento de la compra Los fabricantes de transmisiones transejes Dana Hydro Gear ...

Страница 64: ...alos de engrase recomendados daño por agua o humedad y o almacenamiento incorrecto p Bombeo de rociadores o rociado de materiales cáusticos o inflamables coladores ausentes o rotos o q Uso continuado del producto después de la aparición inicial de un problema o falla 9 Garantía limitada a 10 años de plataforma moldeada reforzada blindada y limitada de por vida para plataforma soldada Estas garantí...

Страница 65: ... e d a d a t i m i l a í t n a r a G a í t n a r a g n i S a í t n a r a g n i S a d i v r o p e d a d a t i m i l a í t n a r a G a d a d l o s a m r o f a t a l p e d a s a c r a C Batería 1 año prorrateado Sin garantía Sin garantía a í t n a r a g n i S o ñ a 1 s o ñ a 3 s o r e d e c e r e p s e t n e n o p m o c s o r t O Cortabordes LE475 arados quitanieves Motor s a í d 0 9 s a í d 0 9 s o ...

Страница 66: ... e i u q z i a l a r e V a d r e i u q z i a l a r e V ó i b m a c e s e u q o i r o s e c c a Consumidor Comercial Alquiler a d a d l o s a m r o f a t a l p e d a s a c r a c e d o l p m e j e n ó i c a u n i t n o c A a d a d n i l b a d a e d l o m a m r o f a t a l p e d a s a c r a c e d o l p m e j e n ó i c a u n i t n o c A La Garantía limitada de por vida de los dientes de arado y el equ...

Страница 67: ...nunca transversalmente con respecto a las pendientes No cortar pendientes mayores de 15 grados Haga los virajes gradualmente para evitar volcarse o la pérdida de control Tenga mucho cuidado cuando cambie de dirección en las pendientes 1 Plegar esta página a lo largo de la línea punteada arriba indicada 2 Tener la página ante de sí mismos de modo que su borde izquierdo sea vertical paralelo al tron...

Страница 68: ...09 26 2012 CL ...

Отзывы: