background image

25

(a)

Abrasion to mower decks;

(b)

Tires damaged by external punctures;

(c)

Natural discoloration of materials due to ultraviolet light;

(d)

Damage to cutting equipment by way of contact with, rocks, or other non-approved materials and/or structures;

In addition, this Limited Warranty does not cover damages, malfunctions or failures resulting from abuse or neglect of the product related to or including
any of the following:

(e)

Failure to provide or perform required maintenance services as prescribed in the operator's manual;

(f)

Abuse, misuse, neglect, modifications, alterations, normal wear, improper servicing, use of unauthorized attachments, Lack of lubrication or

engine failure, due to the use of oils that do not meet Engine manufacturer's specifications;

(g)

Use of gasohol, containing methanol (wood alcohol). Gasohol which contains a maximum 10% ethanol (grain alcohol) or 15% MTBE

(methyl/tertiary/butyl/ether) is approved;

(h)

Use of ether or any starting fluids;

(i)

Pressure cleaning or steam cleaning the product;

(j)

Use of spark plugs other than those meeting emission performance requirements listed in the operator's manual;

(k)

Tampering with engine speed governor or emission components, or running engines above specified and recommended engine speeds as

listed in your operator's manual;

(l)

Operation of the unit with improperly installed/removed or modified cutting shields, guards, or safety devices;

(m) Any removed/damaged air filter, excessive dirt, abrasives, salt water, moisture, corrosion, rust, varnish, stale fuel, or any adverse reaction due

to incorrect storage procedures;

(n)

Failures due to improper set up, pre-delivery service or repair service by anyone other than an authorized Husqvarna servicing dealer during

the warranty period;

(o)

Dirt contaminated grease or oil, use of incorrect type of greases or oils, failure to comply with recommended greasing intervals, water or

moisture damage, and/or improper storage;

(p) Sprayers pumping or spraying caustic or flammable materials, lack of or broken strainers; or

(q) Continued use of product, after initial operational problem or failure occurs.

9.

Reinforced Stamped (Armor Protected) 10 Year Limited & Fabricated Limited Lifetime, Deck Warranties.

 These Limited Warranties are for

the deck shell only  mechanical components/parts such as belts, pulleys, spindle housings, bearings, blades, rods, height adjusters, caster/anti scalp
wheels

are NOT covered. The Limited Lifetime Warranty does not cover damage other than that resulting from defects in material or

workmanship. The following are NOT considered defects in material or workmanship, and therefore are NOT covered:

(a)

Abrasion to mower decks, including sand wear;

(b)  Damage to cutting equipment by way of contact with, rocks, or other non-approved materials and/or structures;

(c)   Rust and corrosion; and

(d)  Natural discoloration of paint or other materials due to ultraviolet light.

HOW TO OBTAIN SERVICE

10.

Authorized Husqvarna Servicing Dealer/Center. 

In order to obtain warranty coverage it is your responsibility (at your expense) to deliver or ship

your Husqvarna unit to an authorized Husqvarna Servicing Dealer/Center and arrange for pick-up or return of your unit after the repairs have been made.
If you do not know the location of your nearest authorized Husqvarna Servicing Dealer, call Husqvarna, at 1-800-487-5951 during the hours of 8:00 AM
to 8:00 PM Eastern Standard Time, or visit 

www.husqvarna.com

. Should you require assistance or have questions concerning this Limited Warranty, you

may contact us at 800-487-5951 (US) or 800-805-5523 (Canada) during the hours of 8:00 AM to 8:00 PM Eastern Standard Time or contact us through
the web at www.husqvarna.com.

11.

Documentation Required. 

You must maintain and present Proof of purchase (including date, product model and, if applicable, engine serial

number) to an authorized Husqvarna Servicing Dealer for warranty service under this Limited Warranty. Proof of purchase rests solely with you.
Husqvarna encourages you to register your product online at 

www.usa.husqvarna.com

 (US & Canada) to help ensure, among other things, that you can

be notified of important product information. However, registering your product is not a condition of warranty service.

Husqvarna Professional Products, NA, 

Inc.

9335 Harris Corners Parkway, Suite 500, Charlotte, NC28269

575 49 43-01 W 2012 IR

Содержание 1830EXLT

Страница 1: ...e containing up to 10 ethanol E10 is acceptable for use in this machine The use of any gasoline exceeding 10 ethanol E10 will void the product warranty Please read the owner s manual carefully and make sure you understand the instructions before using the machine ...

Страница 2: ... the machine Operation 1 Do not put hands or feet near or under rotating parts Keep clear of the discharge opening at all times 2 Exercise extreme caution when operating on or cross ing gravel drives walks or roads Stay alert for hidden hazards or traffic 3 After striking a foreign object stop the engine motor remove the wire from the spark plug disconnect the cord on electric motors thoroughly in...

Страница 3: ...or light Always be sure of your footing and keep a firm hold on the handles Walk never run 16 Never touch a hot engine or muffler 17 When using your snowthrower for long periods of time in deep snow be aware of snow and ice build up be tween the track components This may cause a loss of performance in the drive system Clean out snow and debris between tracks in regular intervals Clearing a Clogged...

Страница 4: ...HEREAROFTHESNOW THROWER HOUSING YOUSHOULDRECORDBOTHSERIALNUMBERAND DATE OF PURCHASE AND KEEP IN A SAFE PLACE FOR FUTURE REFERENCE CUSTOMER RESPONSIBILITIES Read and observe the safety rules Follow a regular schedule in maintaining caring for and using your snow thrower Follow the instructions under Maintenance and Stor age sections of this owner s manual MAINTENANCE 16 17 SERVICE AND ADJUSTMENTS 1...

Страница 5: ...ITION KEY S 443059 1 MULTI WRENCH 180684 1 LOCKNUT 5 16 18 751153 1 CARRIAGE BOLT 5 16 18 x 5 8 72250505 1 LOCKNUT 1 4 20 191730 1 SHOULDER BOLT 1 4 20 179829 1 SPRING 184505 1 POWER CORD 198563 2 SHEAR BOLTS 1 4 20 x 1 3 4 192090 2 LOCKNUTS 1 4 20 73800400 2 FLAT WASHERS 2 CARRIAGE BOLTS 3 8 16 x 2 25 2 HANDLE KNOBS ...

Страница 6: ...ls except plastic tie holding speed control rod to lower handle 5 Remove the two 2 plastic ties securing the upper handle to the pallet 6 Remove snow thrower from carton and check carton thoroughly for additional loose parts HOW TO SET UP YOUR SNOW THROWER TOOL BOX See Fig 10 A toolbox is provided on your snow thrower The toolbox is located on top of the belt cover Store the extra shear bolts nuts...

Страница 7: ...AUGER CONTROL BRACKET RETAINER SPRING FIG 6 INSTALL AUGER CONTROL ROD See Figs 5 and 6 1 Retrieve vinyl sleeve and spring from bag of parts and retrieve the auger control rod from carton chute tray Slide straight rod end through the small hole in the vinyl sleeve Using the long hook end of the spring hook spring in hole 4 in rod See Fig 5 2 Hook end of spring into control arm with loop opening up ...

Страница 8: ...hten securely CHUTE ROTATOR HEAD 3 8 WASHER 3 8 LOCKNUT THREADED STUD PIN ROTATOR HEAD MOUNTING BRACKET CHUTE BRACKET FIG 7 ALIGN BEFORE TIGHTENING LOCKNUT INSTALL CHUTE DEFLECTOR REMOTE CONTROL See Figs 8 and 9 1 Install remote cable bracket to discharge chute with 5 16 18 carriage bolt and 5 16 18 locknut as shown Tighten securely 2 Install remote cable eyelet to chute deflector with 1 4 20shoul...

Страница 9: ...s Save this manual for future reference These symbols may appear on your snow thrower or in literature supplied with the product Learn and understand their meaning FORWARD PRIMER IGNITION KEY INSERT TO START AND RUN PULL OUT TO STOP READ AND FOLLOW ALL SAFETY INFORMATION AND INSTRUCTIONS BEFORE USE OF THIS PRODUCT KEEP THESE INSTRUCTIONS FOR FUTURE REFERENCE DANGER OR WARNING REVERSE SNOW DISCHARG...

Страница 10: ...cut through deep snowdrifts Toolbox used to store spare shear bolts locknuts and wrench Freewheel control disengages transmission for pushing the snowthrower with the engine off Safety ignition key must be inserted for the engine to start and run Remove when snow thrower is not in use Electric start button used for starting the engine Recoil auxiliary starterhandle usedforstartingengine Primer pum...

Страница 11: ...eight adjust mechanism using your foot push down on the pedal tilt the unit to align the pins with the selected height position and slowly release foot pressure until the pins are seated in the desired height setting PEDAL OIL EXPANSION TANK FREEWHEEL CONTROL IMPORTANT Your model snow thrower is equipped with an oil expansion tank attached to the hydrostat ic transmission see fig 13 As you run you...

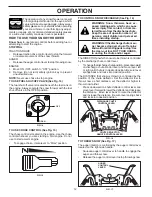
Страница 12: ... FIG 15 TO USE CHOKE CONTROL See Fig 15 The choke control is located on the engine Use the choke control whenever you are starting a cold engine Do not use to start a warm engine To engage choke rotate lever to FULL position TO THROW SNOW See Fig 17 The auger rotation is controlled by the auger control lever located on the right side handle Squeeze auger control lever to handle to engage the auger...

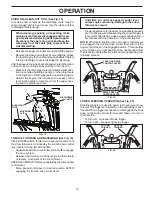
Страница 13: ... the blockage Afterthepackedsnowhasbeendislodged returntheclean out tool to it s mounting clip by pushing it into the clip Makesurethedischargechuteispointedinasafedirec tion novehicles buildings people orotherobjectsare in the direction of discharge before restarting engine Restart the engine then squeeze the auger control lever to the handle to clear snow from the auger hous ing and the discharg...

Страница 14: ...raised to highest position and tighten nuts securely Repeat for opposite side of snow thrower When not using drift cutters loosen adjustment nuts lower to storage position and tighten nuts securely ADJUSTMENT NUTS STORAGE POSITION AUGER HOUSING DRIFT CUTTER FIG 22 BEFORE STARTING THE ENGINE CHECK ENGINE OIL LEVEL See Fig 18 The engine on your snow thrower has been shipped from the factory already ...

Страница 15: ...F priming is not necessary NOTE Over priming may cause flooding preventing the engine from starting If you do flood the engine wait a few minutes before attempting to start and DO NOT push the primer 5 Pull recoil starter handle quickly Do not allow starter rope to snap back 6 Whentheenginestarts releasetherecoilstarterhandle andslowlymovethechokecontroltothe OFF position Allow the engine to warm ...

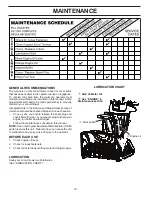
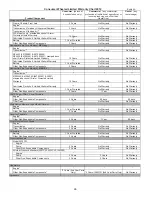
Страница 16: ...ked at least once each season Once a year you should replace the spark plug and check belts for wear A new spark plug will help your engine run better and last longer Follow the maintenance schedule in this manual NOTE Use only Original Equipment Manufacturer OEM parts to service this unit Failure to do so can cause the unit to malfunction and pose a risk of injury to the operator BEFORE EACH USE ...

Страница 17: ... plug 3 Remove drain plug and drain oil in a suitable container 4 Install drain plug and tighten securely 5 Wipe off any spilled oil from snow thrower and engine 6 Install left track if removed for draining oil Be sure to install klik pin into hole in axle See TO REMOVE TRACKS in the Service and Adjustments section of this manual 7 Remove oil fill cap dipstick Be careful not to allow dirt to enter...

Страница 18: ...UGER HUB FIG 24 To replace the capscrew shear bolts 1 Disengage all controls and move throttle control to STOP position Wait for all moving parts to stop 2 Remove safety ignition key and disconnect spark plug wire from spark plug Place wire where it cannot come in contact with spark plug 3 Align holes in impeller hub with holes in impeller shaft and install two 2 new 1 4 20 x 1 5 8 capscrew shear ...

Страница 19: ...elt s be replaced by a service center department NOTE It is recommended that both the auger and traction drive belt be replaced at the same time The V belts on your snow thrower are of special construc tion and should be replaced by original equipment manu facturer OEM belts available from your nearest service center department Using other than OEM belts can cause personal injury or damage to the ...

Страница 20: ...ystem The cable has an in line adjuster that is turned to shorten or lengthen the cable extension Location of adjuster is shown in Fig 29 1 Stand the snow thrower on the front of the auger housing 2 Remove wheels or tracks from axles To remove tracks it is necessary to remove the cross bar that connects the two track frames together Remove screws on each end of the cross bar 3 Remove the plastic p...

Страница 21: ...e of the flat vertical surface of the bellcrank Fig 34 shows an end view of the bellcrank in the correct position 4 Adjusting the position of the steering bellcrank by turning the adjuster to raise or lower the bellcrank When the bellcrank is positioned correctly replace the plastic power steering cover and the wheel or track 5 Repeat the procedure for the opposite side STEERING BELLCRANK FIG 34 L...

Страница 22: ... system of an engine while in storage Empty the fuel tank by starting the engine and letting it run until the fuel lines and carburetor are empty Never use engine or carburetor cleaner products in the fuel tank or permanent damage may occur Use fresh fuel next season NOTE Fuel stabilizer is an acceptable alternative in min imizing the formation of fuel gum deposits during storage Add stabilizer to...

Страница 23: ... or clogged muffler 4 Clean or replace muffler Engine idles or runs roughly 1 Choke is in FULL position 1 Move choke to OFF position 2 Blockage in fuel line 2 Clean fuel line 3 Stale fuel 3 Empty fuel tank carburetor refill with fresh clean gasoline 4 Water in fuel 4 Empty fuel tank carburetor refill with fresh clean gasoline 5 Carburetor is in need of adjustment or overhaul 5 Contact an authorize...

Страница 24: ...Warranty In most cases these items are NOT manufactured by Husqvarna in which case they may be covered separately by their respective manufacturer s warranties if one is provided and included with the product at the time of purchase The following transmission transaxle manufacturers Dana Hydro Gear Tuff Torq provide a warranty for the transmission transaxle to the ultimate purchaser or to Husqvarn...

Страница 25: ...onal problem or failure occurs 9 Reinforced Stamped Armor Protected 10 Year Limited Fabricated Limited Lifetime Deck Warranties These Limited Warranties are for the deck shell only mechanical components parts such as belts pulleys spindle housings bearings blades rods height adjusters caster anti scalp wheels are NOT covered The Limited Lifetime Warranty does not cover damage other than that resul...

Страница 26: ...arranty 10 Years No Warranty No Warranty Fabricated Deck shell Limited Lifetime Warranty No Warranty No Warranty Battery 1 Year Pro rated No Warranty No Warranty Other Non Expendable Components 3 Years 1 Year No Warranty LE475 Edger Tillers Snow Throwers Engine Other Non Expendable Components 2 Years 90 days 90 days Tiller Tines No Warranty No Warranty Walk Behind Mowers High Wheel Trimmer Engine ...

Страница 27: ... left Consumer Commercial Rental Armor Protected Stamped Deck Shell Example Below Fabricated Deck Shell Example Below Stamped Deck Shell below NOT reinforced Limited Lifetime Warranty on Tiller tines and Fabricated Deck shell is for the life of the product or 7 seven years after the last date of the complete unit s final production whichever comes first Deck Shell replacement will be limited to a ...

Страница 28: ...08 18 2012 SR ...

Отзывы: