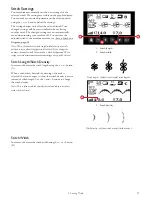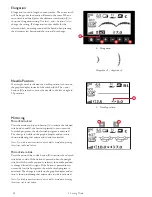
FIX Function (Baste)
In sewing mode:
FIX is used to tie off a stitch. FIX is
automatically activated when you select a stitch, use the cut
function, or use STOP while you are sewing. At the
beginning, your machine sews a few tie-off stitches and
continues with the selected stitch. Press FIX while sewing and
your machine sews a few tie-off stitches and stops
automatically. The LED next to the button is lit when FIX is
active. Press the FIX button to turn the function off. The
FIX function can be programmed, see Add Commands, page
42.
Note: FIX auto can be cancelled in the SET menu (see FIX Auto
(Only in Sewing Mode)). No automatic FIX stitches will be sewn unless
you use the FIX button on your machine.
In embroidery mode:
Press FIX to baste an outline of the
embroidery design area or to baste the fabric to the stabilizer.
Cut Function
In sewing mode:
Press the cut function button and your
machine cuts the top and bobbin threads, raises the needle,
and activates the FIX function for the next start. To cut
threads at the end of a stitch or stitch program, press the cut
function button while sewing. The LED next to the button
starts flashing indicating that a cut is requested. When the
stitch or stitch program is completed, the machine will make a
FIX and then cut the upper thread and bobbin thread.
Note: Your machine cuts the threads automatically after certain stitches
such as completing a one-step buttonhole. Cut auto can be deselected in
the SET menu, see CUT Auto (Only in Sewing Mode), page 29.
If FIX auto has been deselected in the SET menu, the FIX function
will not be activated when using the cut function.
In embroidery mode:
The cut function button has no
function while embroidering. When stopped, press the cut
function button and your machine cuts the top and bobbin
threads. At the end of a color block or when the design is
finished, both top and bobbin threads are cut automatically.
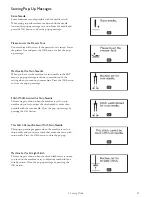
Speed + and –
In sewing mode:
All stitches in your machine have a pre-set,
recommended sewing speed. Press speed + or speed – to
increase or decrease the sewing speed. The speed level is
shown on the graphic display. You cannot select a higher
speed than the max speed for the selected stitch.
When sewing with metallic threads, or when sewing on
delicate fabrics, lower the speed for optimal results.
In embroidery mode:
Each stitch type in a design has a pre-
set maximum speed at which it can be sewn. To reduce the
speed when using specialty threads or embroidering on
delicate fabrics, press speed –. To increase the speed again
press speed +.
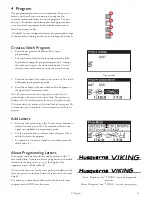
Start/Stop
Press this button to start or stop the machine sewing or
embroidering when you are not using the foot control. Press
start/stop to begin and press again to stop.
Your machine stops automatically at color changes and when
the embroidery is finished.
Reverse
For permanent reverse, press the reverse button once before
starting to sew. The reverse indicator will be lit and the
machine sews in reverse until you press the button again to
cancel. If you press the reverse button while sewing, the
machine will sew in reverse for as long as you keep the button
pressed. The reverse indicator is lit when the reverse button is
pressed.
Reverse is also used when sewing bartacks and darning
stitches to step between the parts of the stitch.
Reverse has no function in embroidery mode.
Stitch Selection Buttons
By pressing any of the 0 to 9 buttons you select the stitch
illustrated on that button immediately.
By pressing two digits in quick succession you will be able to
select a stitch from 10 and up from the selected stitch menu.
If the stitch number does not exist in the selected stitch menu
you will hear a beep and the first entered digit will be selected
as a stitch.
Delete
Press to delete a single stitch or all stitches in a stitch program
or embroidery font program.
Stitch Length/Density/Elongation and Design
Height
In sewing mode, reduce or increase the stitch length/density
by pressing – or +. See Stitch Length/Stitch Density, page
37.
In embroidery mode, reduce or increase the design height by
pressing – or +. See Design Height, page 68.
Stitch Width/Needle Position and Design
Width
In sewing mode, adjust the stitch width/needle position by
pressing – or +. See Stitch Width, page 37 and Needle
Position, page 38.
In embroidery mode, reduce or increase the design width by
pressing – or +. See Design Width, page 68.
26
2 Preparations
Содержание Designer Jade 35
Страница 1: ...User s Guide KEEPING THE WORLD SEWING ...
Страница 82: ......


