


INSTALLATION
12
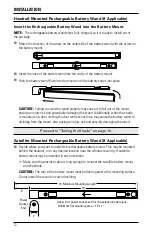
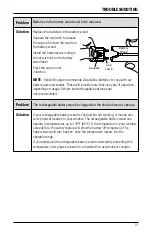
Headrail-Mounted Rechargeable Battery Wand (If Applicable)
Insert the Rechargeable Battery Wand into the Battery Mount
NOTE:
The rechargeable battery wand ships fully charged, so it is ready to install out of
the package.
■
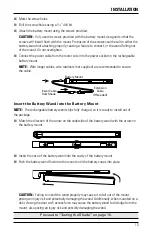
Match the direction of the arrow on the underside of the battery wand with the arrow on
the battery mount.
■
Insert the nose of the battery wand into the cavity of the battery mount.
■
Push the battery wand flush into the mount until the battery snaps into place.
CAUTION:
Failing to insert the wand properly may cause it to fall out of the mount,
posing an injury risk and potentially damaging the wand. Additionally, when the shade
is mounted on a door, closing the door with excess force may cause the battery wand to
dislodge from the mount, also posing an injury risk and possibly damaging the wand.
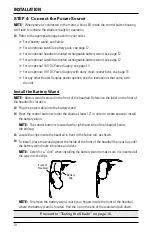
Proceed to “Testing the Shade” on page 16.
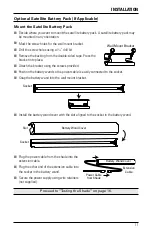
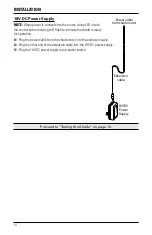
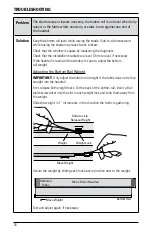
Satellite-Mounted Rechargeable Battery Wand (If Applicable)
■
Decide where you want to install the rechargeable battery mount. This may be mounted
behind the headrail, or in any desired location near the window covering. A satellite
battery mount may be installed in any orientation.
➤
Make sure the provided cable is long enough to connect the satellite battery mount
and the shade.
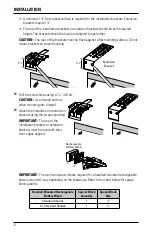
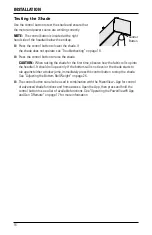
CAUTION:
The rear of the battery mount
must
be flush against a flat mounting surface.
Do not
install the mount on curved molding.
2"
Power
Socket
End
Allow 2" at power socket end for the extension cable jack.
Minimum flat mounting area = 15" x 1"
13"
15" Minimum Mounting Length
1"