background image

Installation And 

Care Instructions

Cadence

®

 With  

The Paramount

®


Headrail System

Soft Vertical Blind Collection

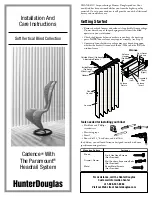
Outside Mount (Optional)

Adjustable Bracket

Inside Mount  

(Optional)

Mounting Clip

Headrail

Valance

Dust Cover 

Valance

Corner 

(Left)

Corner 

(Right)

Valance 

Insert

Assembly 

Clips

Valance 

Return

Valance 

Hanger 

(Optional)

Wand 

Control

Louvers

THANK YOU for purchasing a Hunter Douglas product. Your 

new blind has been custom built for you from the highest quality 

materials. Once in your window, it will provide you with a lifetime of 

beauty and trouble-free use.

Getting Started

Remove headrail, louvers and valance (if applicable) from package. 

Do not discard any of the packaging material until the blind 

operates to your satisfaction.
Check the diagram below to make sure you have the necessary 

parts. 

NOTE:

 Your valance may require assembly (see Step 1).

Contents of your hardware package may vary depending upon 

whether the headrail is mounted inside (IB) or outside (OB) the 

window frame.

Tools needed for installing your blind:

Flat blade and Phillips 

screwdrivers
Measuring tape
Pencil
Power drill, 

1

/

4

" hex driver, and drill bits

In addition, you will need fasteners designed to work with your 

specific mounting surfaces:


For assistance, call the Hunter Douglas 

Customer Information Center  

at 1-888-501-8364 

Visit our Web site at hunterdouglas.com

Mounting Surface

Fastener

No. 6 Hex Head Screws 

(Not Provided)

Wall Anchors, Expansion Bolts

(Not Provided)

Wood

Drywall, Plaster

Sheet Metal Screws

(Not Provided)

Metal

Содержание Cadence

Страница 1: ...scard any of the packaging material until the blind operates to your satisfaction Check the diagram below to make sure you have the necessary parts NOTE Your valance may require assembly see Step 1 Contents of your hardware package may vary depending upon whether the headrail is mounted inside IB or outside OB the window frame Tools needed for installing your blind Flat blade and Phillips screwdri...

Страница 2: ...nt Installation Measure And Mark Mounting Clip Location Mark mounting clip locations between 2 and 4 from each end of the headrail Evenly space intermediate clips between end clips at 24 to 30 intervals If available use a mounting template to determine consistent mounting depth NOTE If you do not have a mounting template measure the depth to allow 1 2 clearance between the louver and the window i ...

Страница 3: ...p toward the rear of the blind and snap into place If a valance is included snap on a valance hanger next to each L bracket Center the valance in relation to the headrail and slide it into the valance hanger 3 Mounting Clip Side View Wall Ceiling Head Louver 35 8 21 2 41 2 DualFold Valance 1 2 Mounting Clip Side View Wall L Bracket Valance Hanger DualFold Valance Louver 31 2 21 4 41 4 1 2 6 Attach...

Страница 4: ... cord 8 2005 Hunter Douglas Inc Registered trademark of Hunter Douglas Inc Trademark of Hunter Douglas Inc Patented in the U S and foreign countries Other U S and foreign patents pending PCN 77CII0105 rev 12 05 To Reduce Cord Length On Center Draw Blinds Release the tension on the cord with the cord tensioner Place the blind in the closed position Locate the cord ends in the front of the lead carr...

Отзывы: