Installation Manual
©2019 Hunter Fan Co.
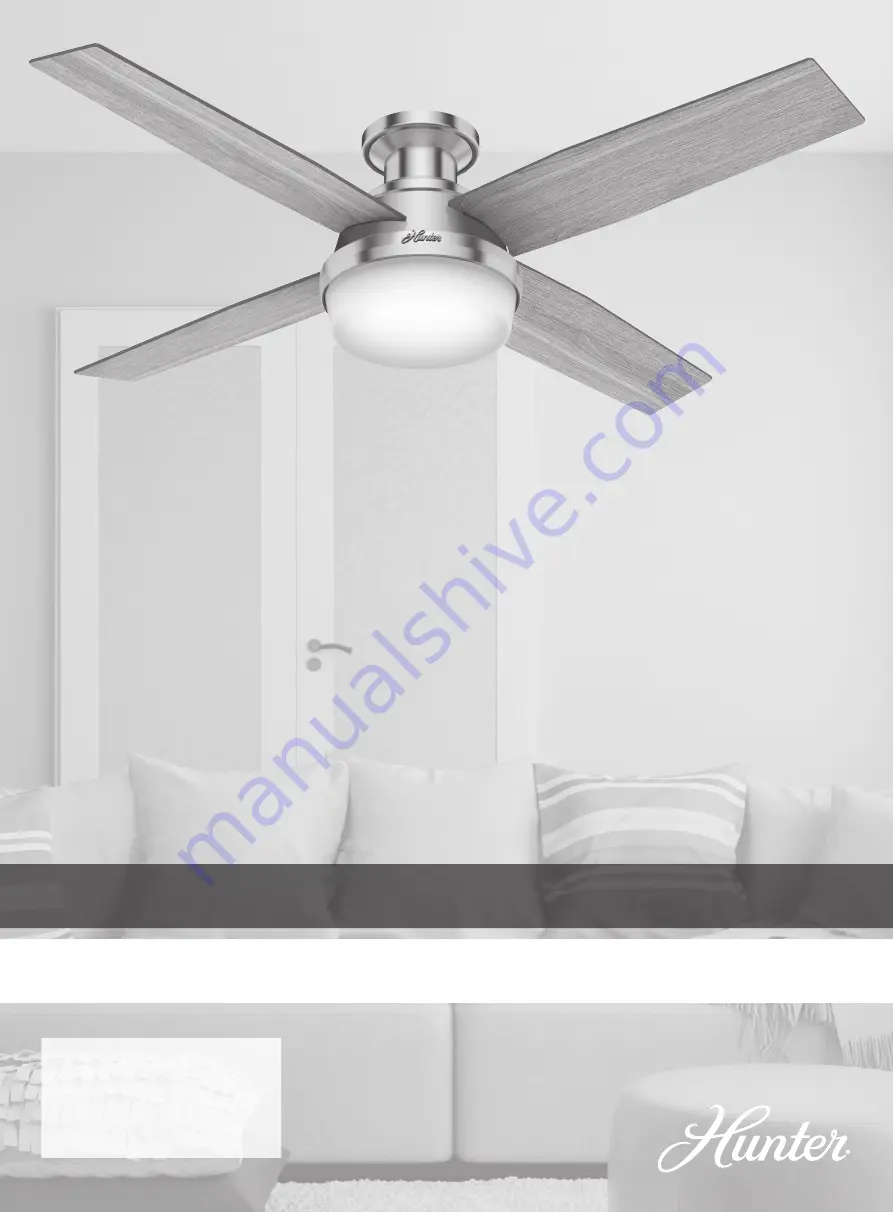
Model: 50283 Brushed Nickel
59241 Brushed Nickel
59242 Fresh White
59447 Noble Bronze
Fan weight ±2 lbs: 19.8 lbs (9.0 kg)
Dempsey
PG3774 r042519
Страница 1: ...Installation Manual 2019 Hunter Fan Co Model 50283 Brushed Nickel 59241 Brushed Nickel 59242 Fresh White 59447 Noble Bronze Fan weight 2 lbs 19 8 lbs 9 0 kg Dempsey PG3774 r042519 ...
Страница 2: ... cell battery If a new or used lithium button coin cell battery is swallowed or enters the body it can cause severe internal burns and can lead to death in as little as 2 hours Always completely secure the battery compartment If the battery compartment does not close securely stop using the product remove the batteries and keep it away from children If you think batteries might have been swallowed...
Страница 3: ...nger bracket and wiring the fan For installing the blades For installing the canopy For installing the light kit Motor Canopy Canopy Screw Top Housing Screw Grounding Screw Ceiling Bracket Canopy Trim Ring Wood Screw Wire Nut Washer bag Hunter Pro Tip Find a part that is missing or damaged Don t take it back to the store Let us make it right Visit us at HunterFan com or call us at 1 888 830 1326 H...
Страница 4: ...n rated outlet box Make sure it is securely installed and is acceptable for fan support of 31 8 kg 70 lbs or less Option 2 Wood Screws Option 1 Machine Screws OFF Turn Power Do this first bag Wood Screw Washer x2 x2 You have two options for installation Pick which one works best for your location Remove any existing bracket prior to installation Only use the provided Hunter ceiling bracket that ca...
Страница 5: ...s can be found in the hardware bag Grounding Screw Hanging the Fan NOTICE To prevent damage to fan ALWAYS lift holding the fan housing Note To hang the fan you must tilt the canopy to an almost vertical position so that the canopy slots sit on the ceiling plate hooks Raise the fan and align the slots in the canopy with the hooks on the ceiling plate Place the slots over the ceiling plate hooks to ...
Страница 6: ...ounding wires green green yellow stripe or bare copper coming from the ceiling and ceiling plate Connect the black wire ungrounded from the ceiling to the black wire from the receiver Connect the white wire grounded from the ceiling to both the white wire from the receiver and the white wire from the fan White White Black Ungrounded Grounded Connect the blue wire from the receiver to the blue wire...
Страница 7: ...ks When all the holes are properly aligned securely tighten all three canopy screws Note The slots in the canopy must remain engaged while swinging the canopy for alignment Note Should you need to remove the trim ring press firmly on opposite sides of the trim ring The tabs will flex out releasing the canopy trim ring Place the receiver inside the canopy Ensure the wires remain connected WARNING F...
Страница 8: ...nstall the third switch housing screw Tighten all three screws securely Connect the plugs from the upper and lower switch housings Make sure to line up the colored markings on the connectors Wrap light kit keyhole slots around the screws and twist counterclockwise Screw two housing assembly screws from the hardware bag halfway into the upper switch housing It does not matter which two screw holes ...
Страница 9: ...l switch Within 3 minutes press and hold both the Fan Off button and the High button for 4 seconds to pair the remote To prevent faulty operation please ensure all other ceiling fans within range are turned off at the wall switch while pairing To install the transmitter cradle remove the two screws holding the switch cover plate Do not remove the cover plate Orient the cradle by lining up the two ...
Страница 10: ...uded This warranty does not cover any costs or fees associated with the labor including electrician s fees required to install remove or replace a fan or any fan parts There is no warranty for light bulbs except where otherwise noted remote control batteries fans purchased or installed outside the United States fans owned by someone other than the original purchaser fans for which proof of purchas...
Страница 11: ...e fan carefully and check that the hanger ball is properly seated Use the provided balancing kit and instructions to balance the fan Noisy Operation Make sure the blades are properly installed Check to see if any of the blades are cracked If so replace all of the blades Remote Control of Fan is Erratic Make sure the battery is installed correctly Install a fresh battery Multiple Remote Issues If y...